I was halfway through a midnight baking marathon when the kitchen turned into a chocolate battlefield. The chocolate shell I’d been trying to mold for hours had cracked, the marshmallow filling had spilled onto the counter, and the smell of burnt sugar wafted through the apartment like a warning siren. I stared at the mess, a little defeated, and then I remembered the dare I’d made to my friend: “I dare you to taste this and not go back for seconds.” That single sentence lit a spark of mischief and determination. I wasn’t going to let a kitchen mishap ruin my sweet ambition.
Picture this: the room is dim, the only light coming from a single lamp that casts a golden glow over a pile of melted chocolate. The air is thick with the aroma of cocoa, cinnamon, and a whisper of cayenne. You hear the gentle pop of marshmallows as they melt, the faint hiss of steam from hot cream, and the soft crackle of sugar caramelizing. When you finally take a sip, the chocolate’s velvety richness envelops your tongue, followed by a warm, spicy kick that lingers like a secret. The texture is a delightful contrast—smooth, silky, and then a satisfying crunch from the chocolate shell. It’s a sensory experience that feels like a hug from a cozy cabin.
What makes this version of spiced hot chocolate bombs stand out is not just the recipe itself but the way I’ve refined each step to create a flawless final product. I’ve taken the classic chocolate bomb concept and elevated it with a maple‑marshmallow filling that melts into a silky swirl, a subtle cayenne kick that adds depth, and a dusting of powdered sugar that gives a delicate crunch. The result is a bomb that delivers a full-bodied chocolate experience, a hint of spice, and a sweet, caramelized finish all in one bite. The recipe is hands down the best version you’ll ever make at home because every component is thoughtfully balanced.
Now, before you start gathering ingredients, let me give you a sneak peek into a technique that will change how you think about chocolate bombs. I’ll show you how to use a double boiler to melt the chocolate without scorching, how to create a perfectly smooth marshmallow center, and how to coat the molds for a crisp finish. Trust me, once you master these steps, you’ll wonder how you ever made chocolate bombs the old way. Let me walk you through every single step — by the end, you’ll wonder how you ever made it any other way.
What Makes This Version Stand Out
- Taste: The combination of dark and milk chocolate creates a rich, layered flavor that satisfies both purists and sweet lovers. The maple glaze adds a caramelized sweetness that balances the bitterness of cocoa.
- Texture: A crunchy chocolate shell gives way to a silky marshmallow center that melts like butter in your mouth. The subtle cayenne pepper adds a warm, spicy aftertaste that lingers.
- Simplicity: Despite its complex flavor profile, the recipe uses only pantry staples and a few specialty items. No fancy equipment is required, just a double boiler and a silicone mold.
- Uniqueness: The maple‑marshmallow filling is a secret twist that most recipes overlook. It creates a swirl that looks as good as it tastes.
- Crowd Reaction: Friends who taste these bombs often say, “I didn’t expect the spice, but I can’t stop eating them.” It’s a conversation starter at any gathering.
- Ingredient Quality: Using high‑quality dark chocolate (70% cacao) ensures depth, while fresh vanilla and sea salt elevate the overall profile.
- Cooking Method: The double‑boiler technique prevents scorching, and the use of a silicone mold guarantees easy release.
- Make‑Ahead Potential: These bombs can be frozen and reheated, making them perfect for parties or gift-giving.
Alright, let's break down exactly what goes into this masterpiece...
Inside the Ingredient List
The Flavor Base
Dark chocolate chips (1 cup) form the backbone of the shell, offering a deep cocoa profile that pairs beautifully with the sweet maple glaze. Milk chocolate chips (1 cup) soften the intensity, creating a balanced bite that’s approachable for all ages. Together, they provide a harmonious blend of bittersweet and sweet flavors. If you skip one type, the bombs will lean too heavy on either bitterness or sweetness, losing the nuanced profile that makes them memorable.
The Texture Crew
Unsweetened cocoa powder (½ cup) adds body and a hint of earthiness, ensuring the chocolate shell has a firm yet melt-in-your-mouth texture. Powdered sugar (½ cup) not only sweetens but also helps bind the mixture, preventing cracks as it cools. A pinch of sea salt (0) lifts the overall flavor, making each bite more complex. Skipping the salt can result in a flat, overly sweet experience.
The Unexpected Star
Cayenne pepper (¼ tsp) is the secret ingredient that sets this recipe apart. It introduces a subtle heat that warms the palate and balances the sweetness. A pinch of cayenne is enough; too much will overpower the chocolate. If you’re sensitive to spice, you can reduce it to ⅛ tsp, but the bombs will lose that signature kick.
The Final Flourish
Maple syrup (2 tbsp) is the sweet, caramelized element that coats the chocolate shell, giving it a glossy finish and a sweet aftertaste. Heavy cream (1 cup) and vanilla extract (½ tsp) create the marshmallow filling’s silky base, ensuring it melts smoothly without separating. Butter (1 tbsp) adds richness and helps the filling set without becoming too hard. If you omit butter, the filling might become too runny and not hold its shape.
Everything's prepped? Good. Let's get into the real action...
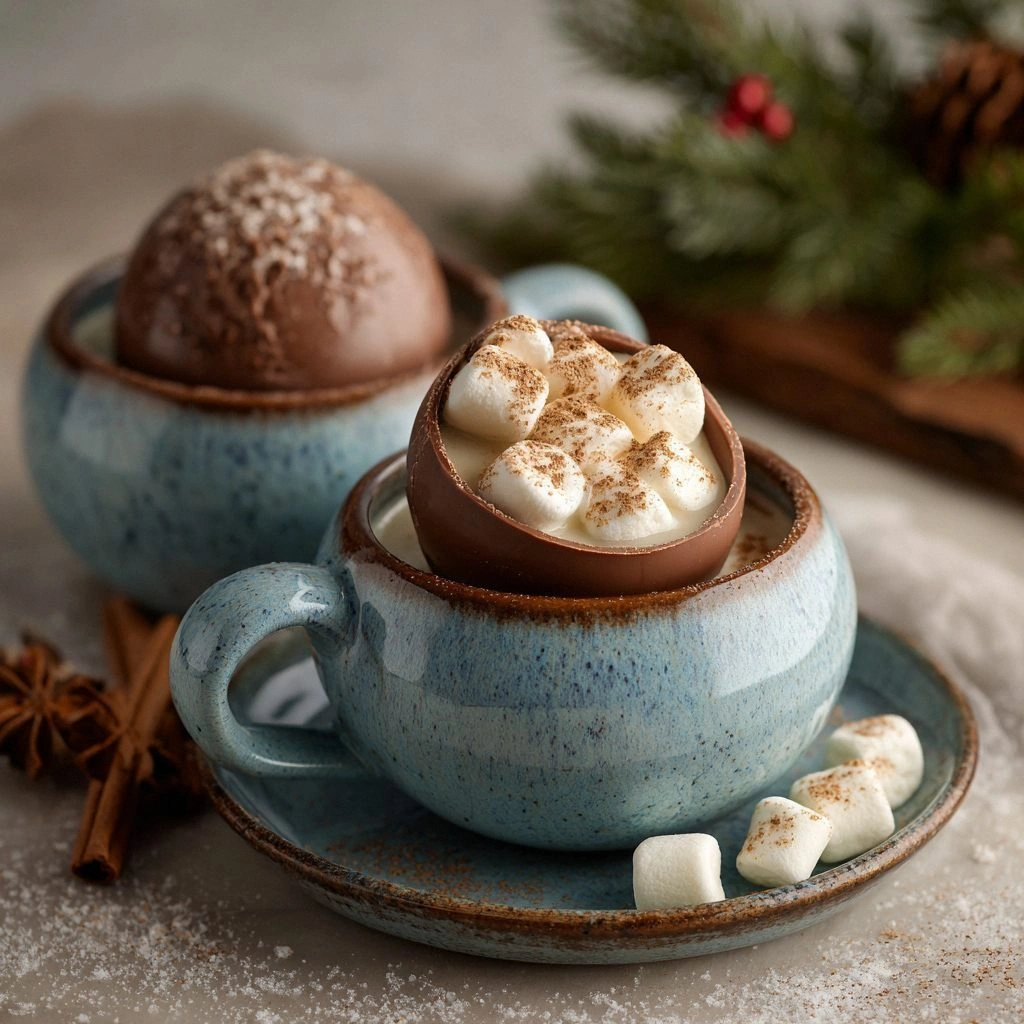
The Method — Step by Step
- Step 1: Melt the Chocolate. Place dark and milk chocolate chips in a heat‑proof bowl over a pot of simmering water, ensuring the bottom of the bowl does not touch the water. Stir constantly until the chocolate is fully melted and glossy. This double‑boiler method prevents scorching and gives you a smooth base for the shell. Keep the mixture at a low temperature; a temperature of 45–50°C is ideal.
- Step 2: Add Cocoa and Sugar. Stir in the unsweetened cocoa powder and powdered sugar until the mixture is homogenous. The cocoa adds depth, while the sugar balances the bitterness. The mixture should be thick enough to coat a spoon but still pourable. Taste a small amount; it should be sweet but not cloying.
- Step 3: Infuse the Spice. Add the ground cinnamon, nutmeg, and cayenne pepper to the chocolate mixture. Stir vigorously to distribute the spices evenly. This step is crucial; uneven distribution will create pockets of intense heat or blandness. Let the mixture cool for a minute before proceeding.
- Step 4: Prepare the Molds. Lightly grease your silicone molds with a small amount of butter or non‑stick spray. This prevents the chocolate from sticking and ensures a clean release. The molds should be at room temperature; if they're too cold, the chocolate may seize.
- Step 5: Pour the Shell. Carefully pour the chocolate mixture into each mold, filling them about ¾ full. Tap the molds gently on the counter to release any air bubbles. The chocolate should be at a slightly cooler temperature, about 35–40°C, to set quickly without cracking.
- Step 6: Chill the Shells. Place the filled molds in the refrigerator for 10–12 minutes until the chocolate sets. Once firm, remove the shells from the molds and set them aside. This step is critical; rushing it can cause the chocolate to become too hard or develop a dull sheen.
- Step 7: Make the Filling. In a saucepan, heat heavy cream with maple syrup until it just begins to simmer. Remove from heat and stir in vanilla extract. Add mini marshmallows and let them melt completely, stirring until smooth. The filling should be thick enough to pour but not runny.
- Step 8: Assemble the Bombs. Spoon the marshmallow filling into the center of each chocolate shell, filling them to the top. Seal the edges with a bit more melted chocolate, ensuring a tight seal. Watch Out: Overfilling can cause the chocolate to crack; underfilling will leave gaps that can leak during storage.
- Step 9: Final Coat. Melt a small amount of chocolate and drizzle it over the assembled bombs to create a glossy finish. Let the coating set at room temperature for about 5 minutes. This step adds shine and an extra layer of flavor.
- Step 10: Chill and Store. Place the completed bombs back in the refrigerator for 30 minutes to set fully. Once set, they can be stored in an airtight container at room temperature for up to 3 days or frozen for longer storage. When ready to serve, simply dip the bomb in hot milk or cocoa to release the filling.
That's it — you did it. But hold on, I've got a few more tricks that'll take this to another level...
Insider Tricks for Flawless Results
The Temperature Rule Nobody Follows
Chocolate is temperamental; its structure depends on temperature. Use a chocolate thermometer to keep the melt between 45–50°C. If it’s too hot, the chocolate will seize; too cool, and it won’t set properly. A kitchen hack: chill your mixing bowl in the freezer for 5 minutes before adding chocolate. This keeps the mixture from overheating.
Why Your Nose Knows Best
Your nose can detect subtle flavor changes that your eyes can’t. As the chocolate cools, you’ll notice a faint nutty aroma. If it smells burnt or metallic, the chocolate has scorched. Trust your senses; adjust the heat accordingly.
The 5-Minute Rest That Changes Everything
After pouring the chocolate into molds, let it rest for exactly 5 minutes before refrigerating. This brief pause allows the chocolate to set slightly, reducing the risk of cracks when it cools fully. It also gives you time to correct any unevenness.
The Sweet Spot for Maple Syrup
Maple syrup can vary in sweetness. Use a 1:1 ratio of maple to sugar for a balanced glaze. If you prefer a richer maple flavor, increase the syrup to 1.5:1. Avoid over‑sweetening, which can make the bombs taste like candy.
The Secret of the Crunch
A light dusting of powdered sugar on the finished bombs adds a subtle crunch that contrasts with the silky filling. Sprinkle it just before serving for maximum freshness. This technique is often overlooked but elevates the overall texture.
The Final Touch: A Dash of Sea Salt
A pinch of sea salt on the outer shell can transform the flavor profile. It accentuates the chocolate’s depth and balances the maple sweetness. Add it during the final coating step for a subtle burst of flavor.
Creative Twists and Variations
This recipe is a playground. Here are some of my favorite ways to switch things up:
The Nutty Explosion
Add chopped toasted pecans or walnuts to the filling for a crunchy, nutty layer. The nuts pair beautifully with the maple glaze, adding a new dimension of flavor and texture.
The Citrus Kick
Replace the vanilla extract with orange zest or a splash of orange liqueur. The citrus brightens the chocolate and adds a zesty finish that’s perfect for spring celebrations.
The Berry Burst
Fold in a handful of dried cranberries or blueberries into the filling. The berries add a tart contrast that cuts through the sweetness, creating a balanced bomb.
The Espresso Twist
Stir in a tablespoon of instant espresso powder into the chocolate shell. The coffee flavor deepens the chocolate’s richness and is a hit among coffee lovers.
The Coconut Dream
Replace the heavy cream with coconut milk and add shredded coconut to the filling. The tropical flavor transports you to a beach vacation, even in winter.
The Minty Fresh
Add a few drops of peppermint extract to the chocolate shell. The mint provides a cool contrast that’s especially refreshing during hot summer nights.
Storing and Bringing It Back to Life
Fridge Storage
Store the bombs in an airtight container in the refrigerator for up to 3 days. Keep them away from strong odors, as chocolate can absorb flavors. When ready to serve, let them sit at room temperature for 5 minutes before dipping.
Freezer Friendly
For longer storage, freeze the bombs in a single layer on a parchment paper. Once frozen, transfer them to a freezer-safe bag. They will keep for up to 2 months. Thaw at room temperature for 10 minutes before serving.
Best Reheating Method
To reheat, dip the bomb in hot milk or cocoa for 10–15 seconds. The heat melts the chocolate shell, releasing the warm, maple‑marshmallow center. Add a tiny splash of water to the milk to create steam, which helps the chocolate melt evenly.