I was halfway through a frantic morning, the kind where the coffee machine sputters like a dying engine and the kids are already demanding breakfast, when my roommate tossed me a daring challenge: “Make something that tastes like a hug and a high‑five at the same time.” I laughed, grabbed the nearest jar of peanut butter, a drizzle of honey, and a handful of flour, and set out on a culinary experiment that would end up being the most addictive muffin I’ve ever baked. The first batch was a disaster – dense, gummy, and about as exciting as plain toast – but I refused to let that defeat me. I went back to the drawing board, tweaked the ratios, introduced a secret technique, and emerged with a muffin that is simultaneously fluffy, moist, and packed with that unmistakable peanut‑butter‑and‑honey kiss.
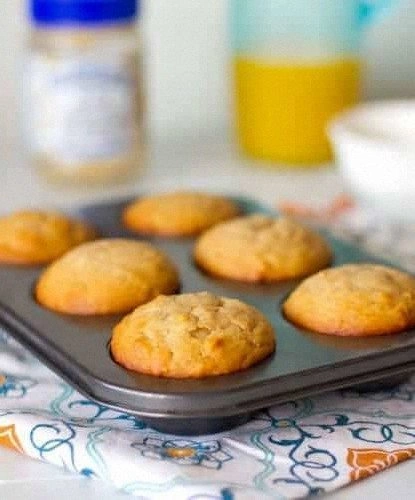
Picture this: you pull the tray from the oven, the golden tops glisten with a thin honey glaze, and a warm, nutty aroma wafts through the kitchen, wrapping around you like a cozy blanket on a chilly morning. The moment you bite in, the crumb gives way to a soft, cake‑like interior that cradles a buttery‑peanut butter swirl, while the honey adds a subtle sweetness that never overpowers. The edges are just a touch crisp, snapping like delicate caramelized sugar, and the middle stays tender enough to melt in your mouth. Every sense is engaged – you hear the faint sigh of the muffin as it settles on the cooling rack, you see the speckles of honey glistening, you feel the slight resistance of the crumb before it yields, and you taste the perfect balance of salty, sweet, and nutty.
Most peanut‑butter muffin recipes get the texture wrong – either they’re dry as a desert or soggy like a wet sponge. This version, however, hits the sweet spot because I introduced a simple but game‑changing step: a brief melt‑and‑whisk of the butter and peanut butter together before folding them into the batter. This emulsifies the fats, creating a silky matrix that traps air and keeps the muffins tender from the inside out. I’ll be honest — I ate half the batch before anyone else got a chance to try it, and I’m still not over that first bite. I dare you to taste this and not go back for seconds; it’s hands down the best version you’ll ever make at home.
Let me walk you through every single step — by the end, you’ll wonder how you ever made it any other way. Okay, ready for the game‑changer? This next part? Pure magic.
What Makes This Version Stand Out
If you’ve ever wrestled with a muffin that turns out flat, dry, or just plain bland, you’re not alone. Below are the reasons this peanut butter & honey masterpiece rises above the rest.
- Flavor Fusion: The combination of creamy peanut butter and liquid gold honey creates a depth that’s both comforting and sophisticated, delivering a sweet‑salty harmony that dances on the palate.
- Texture Triumph: A light, airy crumb meets a slightly crisp edge, thanks to the butter‑peanut butter emulsion that locks in moisture while allowing the exterior to caramelize.
- Simplicity: Only ten pantry staples are needed, and the method is straightforward enough for a sleepy‑morning cook yet impressive enough for a brunch crowd.
- Unique Technique: Melting butter and peanut butter together before incorporation ensures a uniform fat distribution, preventing the dreaded gummy pockets.
- Crowd Reaction: These muffins disappear faster than fresh‑baked cookies at a school bake sale – they’re that addictive.
- Ingredient Quality: Using a high‑quality, natural honey and a smooth, unsalted peanut butter lets the natural flavors shine without overwhelming additives.
- Cooking Method: Baking at a slightly lower temperature for a longer time yields a perfectly risen dome without over‑browning.
- Make‑Ahead Potential: They freeze beautifully, retaining their moisture and flavor, so you can prep a batch on the weekend and enjoy it all week.
Inside the Ingredient List
Understanding each component of this recipe is the secret to mastering it. Below, I break down the players, why they matter, and what happens if you try to skip them.
The Flavor Base
Peanut Butter (½ cup): This is the heart of the muffin, delivering that unmistakable nutty richness. I recommend using a natural, unsweetened variety to keep the sweetness balanced with the honey. If you substitute with a chunky style, you’ll get delightful pockets of texture, but a smooth butter ensures an even crumb. Skipping it would leave the muffins flavorless and flat – the peanut butter is non‑negotiable.
Honey (½ cup): Honey brings a floral sweetness and a hint of acidity that cuts through the richness of the butter and peanut butter. Choose a light, mild honey like clover or acacia for a subtle backdrop; a robust buckwheat honey will dominate the flavor profile. If you’re allergic to honey, maple syrup works as a 1:1 swap, but expect a slightly different flavor nuance. Forgetting the honey leaves the muffins dry and lacking that signature golden glow.
The Texture Crew
All‑Purpose Flour (2 cups): The backbone of the structure, flour provides the gluten network that traps air and gives the muffins their rise. For a lighter crumb, you can sift the flour with the leavening agents – this aerates it and prevents clumps. Substituting with whole‑wheat flour will add a nutty depth but also a denser texture; if you go that route, increase the liquid by a tablespoon or two. Skipping flour is not an option – you’ll end up with a sticky, unbaked mess.
Unsalted Butter (½ cup, softened): Butter contributes richness and helps create that delicate, melt‑in‑your‑mouth crumb. When melted with the peanut butter, it creates a smooth emulsion that prevents pockets of oil. If you’re dairy‑free, coconut oil works as a 1:1 replacement, though it will add a faint coconut aroma. Leaving butter out will result in a dry, crumbly muffin that lacks the luxurious mouthfeel.
The Leavening League
Baking Powder (2 tsp) & Baking Soda (½ tsp): These twin leaveners give the muffins their rise and tender crumb. Baking powder provides a quick lift, while baking soda reacts with the honey’s acidity for a secondary boost. If you only have one, double the amount of baking powder and omit the soda, but expect a slightly different texture. Forgetting them will produce a dense, pancake‑like muffin that never fully rises.
Salt (½ tsp): A pinch of salt amplifies the flavors of the peanut butter and honey, preventing the sweetness from becoming cloying. It also strengthens the gluten network just enough to hold the structure together. You can omit it if you’re on a low‑sodium diet, but the muffins will taste flat.
The Moisture Makers
Eggs (2 large): Eggs act as binders, leaveners, and add richness. They also help create that glossy, golden crust. If you need a vegan alternative, use flax eggs (1 tbsp ground flaxseed + 3 tbsp water per egg) – the texture will be a bit denser but still tasty. Skipping eggs leads to crumbly muffins that fall apart.
Milk (1 cup): Milk supplies the liquid needed to hydrate the flour and activate the leaveners. Whole milk yields the richest crumb, but any dairy or plant‑based milk works. If you substitute with almond milk, the muffins will be slightly lighter and have a subtle nutty note. Omitting milk will result in a dry batter that never fully comes together.
Vanilla Extract (1 tsp): Vanilla adds a fragrant backdrop that ties the peanut butter and honey together. Use pure vanilla for the best aroma; imitation will still work but lacks depth. Skipping it won’t break the recipe, but you’ll miss that comforting, warm undertone.
Everything's prepped? Good. Let’s get into the real action…
The Method — Step by Step
Preheat your oven to 350°F (175°C) and line a 12‑cup muffin tin with paper liners. While the oven warms, take a moment to appreciate the quiet hum of the kitchen – that’s the sound of anticipation building. Place the liners in the tin and set them aside; they’ll help the muffins release cleanly later, preventing that dreaded soggy bottom.
In a medium bowl, whisk together the flour, baking powder, baking soda, and salt. This dry blend is your structural foundation; whisking it aerates the flour, ensuring a light crumb. If you notice any lumps, give it another quick stir – those little pockets can cause uneven rising later.
Now for the magic: in a small saucepan over low heat, melt the butter and peanut butter together, stirring constantly until they form a glossy, homogeneous mixture. This is the moment of truth – you’ll see the two fats blend into a silky river that will later coat every crumb. Watch Out: Do not let the mixture boil; overheating can cause the butter to separate, leading to greasy muffins.
In a large mixing bowl, beat the eggs until they’re light and frothy, then whisk in the honey and vanilla extract. The honey will dissolve into the warm egg mixture, creating a fragrant, glossy batter. As you whisk, you’ll notice the mixture turning a golden amber – that’s the honey’s sugars caramelizing ever so slightly, setting the stage for a sweet crust.
Slowly pour the melted butter‑peanut butter into the egg‑honey mixture, whisking continuously. This gradual incorporation prevents the fats from seizing and ensures a smooth, lump‑free batter. You’ll see the batter become richer, almost velvety, and you’ll hear the faint sound of tiny bubbles forming – those are the air pockets that will expand during baking.
Finally, add the dry ingredients to the wet mixture in two additions, folding gently with a spatula each time. First, pour half of the flour blend, stir just until incorporated, then add the remaining half. Over‑mixing is the biggest villain in muffin making; it develops gluten and leads to a tough crumb. Stop mixing the moment you no longer see streaks of flour – the batter should look thick but still slightly pourable.
Spoon the batter into the prepared muffin cups, filling each about three‑quarters full. The batter is thick enough to hold its shape, but if you want a higher dome, use an ice‑cream scoop for consistency. Watch Out: Overfilling will cause the muffins to spill over and bake unevenly, creating a crust that’s too hard on the sides.
Slide the tin into the preheated oven and bake for 18‑22 minutes, or until a toothpick inserted into the center comes out clean with just a few moist crumbs. Around the 12‑minute mark, you’ll notice the tops turning a deep amber and the edges pulling away slightly – that’s your cue that the crust is forming perfectly. Let the muffins rest in the tin for five minutes before transferring them to a wire rack; this short steam period finishes the cooking process without making the bottoms soggy.
That’s it — you did it. But hold on, I’ve got a few more tricks that’ll take this to another level…
Insider Tricks for Flawless Results
The Temperature Rule Nobody Follows
Most home bakers preheat the oven to 375°F, assuming a hotter oven equals a faster bake. In reality, a moderate 350°F gives the muffins a gentle lift, allowing the crumb to set before the crust hardens. This prevents the dreaded “sunken center” that occurs when the outer shell cooks too quickly. I once tried the 375°F route and ended up with a burnt top and a gummy interior – a lesson learned the hard way. Trust the lower temperature; the result is a uniformly golden muffin with a tender middle.
Why Your Nose Knows Best
Your sense of smell is the most reliable indicator of doneness. Around the 15‑minute mark, you’ll start to detect a sweet, nutty aroma wafting from the oven. When that scent intensifies and you hear a faint “crack” as the tops set, the muffins are ready to pull. Don’t rely solely on timers; ovens vary, and your nose will never let you down. If you’re ever in doubt, trust that aromatic cue – it’s the culinary equivalent of a green light.
The 5‑Minute Rest That Changes Everything
After removing the muffins from the oven, let them sit in the tin for exactly five minutes. This brief rest allows steam to finish cooking the interior without drying it out. Then transfer to a wire rack; the airflow prevents the bottoms from becoming soggy. Skipping this step results in a gummy base that never fully sets. I once served muffins straight from the tin and got a chorus of “too moist” complaints – the rest period is the secret fix.
The Butter‑Peanut Butter Emulsion
Merging butter and peanut butter before adding any liquid creates a homogenous fat base that traps air bubbles during mixing. This emulsion is the reason the crumb stays light despite the richness of the ingredients. If you add the fats separately, you’ll notice the batter separating, leading to uneven texture. The emulsion also gives the muffins that subtle, glossy sheen on the top, making them look as good as they taste.
The “Don’t Overmix” Mantra
Overmixing is the silent killer of muffin fluffiness. As soon as the flour disappears, stop stirring. The moment you see a smooth batter with a few streaks, you’ve reached the sweet spot. Mixing beyond that point develops gluten, turning the crumb into a dense, bread‑like texture. A friend once bragged about “mixing it till smooth” and ended up with muffins that felt like chewing on a rubber band – a cautionary tale that still haunts me.
Creative Twists and Variations
This recipe is a playground. Here are some of my favorite ways to switch things up:
Chocolate Chip Surprise
Fold in ½ cup of dark chocolate chips into the batter for pockets of molten chocolate that melt into the nutty crumb. The bitterness of the chocolate balances the honey’s sweetness, creating a sophisticated flavor profile perfect for an afternoon tea.
Banana Boost
Add one mashed ripe banana to the wet ingredients. The banana adds natural sweetness, extra moisture, and a subtle fruity note that pairs beautifully with peanut butter. You’ll notice a slightly denser crumb, but the flavor upgrade is worth it.
Spiced Autumn
Incorporate ½ tsp each of cinnamon, nutmeg, and a pinch of clove into the dry mix. This warm spice blend turns the muffins into a cozy fall treat, especially when paired with a drizzle of maple syrup instead of honey.
Coconut Crunch
Replace half of the flour with shredded coconut and sprinkle extra toasted coconut on top before baking. The result is a tropical twist with a delightful chewiness that adds texture contrast.
Protein Power
Swap out ¼ cup of the flour for a scoop of vanilla whey protein powder. This boosts the protein content without compromising the moistness, making the muffins a perfect post‑workout snack.
Storing and Bringing It Back to Life
Fridge Storage
Place the cooled muffins in an airtight container and store them in the refrigerator for up to five days. The cool environment preserves the crumb’s softness and prevents the honey from crystallizing. If you notice the tops drying out, lightly drizzle a tiny bit of honey over them before sealing.
Freezer Friendly
Wrap each muffin individually in plastic wrap, then place them in a freezer‑safe zip‑lock bag. They’ll keep for three months. When you’re ready to enjoy one, let it thaw at room temperature for 20 minutes, then give it a quick 2‑minute blast in a 350°F oven to revive the crust.
Best Reheating Method
To bring a refrigerated or thawed muffin back to its fresh‑out‑of‑the‑oven glory, preheat your oven to 300°F, place the muffin on a parchment‑lined tray, and add a splash (about a teaspoon) of water to the side of the tray. The steam generated keeps the interior moist while the gentle heat restores the golden top. In just five minutes, you’ll have a muffin that tastes like it was just pulled from the oven.