Picture this: it’s a rainy Saturday, the kind of day that makes you want to stay in bed and binge watch your favorite series. I’m lying in my pajamas, scrolling through Instagram, when a friend’s post pops up— a photo of the most decadent-looking mini cheesecakes, each topped with a glossy espresso glaze, a sprinkle of cocoa, and a tiny swirl of whipped cream. My stomach growled louder than the thunder outside. I thought, “I’ve seen a dozen cheesecake recipes, but none that combine espresso’s bold bite with the creamy, airy texture of a mini cake.” That was the spark that turned my kitchen into a laboratory of flavor.
I set my phone to record, grabbed my trusty mixer, and let the aroma of freshly brewed espresso fill the room. The espresso hit the air like a dark velvet curtain, its bitterness cutting through the sweetness of the cream cheese. The kitchen was a symphony of sizzling, the sound of whisking, the faint clink of measuring cups— a sensory orchestra that made my heart race. I could almost taste the first bite: a burst of espresso, a whisper of citrus, followed by a smooth, buttery finish that lingers like a memory.
What makes this version of mini espresso cheesecakes a revelation? It’s the secret layering of flavors, the meticulous balance between sweet and bitter, and the simple yet bold technique of a no-bake base that sets these bites apart from every other cheesecake out there. I dared myself to create a mini version that packs the same depth of flavor without the heavy, time-consuming oven process. The result? A bite-sized, espresso-infused cheesecake that melts in your mouth, leaving you craving a second, third, and maybe a fourth. I dare you to taste this and not go back for seconds.
By the end of this post, I’ll walk you through every single step, from the first espresso brew to the final garnish. Trust me, you’ll wonder how you ever made cheesecakes any other way. And if you’ve ever struggled with making mini cheesecakes that stay firm and flavorful, you’re not alone— I’ve got the fix, and it’s simpler than you think.
What Makes This Version Stand Out
- Bold Espresso: The espresso isn’t just a flavor; it’s the backbone, giving the cheesecake a robust, almost coffeehouse vibe that’s unmistakable.
- Light, Airy Texture: A no-bake base keeps the cheesecake silky and airy, avoiding the dense, heavy feel of traditional baked versions.
- Quick Assembly: No oven required, so you can have fresh mini cheesecakes ready in under an hour— perfect for last-minute parties.
- Versatile Garnishes: From chocolate shavings to candied espresso beans, the toppings can be swapped to suit any mood.
- Make-Ahead Friendly: These mini cakes keep their shape for up to three days in the fridge, making them ideal for busy schedules.
- Ingredient Quality: Using high‑quality cream cheese and fresh espresso transforms a simple dessert into a gourmet experience.
- Presentation Power: The glossy espresso glaze and delicate mini size make these cheesecakes a showstopper at any gathering.
- Flavor Balance: The slight citrus zest cuts through the richness, creating a harmonious bite that’s both indulgent and refreshing.
Alright, let’s break down exactly what goes into this masterpiece…
Inside the Ingredient List
The Flavor Base
The heart of any cheesecake is its flavor base, and here, it’s a marriage of cream cheese, espresso, and vanilla. Cream cheese provides the rich, tangy foundation that’s essential for a cheesecake’s signature mouthfeel. The espresso isn’t just a hint of bitterness; it’s a deep, aromatic core that cuts through the sweetness. Vanilla extract lifts the overall profile, adding warmth and complexity. Together, they form a flavor profile that’s both bold and comforting.
The Texture Crew
Texture is everything. The heavy cream and egg act as binders, ensuring the cheesecake holds together without becoming cakey. The addition of a small amount of lemon zest brightens the mixture, preventing it from feeling too heavy. The graham cracker crumbs and melted butter form a subtle crust that adds crunch and a buttery undertone. When you bite, the contrast between the crunchy base and the creamy interior feels like a symphony of textures.
The Unexpected Star
Espresso isn’t a typical cheesecake ingredient, but it’s the secret star that sets this recipe apart. The bitterness of the espresso is balanced by the sugar and the natural acidity of the lemon zest, creating a layered taste that lingers. The espresso also acts as a natural preservative, extending the shelf life of these mini cakes. If you’re a coffee lover, this is the dish that will make you feel like you’ve discovered a new favorite beverage.
The Final Flourish
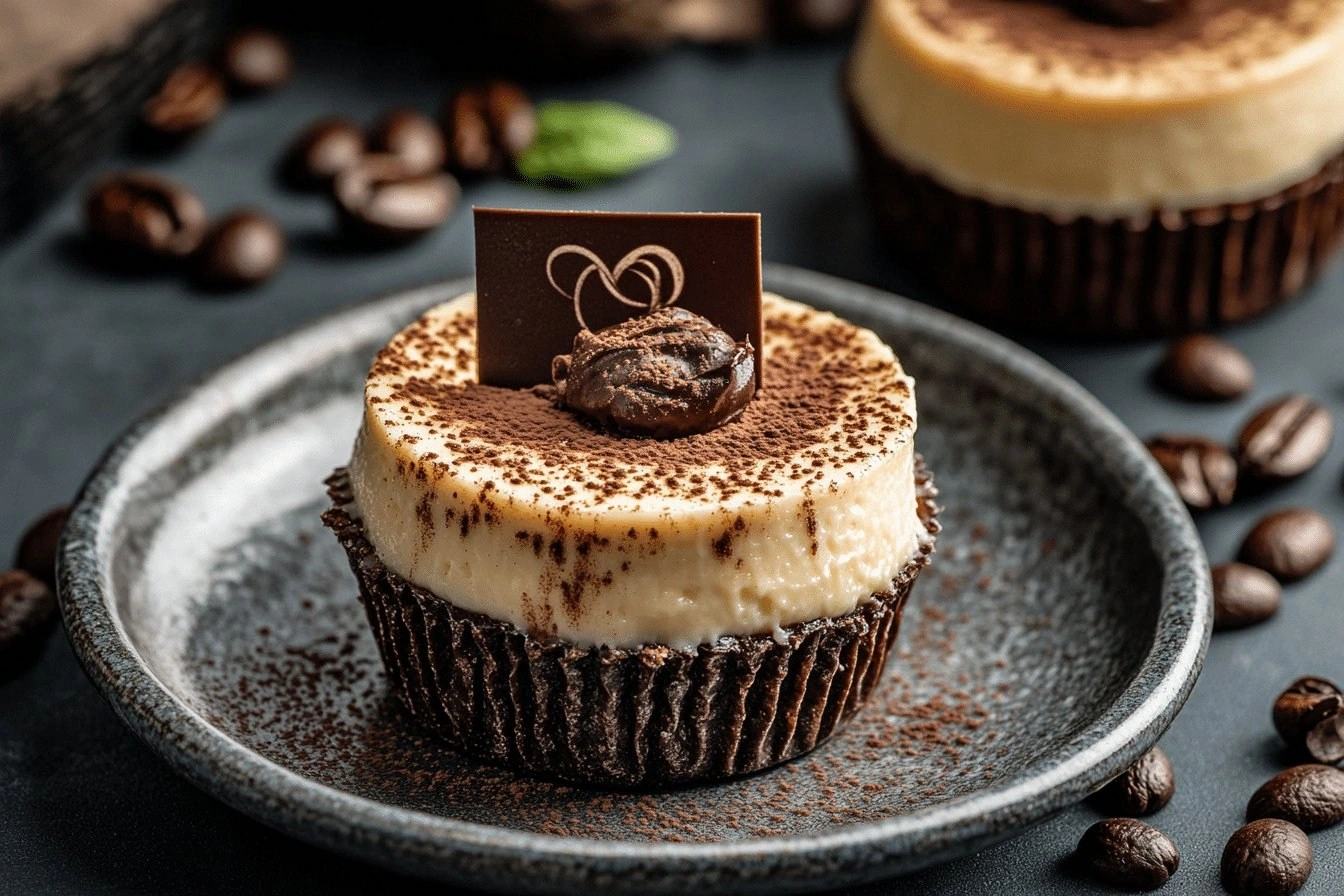
The finishing touch is a glossy espresso glaze that coats each mini cheesecake like velvet. This glaze is made from a simple mixture of espresso, powdered sugar, and a dash of water, giving it a silky sheen that catches the light. The glaze not only adds visual appeal but also enhances the espresso flavor, creating a cohesive and indulgent experience.
Everything’s prepped? Good. Let’s get into the real action…
The Method — Step by Step
- Start by brewing a strong pot of espresso— aim for a 1:1 ratio of espresso to water. Let it cool to room temperature; this ensures it won’t curdle the cream cheese. While the espresso cools, gather all your ingredients, as this process is a quick‑fire affair.
- In a medium bowl, combine the softened cream cheese and granulated sugar. Beat with an electric mixer on medium speed until the mixture is smooth, creamy, and the sugar is fully dissolved. The goal is a silky base that won’t have lumps.
- Add the cooled espresso, vanilla extract, and lemon zest to the cream cheese mixture. Beat on low speed until fully incorporated. The espresso should give the mixture a dark, almost translucent hue— a sign that it’s absorbing well.
- Stir in the heavy cream and egg. Mix until the mixture is uniform and glossy. This step is critical; if you over‑mix, the cheesecake can become too runny. You want a smooth, thick batter that will set nicely.
- Prepare the crust by mixing graham cracker crumbs with melted butter and a pinch of salt. Press this mixture firmly into the bottom of silicone muffin liners or a mini tart pan. The crust should be compact but not overly dense; you want it to support the filling without overpowering it.
- Pour the cheesecake batter over the crust, filling each mold about ¾ full. Tap the pan gently on the counter to release any air bubbles. The batter should sit evenly on the crust, creating a smooth surface.
- Place the pan in the refrigerator for at least 4 hours, or overnight if possible. The cheesecake needs time to set and develop its full flavor profile. The longer you let it chill, the firmer it will be.
- Once the cheesecake has set, remove it from the fridge. Prepare the espresso glaze: whisk together espresso, powdered sugar, and a splash of water until smooth. The glaze should be pourable but still thick enough to coat the surface.
- Drizzle the glaze over each mini cheesecake, letting it pool slightly in the corners. The glaze should create a glossy, almost liquid sheen that glistens in the light. Let the glaze set for 10–15 minutes before serving.
- Optional: Garnish with a dusting of cocoa powder or a sprinkle of candied espresso beans for a sophisticated finish. Serve immediately or chill for a few more minutes for a firmer bite.
That’s it— you did it. But hold on, I’ve got a few more tricks that will take this to another level…
Insider Tricks for Flawless Results
The Temperature Rule Nobody Follows
Many people bake cheesecakes at room temperature, but this recipe is no-bake. Keep all ingredients, especially the cream cheese, at room temperature before mixing. If the cream cheese is too cold, the batter will separate, leading to a lumpy texture. I’ve found that letting the cream cheese sit out for 30 minutes makes a noticeable difference.
Why Your Nose Knows Best
The espresso’s aroma is a subtle indicator of how well it’s brewed. A strong, bitter scent means the espresso is potent enough to stand up against the sugar. If it smells weak or watery, you’ll end up with a bland cheesecake. Trust your nose— it’s your best friend in the kitchen.
The 5-Minute Rest That Changes Everything
After pouring the batter into the molds, let it rest for five minutes before refrigerating. This short pause allows the batter to settle and eliminates air pockets that can cause cracks during chilling. A quick rest can be the difference between a flawless finish and a cracked surface.
Don’t Skip the Crust
Even if you’re tempted to skip the graham cracker crust for a lighter version, the crust anchors the cheesecake and adds a delightful crunch. If you’re looking for a dairy-free option, use oat crackers or a gluten-free biscuit base. The crust also prevents the filling from sliding out of the mold.
Keep the Glaze Cool
When applying the espresso glaze, keep it slightly cooler than room temperature. A hot glaze can melt the cheesecake’s surface, making it runny. Chill the glaze for a few minutes before drizzling, and you’ll achieve that perfect glossy sheen.
Use a Silicone Mold for Easy Release
Silicone molds are a game changer for mini cheesecakes. They’re flexible, which means you can pop the cakes out with minimal effort. If you don’t have silicone, use paper liners in a standard muffin tin. Either way, the release will be smooth, and cleanup will be a breeze.
Creative Twists and Variations
Chocolate Espresso Crunch
Swap the graham cracker crust for a chocolate cookie base and sprinkle chopped dark chocolate over the glaze. The chocolate adds depth, creating a mocha-inspired bite that’s perfect for chocolate lovers.
Lemon Espresso Light
Replace the lemon zest with a splash of fresh lemon juice and reduce the sugar by a quarter cup. The citrus brightness will make the cheesecake feel lighter, ideal for a summer gathering.
Caramel Espresso Swirl
Fold a drizzle of caramel sauce into the batter before pouring. The caramel will swirl through the cheesecake, adding a sweet, buttery layer that balances the espresso’s bitterness.
Nutty Espresso Delight
Add chopped toasted hazelnuts or walnuts to the batter. The nutty crunch will contrast the creamy filling and add a sophisticated texture that’s perfect for a holiday menu.
Mint Espresso Twist
Infuse the glaze with a few drops of peppermint extract. The minty freshness will give the cheesecake a refreshing finish, especially after a hearty meal.
Vegan Espresso Cheesecake
Use coconut cream instead of heavy cream, and replace the egg with a flaxseed binder. This version maintains the creamy texture while keeping the espresso flavor intact, making it suitable for vegan diners.
Storing and Bringing It Back to Life
Fridge Storage
Store the mini cheesecakes in an airtight container in the refrigerator for up to 3 days. The glaze helps seal the surface, keeping the cakes from drying out. Before serving, let them sit at room temperature for 10–15 minutes to soften slightly.
Freezer Friendly
For longer storage, place the mini cheesecakes in a freezer-safe container and freeze for up to 2 weeks. When ready to serve, thaw in the refrigerator overnight. The texture may be slightly firmer, but the flavor remains intact.
Best Reheating Method
If you need to warm the cheesecakes, microwave on low power for 10–15 seconds. Add a tiny splash of water before reheating; the steam will help restore the cheesecake’s moisture and keep it from becoming rubbery.