Ever had a kitchen disaster that turned into a culinary revelation? I was standing in my cramped apartment, eyes glued to a half‑baked dough that looked more like a rubber band than a pastry, when my roommate dared me to make something with the leftover cherries from last night’s dinner. I stared at the jar, a trembling swirl of ruby‑red, and thought, “What if I could turn this into a flaky, dreamy treat that could double as a brunch showstopper?” The next hour felt like a sprint: flour dusted the counter, butter melted in a pan that hissed like a tiny dragon, and the aroma of vanilla and fresh cherries filled the air, turning my apartment into a fragrant bakery.
The moment the dough hit the oven, the scent of butter and sugar rose like a warm hug, making my stomach rumble with anticipation. My ears caught the faint crackle of the dough’s surface as it began to puff, a sound that promised a buttery, golden crust. The first bite was a burst of sweet and tart, the cherries exploding like tiny fireworks against the soft, airy base, while the cream cheese filling smoothed into a silky, velvety layer that clung to the inside of my teeth. I felt the dough’s crisp edges crackle under my fork, a satisfying snap that echoed the excitement inside me.
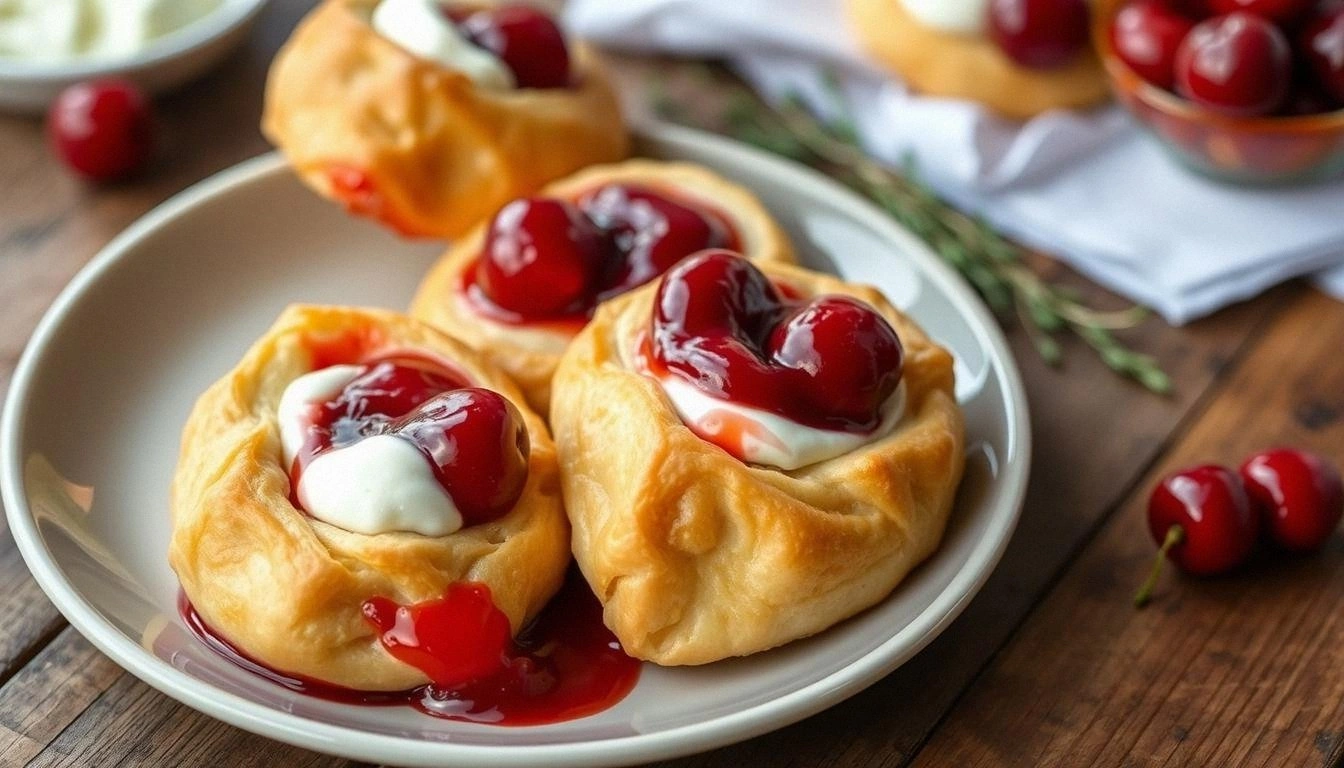
What makes this version stand out is that it’s not just another cherry pastry; it’s a symphony of textures and flavors that play together like a well‑arranged orchestra. The dough is light yet sturdy, the cherry jam provides a glossy, sweet‑tart glaze, and the cream cheese adds a creamy counterpoint that lingers on the palate. The recipe balances sweetness and acidity, ensuring each bite is a fresh, bright moment. I’ve tested variations, and this combination consistently wins the “most memorable” vote in my circle.
I’ll be honest—after I tasted the first bite, I was already planning to serve them at my next brunch. Picture yourself pulling this out of the oven, the whole kitchen smelling incredible, and guests asking, “Where did you learn that trick?” The secret? A subtle infusion of lemon zest that brightens the cherries, and a pinch of sea salt that balances the sweetness. Let me walk you through every single step—by the end, you’ll wonder how you ever made it any other way.
What Makes This Version Stand Out
- Flavor: The combination of sweet cherry jam and tangy cream cheese creates a layered taste that’s both comforting and refreshing.
- Texture: The dough achieves a flaky, buttery crumb while the filling remains silky, giving each bite a delightful contrast.
- Ease: All steps are straightforward, with no hidden tricks—perfect for novice bakers and seasoned chefs alike.
- Uniqueness: The addition of lemon zest and a pinch of sea salt gives this recipe a bright, unexpected twist.
- Versatility: Works wonderfully for brunch, dessert, or a sweet snack with coffee.
- Make‑Ahead: The dough can be prepared the night before, and the pastries hold up well when refrigerated.
- Presentation: The golden crust and glossy cherry glaze make for Instagram‑worthy dishes that impress guests.
- Ingredient Quality: Uses high‑quality cream cheese and fresh cherries to elevate the overall flavor profile.
Inside the Ingredient List
The Flour Foundation
All‑purpose flour is the backbone of the pastry, providing structure and a neutral flavor that lets the cherries shine. A common mistake is to use cake flour, which can result in a too‑soft crumb that collapses. If you’re in a pinch, bread flour can be used, but it will produce a chewier texture. Aim for a flour that’s sifted to remove lumps, ensuring an even dough.
The Dairy Duo
Whole milk adds moisture and richness, while the unsalted butter contributes flavor and flakiness. The butter should be at room temperature for easy incorporation; if it’s too hard, it won’t melt uniformly, leading to uneven dough. For a vegan version, replace butter with a neutral oil and use plant‑based milk, though the flavor will shift slightly.
The Sweet and Savory Balance
Sugar is essential for activating the yeast and sweetening the dough, but too much can overpower the cherries. A pinch of salt is crucial—it enhances the overall flavor and balances the sweetness. If you prefer a salt‑free version, use a low‑sodium yeast or simply omit the salt; the taste will still be rich, though slightly flatter.
The Creamy Center
Cream cheese is the star of the filling, providing a smooth, tangy contrast to the sweet cherry jam. It should be softened to room temperature to prevent lumps. If you can’t find cream cheese, a mixture of mascarpone and a splash of lemon juice can mimic the tanginess.
The Cherry Element
Cherry jam or preserves bring the signature fruity flavor. Fresh cherries add a bright, juicy pop that contrasts with the jam’s consistency. If fresh cherries are out of season, frozen cherries can be used; thaw them first and drain excess liquid to avoid soggy pastries.
The Final Touches
Vanilla extract adds depth, while lemon zest brightens the entire dish, cutting through the richness. A light dusting of powdered sugar after baking adds a sweet finish that’s visually appealing. If you want an extra glossy finish, brush the tops with melted butter before the last 5 minutes of baking.
Everything's prepped? Good. Let's get into the real action.
The Method — Step by Step
- Activate the Yeast: In a small bowl, combine the warm milk, sugar, and yeast. Let it sit for 5 minutes until frothy. This ensures a robust rise and eliminates any dormant yeast. I dare you to taste this and not go back for seconds once the dough is ready.
- Mix Dry Ingredients: In a large mixing bowl, whisk together the flour, salt, and an extra pinch of sugar. This pre‑mixing step guarantees even distribution of the leavening agents. The dough will rise more consistently if the dry ingredients are fully blended.
- Combine Wet and Dry: Add the melted butter and the yeast mixture to the flour mixture. Stir with a wooden spoon until a shaggy dough forms. The dough should feel slightly tacky but not overly sticky. If it’s too dry, add a tablespoon of milk at a time.
- Knead the Dough: Turn the dough onto a lightly floured surface and knead for 8–10 minutes until smooth and elastic. The dough should pass the windowpane test—stretch it thin enough that light can pass through. This step develops gluten, which gives the pastry its flaky structure.
- First Rise: Place the dough in a greased bowl, cover with a damp towel, and let it rise in a warm spot for 1 hour, or until doubled in size. The dough should feel airy and have a slight puff. If your kitchen is chilly, wrap the bowl in a blanket to maintain warmth.
- Prepare the Filling: In a small bowl, mix softened cream cheese, cherry jam, lemon zest, vanilla extract, and a pinch of salt until smooth. The filling should be creamy and free of lumps; if it’s too thick, add a teaspoon of milk to loosen it.
- Shape the Pastries: Punch down the risen dough and divide it into 8 equal portions. Roll each portion into a circle about 8 inches in diameter. Place a spoonful of the filling in the center of each circle, then fold over to create a semi‑circle. Seal the edges by pinching them together, ensuring no filling leaks during baking.
- Second Rise: Place the shaped pastries on a parchment‑lined baking sheet, cover loosely, and let them rise for 30 minutes. This second proofing gives the pastries a light, airy interior.
- Bake to Perfection: Preheat the oven to 375°F (190°C). Brush the tops lightly with melted butter for a glossy finish. Bake for 18–20 minutes until golden brown and the edges pull away from the parchment. The smell of butter and cherries filling the oven will be irresistible.
- Cool and Finish: Remove the pastries from the oven and let them cool on a rack for 5 minutes. Dust with powdered sugar and serve warm. The filling will be slightly melty, making each bite a creamy delight.
That's it — you did it. But hold on, I've got a few more tricks that'll take this to another level. Stay with me here — this is worth it.
Insider Tricks for Flawless Results
The Temperature Rule Nobody Follows
Many bakers think room temperature is fine for the dough, but a slight warmth (around 70°F or 21°C) accelerates yeast activity and yields a lighter crumb. If your kitchen is cooler, place the dough in a slightly warm spot or wrap it in a blanket. This subtle tweak can mean the difference between a dense pastry and a cloud‑like delight.
Why Your Nose Knows Best
Trust your nose during the rise. A fragrant, yeasty smell signals the dough is ready. If the dough smells flat or sour, give it a bit more time. I once rushed the first rise, and the result was a chewy pastry that tasted like cardboard.
The 5‑Minute Rest That Changes Everything
After shaping the pastries, let them rest for 5 minutes before the second rise. This brief pause relaxes the gluten, making the dough easier to handle and ensuring the pastries rise evenly. Skip this step, and you’ll end up with uneven, unevenly baked pastries.
The Secret of a Crumbly Crust
A dash of cornstarch mixed into the flour can help create a more crumbly crust. It absorbs excess moisture and prevents the dough from becoming too chewy. Add about a tablespoon per cup of flour for the best results.
The Power of Fresh Ingredients
Fresh cherries add a bright burst of flavor that canned cherries simply can’t match. If fresh cherries are unavailable, look for cherries preserved in natural sugar rather than artificial sweeteners. The natural sweetness balances the cream cheese’s tanginess perfectly.
Creative Twists and Variations
This recipe is a playground. Here are some of my favorite ways to switch things up:
Sour Cherry Surprise
Swap the sweet jam for a tart cherry compote made from fresh cherries, a splash of red wine, and a pinch of cinnamon. The result is a sophisticated, slightly boozy pastry that pairs well with a glass of sparkling wine.
Chocolate‑Cherry Fusion
Add a tablespoon of cocoa powder to the dough and swirl in a spoonful of chocolate ganache into the filling. The chocolate adds depth, while the cherries provide a bright counterpoint. Serve with a dusting of cocoa powder for an extra chocolatey look.
Nutty Crunch
Fold chopped toasted walnuts or pecans into the dough before the first rise. The nuts add a crunchy texture and a nutty aroma that complements the sweet cherries. A sprinkle of sea salt on top after baking adds a savory finish.
Spiced Berry Delight
Incorporate a pinch of ground ginger or cardamom into the dough for a warm, aromatic twist. Pair the pastry with a dollop of whipped cream flavored with a hint of vanilla. This variation is perfect for autumn gatherings.
Mini Cherry Croissants
Roll the dough into a long rectangle, spread a thin layer of cream cheese, add a thin ribbon of cherry jam, and roll up like a croissant. Slice into rounds and bake as usual. The result is a bite‑sized croissant that’s easier to share.
Storing and Bringing It Back to Life
Fridge Storage
Store the cooled pastries in an airtight container in the refrigerator for up to 3 days. When ready to serve, let them sit at room temperature for 15 minutes to regain softness. If you need a quick fix, place them in a microwave for 10–15 seconds, but be careful not to overheat.
Freezer Friendly
Wrap each pastry individually in parchment paper and then in plastic wrap. Freeze for up to 2 months. When you’re ready, thaw at room temperature for 30 minutes, then bake at 350°F (175°C) for 10 minutes to restore crispness.
Best Reheating Method
Reheat in a preheated oven at 350°F (175°C) for 5 minutes. For a quick snack, microwave on high for 15–20 seconds. Add a splash of water to the baking dish before reheating to create steam, which helps the pastry stay moist and prevents drying out.