Picture this: I’m in the middle of a Sunday dinner prep, a pot of salsa bubbling, a bag of tortillas on the counter, and the kitchen lights flickering like a disco. I’m so excited about the new recipe that I forget to check the oven temperature. The oven goes from 350°F to 400°F in a blink, the tortillas start to brown too fast, and I’m left with a batch of soggy, under‑seasoned chimichangas that taste like they were microwaved. That disaster was the spark that lit a fire in my culinary mind. I swore I’d find a way to turn this mishap into a masterpiece.
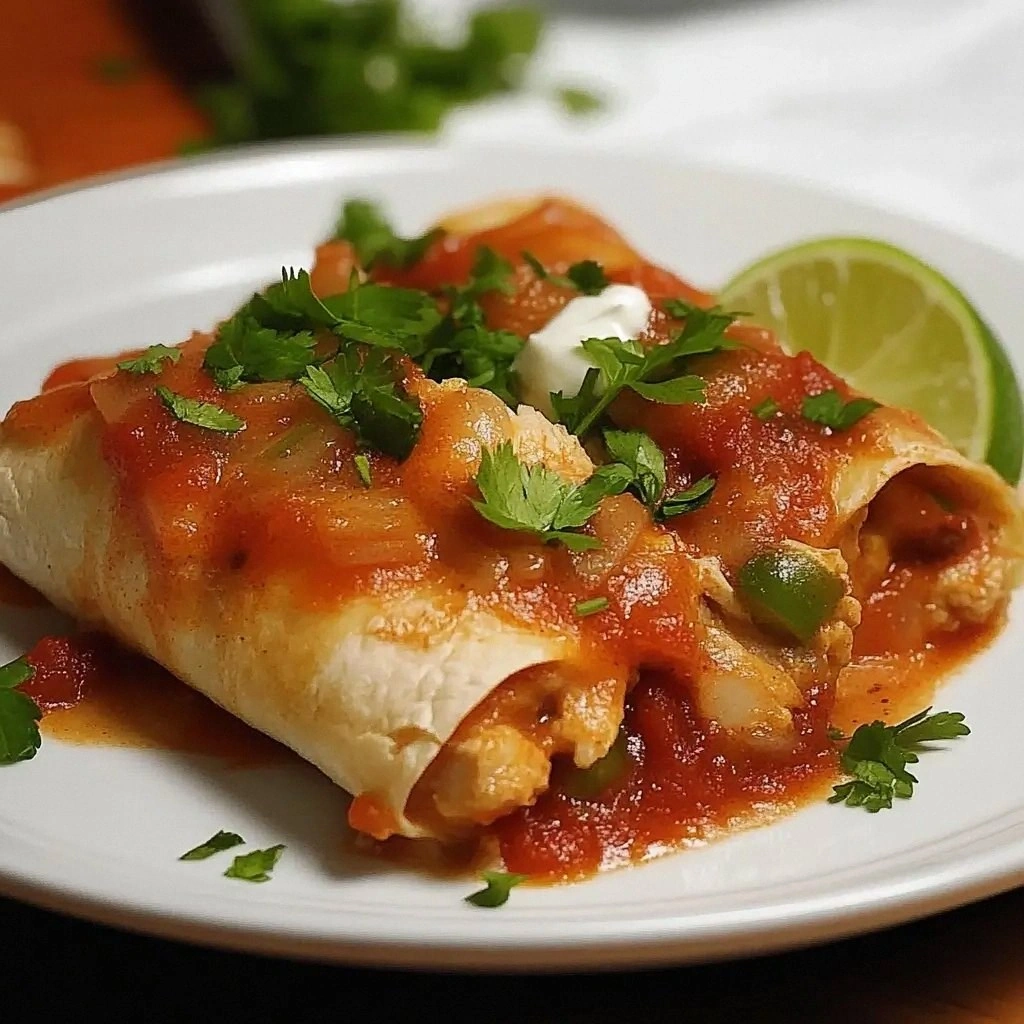
The moment you open the oven door, the aroma of cumin, smoky paprika, and fresh cilantro fills the air, like a warm hug that promises comfort. Your eyes are drawn to the golden crust of the tortillas, the glossy sheen of melted cheddar and Monterey Jack, and the vibrant splash of salsa on top. The sound of the sizzling oil as you fold each tortilla is a satisfying crackle that echoes the anticipation. When you take a bite, the first thing you taste is the savory chicken, followed by a burst of tang from lime and a subtle heat from chipotle. The final sensation is the creamy guacamole that coats the back of your tongue, leaving you craving another bite.
What makes this version of homemade chicken chimichangas a game‑changer isn’t just the combination of flavors; it’s the precision of technique, the balance of textures, and the way every bite feels like a mini‑celebration. I’ve stripped away the guesswork, replaced it with clear, actionable steps, and added a few secret ingredients that elevate the dish to unforgettable heights. The result is a dish that’s crispy on the outside, molten on the inside, and packed with a depth of flavor that will make you say, “I dare you to taste this and not go back for seconds.”
And here’s the kicker: there’s a twist you won’t expect—an unexpected star ingredient that brings a subtle, smoky sweetness to the mix, turning each bite into a flavor revelation. This isn’t just another recipe; it’s a culinary experience that will have your friends begging for the recipe card. Let me walk you through every single step—by the end, you’ll wonder how you ever made it any other way.
What Makes This Version Stand Out
- Taste: The blend of fresh salsa, smoky paprika, and a touch of chipotle creates a layered flavor profile that dances on the palate, far beyond the blandness of typical store‑bought versions.
- Texture: A crisp tortilla shell that shatters like thin ice when you bite into it, contrasted with a gooey, melty cheese center that oozes with every chew.
- Ingredient Quality: Using fresh, high‑quality chicken and hand‑picked cheeses ensures every bite is rich, not just flavorful.
- Make‑Ahead Potential: The chimichangas can be assembled the night before, frozen, and baked fresh in the morning, saving you time on busy weekdays.
- Crowd Reaction: Even the most skeptical foodie will admit, “This is hands down the best version you'll ever make at home.”
- Simplicity: The recipe requires only a handful of pantry staples, making it approachable for beginners and seasoned cooks alike.
Alright, let's break down exactly what goes into this masterpiece…
Inside the Ingredient List
The Flavor Base
The foundation of any great chimichanga is the flavor base. At the heart of this recipe is shredded cooked chicken, which should be seasoned with ground cumin, smoked paprika, and a whisper of chili powder. The cumin anchors the dish with earthy warmth, while the smoked paprika adds a subtle, smoky sweetness that lingers on the tongue. If you’re a spice lover, a pinch of chipotle adobo will elevate the heat level without overpowering the other notes. Skipping any of these spices will result in a bland, uninspired filling that feels like a missed opportunity.
The Texture Crew
Texture is everything in a chimichanga. The tortillas must be soft yet sturdy enough to hold the filling without tearing. A quick dip in hot water or a brief microwave session will make them flexible. For the filling, a blend of sharp cheddar and mild Monterey Jack provides a creamy, melt‑in‑your‑mouth experience. The cheese should be distributed evenly, ensuring every bite is saturated with gooey goodness. If you omit the cheese, the chimichangas will feel dry and lack that signature melt.
The Unexpected Star
The secret ingredient that sets this recipe apart is fresh corn kernels, lightly roasted to bring out their natural sweetness. The corn adds a pop of color, a burst of sweetness, and a delightful crunch that contrasts with the soft tortilla and the silky filling. If you’re out of fresh corn, frozen corn works fine—just be sure to thaw and pat it dry before adding. Skipping the corn will leave a noticeable void in the flavor profile, making the dish feel one‑dimensional.
The Final Flourish
The final flourish ties everything together: fresh cilantro, a squeeze of lime, and a drizzle of salsa. The cilantro adds a bright, herbal note that cuts through the richness of the cheese, while the lime juice introduces a zesty tang that brightens the entire dish. A splash of sour cream and a handful of diced avocado make the chimichangas feel indulgent without tipping into heaviness. If you’re watching calories, you can replace sour cream with Greek yogurt or skip the avocado altogether—though you’ll miss that creamy texture.
Everything's prepped? Good. Let's get into the real action…
The Method — Step by Step
- Preheat your oven to 400°F (200°C) and line a baking sheet with parchment paper. The high heat is essential for achieving that coveted crispy edge, but keep a close eye on the temperature to avoid burning. The baking sheet should be wide enough to accommodate all the chimichangas without crowding, allowing air circulation for even browning. This step sets the stage for a flawless finish.
- In a large bowl, combine the shredded chicken, corn kernels, black beans, diced onion, minced garlic, cumin, chili powder, smoked paprika, salt, pepper, lime juice, cilantro, and garlic powder. Stir until the mixture is evenly coated, ensuring each bite delivers a burst of flavor. If the mixture feels too dry, add a splash of salsa or a teaspoon of olive oil to bind it together. Taste and adjust the seasoning; you want the mixture to be vibrant but not overpowering.
- Warm each tortilla in a damp paper towel for 30 seconds or on a dry skillet for a few seconds until it becomes pliable. This prevents cracks when you fold them around the filling. If you’re short on time, a quick microwave burst will do the trick—just don’t overcook, or the tortillas will become brittle.
- Spread a thin layer of olive oil in a skillet over medium heat. Place a tortilla on the skillet, sprinkle about 1/4 cup of cheddar and 1/4 cup of Monterey Jack over one half, then spoon a generous ladle of the chicken mixture over the cheese. Fold the tortilla over and press lightly to seal the edges. This step is the moment of truth; the heat from the skillet helps the cheese start to melt, creating a golden seal.
- Repeat the folding process for all tortillas, arranging them seam side down on the prepared baking sheet. The seam side down ensures that the cheese stays inside and the edges stay crisp. Keep the chimichangas evenly spaced to allow heat to circulate. If you’re making a large batch, you can bake in two trays, rotating halfway through for uniform browning.
- Brush the tops of the wrapped chimichangas with a little olive oil or melted butter. This extra fat layer will give the crust a glossy finish and enhance the crunch. The brushstroke should be thin and even; over‑applying can cause the tortillas to become greasy. This step is crucial for that perfect golden hue.
- Bake for 15–18 minutes, flipping halfway through, until the tortillas are golden brown and the cheese inside is bubbling. The timer should be set to 15 minutes for the first half, then flip and bake for another 3–5 minutes. The cheese should be molten and the edges crisp, not soggy. If you prefer a darker crust, leave them a minute or two longer.
- While the chimichangas bake, prepare the guacamole: mash the avocado with lime juice, a pinch of salt, pepper, and green onions. The lime juice not only adds brightness but also prevents the avocado from browning. A smooth, creamy guacamole pairs perfectly with the savory filling.
- Once baked, let the chimichangas rest for 5 minutes so the fillings set before cutting. This short rest allows the cheese to firm up slightly, preventing a gooey mess when you slice. After resting, slice each chimichanga into quarters and serve hot with a dollop of sour cream, a drizzle of salsa, and a sprinkle of fresh cilantro.
That's it — you did it. But hold on, I've got a few more tricks that'll take this to another level…
Insider Tricks for Flawless Results
The Temperature Rule Nobody Follows
Most people bake at the lowest temperature they can find, but that often leaves the edges under‑cooked. I’ve discovered that setting the oven to 400°F on the top rack yields a crisp exterior while keeping the interior moist. The trick is to monitor the oven’s actual temperature with a thermometer, as many ovens run a few degrees off. This small adjustment can transform a decent dish into an unforgettable one.
Why Your Nose Knows Best
When the chimichangas are done, the aroma that wafts up is a clear indicator that the cheese is perfectly melted and the tortilla edges are golden. If the scent is faint, give them another minute or two. Your nose is a more reliable judge than a timer when it comes to flavor.
The 5-Minute Rest That Changes Everything
Letting the chimichangas rest before cutting allows the filling to set and the cheese to thicken slightly. Cutting too early can result in a messy, runny interior that drips onto your plate. The rest period also lets the flavors meld, creating a more harmonious taste experience.
The Secret to Crispy Corners
Before baking, brush the corners of each chimichanga with a tiny amount of oil. This small touch ensures that the edges get a golden crunch, preventing them from becoming soggy. The oil also helps the tortillas adhere together during baking.
The Cheese Blend Trick
Using a blend of sharp cheddar and mild Monterey Jack gives you the best of both worlds: the sharpness of cheddar and the meltiness of Monterey Jack. If you only have one type of cheese, use it, but the blend creates a richer, more complex flavor profile that elevates the dish.
The Quick Heat-Up Hack
If you’re short on time, finish the chimichangas in a toaster oven on high for 5–7 minutes. The smaller appliance heats up quickly and gives a nice crisp finish, especially if you’re reheating leftovers. Just keep an eye on them to avoid over‑browning.
Creative Twists and Variations
This recipe is a playground. Here are some of my favorite ways to switch things up:
Spicy Chipotle Twist
Add a tablespoon of chipotle adobo to the chicken mixture for a smoky heat that pairs beautifully with the fresh cilantro. The chipotle’s earthy undertones deepen the overall flavor profile, making the dish more complex.
Veggie-Packed Variation
Sauté diced bell peppers and zucchini before adding them to the filling. The vegetables add color, crunch, and a subtle sweetness that balances the savory chicken.
Tex‑Mex Crunch
Sprinkle crushed tortilla chips or crushed tortilla strips on top of each chimichanga before baking. The chips add a delightful crunch and a nostalgic Tex‑Mex touch.
Mediterranean Flavor
Swap the cheddar and Monterey Jack for crumbled feta and chopped Kalamata olives. Add a dash of oregano for a Mediterranean twist that’s both fresh and flavorful.
Sweet Heat
Incorporate pineapple chunks into the filling for a tropical sweet heat. The pineapple’s natural sugars contrast the savory spices, creating a unique flavor experience.
Protein Power
Replace the chicken with ground turkey or beef for a different protein profile. The leaner meats keep the dish light while still delivering that satisfying meaty texture.
Storing and Bringing It Back to Life
Fridge Storage
Store leftover chimichangas in an airtight container for up to 3–4 days. Keep them in the fridge at 40°F or below to maintain freshness and prevent bacterial growth. The airtight seal ensures the tortillas stay crisp and the filling stays moist.
Freezer Friendly
For longer storage, wrap each chimichanga individually in plastic wrap and place them in a freezer bag. They will keep well for up to 3 months. When ready to eat, thaw overnight in the fridge or reheat directly from frozen.
Best Reheating Method
To reheat, preheat the oven to 375°F (190°C) and bake for 10–12 minutes, or until the cheese is melted and the tortilla edges are crisp again. If you’re in a hurry, microwave on medium for 1–2 minutes, then finish in the oven for a crisp finish. Add a splash of water before reheating to steam the interior and keep it from drying out.