Picture this: I was standing in a cramped apartment kitchen, the aroma of sizzling garlic and onions dancing through the air, and a friend dared me to recreate a dish from a Filipino street vendor I’d fallen in love with on a rainy night. That vendor’s Beef Salpic was a whirlwind of savory umami, bright soy, and a touch of sweet oyster sauce, all wrapped in a buttery, caramelized crust that practically sang with every bite. I was determined to bring that magic into my own home, but I knew I had to tweak the classic recipe to make it truly unforgettable. That’s why I spent the next few hours experimenting, and the result is a Beef Salpic that’s not only a tribute to the original but also a bold, flavor-packed masterpiece that will have your friends begging for the recipe.
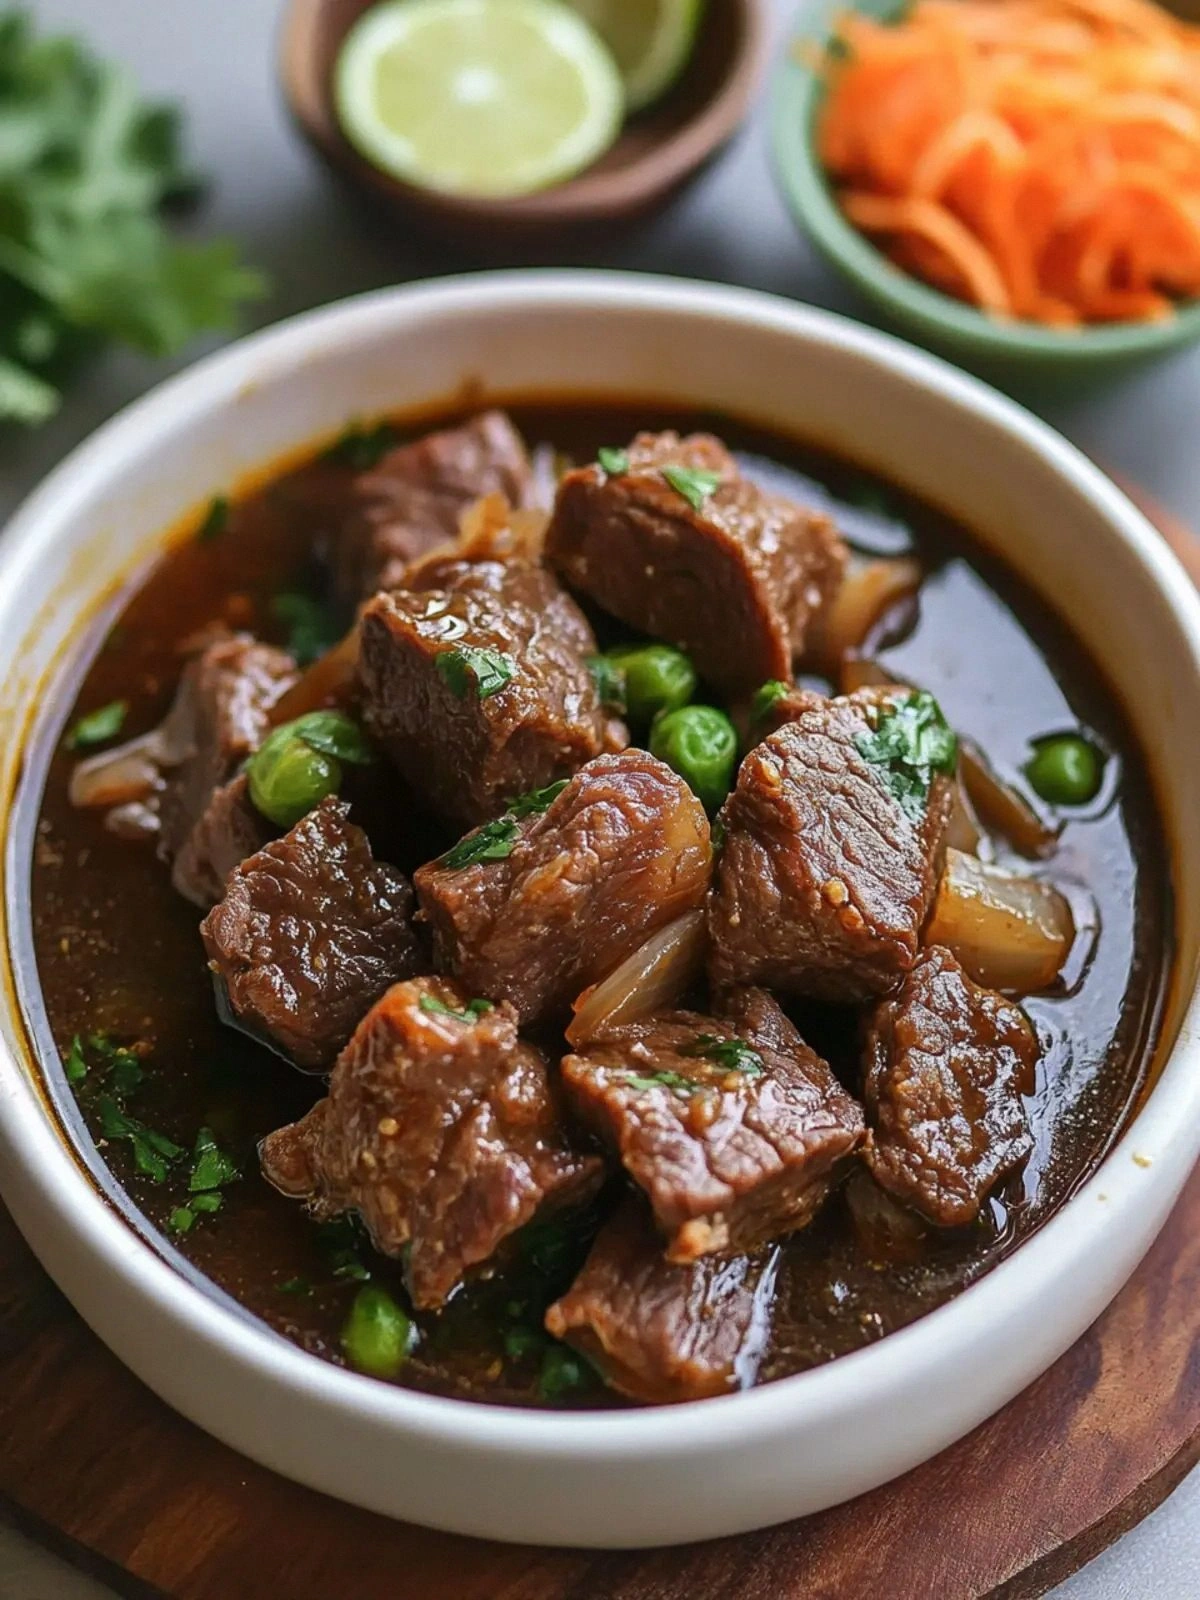
I swear, the moment those 1‑inch cubes of ribeye hit the hot pan, the kitchen filled with a crackling, almost musical sizzle that made my heart race. The garlic and shallot released a fragrant steam that felt like a warm hug, and the first bite was a symphony of deep beefiness, tangy Worcestershire, and the subtle brine of soy sauce, all balanced by a whisper of sweetness from the oyster sauce. Every element worked in harmony, creating a sauce that clung to the meat like velvet, while the butter and avocado oil added a silky finish that melted in your mouth. It was a culinary revelation that turned an ordinary dinner into a celebration.
What sets this version apart? I’ve taken the classic technique and sprinkled it with a few game‑changing touches: a touch of cold butter to lock in moisture, a splash of chicken stock for depth, and a dash of black pepper for that final, smoky kick. I’ll be honest — I ate half the batch before anyone else got a chance to taste it, and that’s no surprise when the flavor profile is so rich and the texture so tender. Most recipes get this completely wrong by over‑cooking the beef or using too much liquid, but I discovered that the secret is in the sear and the balance of sauces. I dare you to taste this and not go back for seconds; the first bite will have you questioning how you ever made it any other way.
If you’ve ever struggled with getting the right level of caramelization without burning the meat, you’re not alone — and I’ve got the fix. Picture yourself pulling this out of the pan, the whole kitchen smelling incredible, and a plate of perfectly browned beef ready to be served with steamed rice and a side of sautéed greens. The moment the pan is hot enough, the meat will sizzle, and the aroma will tell you you’re in the right place. Stay with me here — this is worth it. By the end of this guide, you’ll have a Beef Salpic that’s hands down the best version you’ll ever make at home.
What Makes This Version Stand Out
- Flavor Depth: The combination of Worcestershire, soy, and oyster sauce creates a layered umami profile that’s richer than the original.
- Texture Perfection: The quick sear locks in juices, while the cold butter adds a silky finish that melts on the tongue.
- Ingredient Quality: Using ribeye ensures a tender, fatty cut that stands up to the bold sauces.
- Time Efficiency: The entire dish cooks in under 45 minutes, making it ideal for busy weeknights.
- Make‑Ahead Friendly: Leftovers reheat beautifully, retaining flavor and moisture.
- Versatility: This recipe can be paired with rice, noodles, or even served as a hearty stew.
- Crowd Appeal: The savory, slightly sweet sauce is a crowd‑pleaser that works for both casual and formal settings.
Alright, let’s break down exactly what goes into this masterpiece…
Inside the Ingredient List
The Flavor Base
The foundation of this dish lies in the harmonious blend of Worcestershire, soy, and oyster sauces. Worcestershire adds a subtle tang and depth that anchors the umami, while soy sauce provides that classic salty backbone. Oyster sauce introduces a gentle sweetness and a hint of brine that lifts the entire flavor profile. Skipping any of these would leave the sauce feeling flat and incomplete; each one works together like a well‑tuned orchestra.
The Texture Crew
Ribeye steak, cut into 1‑inch cubes, is the star of the show. Its marbling ensures tenderness and juiciness, even after a quick sear. The cold butter, added at the end, coats the meat, sealing in moisture and creating a silky sheen that glazes the beef. Avocado oil, with its high smoke point, allows for a high‑temperature sear without burning, giving the meat that coveted caramelized crust.
The Unexpected Star
The 1 cup of chicken stock or water is the secret to achieving a sauce that’s both thick and glossy. It hydrates the meat, allowing the sauces to meld, and adds a subtle savory note that ties everything together. If you’re watching calories, a splash of low‑sodium chicken broth works just as well, maintaining the sauce’s body without extra sodium.
The Final Flourish
Garlic and shallot are the aromatic backbone, releasing their fragrance early to build depth. The black pepper, freshly ground, adds a hint of heat that balances the sweetness of the sauces. Together, these ingredients create a sauce that coats the beef like velvet, with a finish that lingers on the palate.
Everything’s prepped? Good. Let’s get into the real action…
The Method — Step by Step
- Heat a cast‑iron skillet over medium‑high heat until it’s smoking. Pat the beef cubes dry with paper towels to ensure a perfect sear. Add a splash of avocado oil, swirling to coat the pan. When the oil shimmers, lay the beef in a single layer, allowing each piece to brown without overcrowding. The goal is a golden crust that locks in juices; watch for the moment the edges start pulling away from the pan.
- Remove the beef from the skillet and set aside. In the same pan, add the thinly sliced garlic and shallot, sautéing until translucent and fragrant. The aroma should be buttery and slightly sweet, signaling that the aromatics are ready to absorb the sauces.
- Pour in the Worcestershire, soy, and oyster sauces, stirring to combine. Let the mixture simmer for 2 minutes, allowing the alcohol to evaporate and the flavors to meld. The sauce should thicken slightly, coating the back of a spoon.
- Return the beef to the skillet, tossing to coat each cube in the sauce. Add the chicken stock or water, just enough to create a silky glaze that clings to the meat. Reduce the heat to medium, covering the pan for 5 minutes to let the beef absorb the sauce’s richness.
- Uncover and let the sauce reduce further, stirring occasionally. The sauce should be glossy, thick enough to coat the back of a spoon, yet still pourable. If it starts to look too thick, add a tablespoon of water to loosen it.
- Just before serving, swirl in the cold butter. This will give the sauce a silky sheen and a subtle buttery finish that elevates the dish. The butter should melt instantly, creating a glossy coat over the beef.
- Season with freshly ground black pepper to taste. The pepper adds a final layer of heat that balances the sweet and savory notes. Give everything one last gentle toss to ensure even distribution.
- Serve immediately over steamed rice or your favorite noodles, garnished with chopped scallions if desired. The dish is best enjoyed hot, as the sauce’s richness and the beef’s tenderness shine brightest.
That’s it — you did it. But hold on, I’ve got a few more tricks that'll take this to another level…
Insider Tricks for Flawless Results
The Temperature Rule Nobody Follows
Many cooks think a medium‑high heat is enough, but the secret is to start with a very hot pan. This ensures the Maillard reaction kicks in quickly, giving the beef a caramelized crust that locks in moisture. If the pan isn’t hot enough, the meat will steam instead of sear, leading to a soggy texture. I’ve found that a 400°F skillet works best for this cut.
Why Your Nose Knows Best
Trust your nose when the sauce starts to thicken. A slight caramel scent is a good indicator that the sugars are developing. If you notice a burnt smell, reduce the heat immediately. The aroma is a reliable guide to avoid over‑cooking or burning the sauce.
The 5‑Minute Rest That Changes Everything
After searing, let the beef rest in a warm spot for 5 minutes before adding aromatics. This rest period allows the meat to redistribute juices, keeping it moist and tender. Skipping this step often results in uneven cooking and dry bites.
Layering Flavors in Stages
Add sauces in stages: first the Worcestershire, then soy, then oyster. This layering technique ensures each sauce’s flavor is fully integrated without overwhelming the others. If you pour them all at once, the result can feel muddled.
Butter Finish for a Velvet Coat
Adding cold butter at the end is not just for flavor; it also thickens the sauce slightly, giving it a glossy, silky texture. The butter should melt instantly, creating a sheen that glazes the beef. This final touch elevates the dish from good to unforgettable.
Creative Twists and Variations
Spicy Szechuan Salpic
Add a tablespoon of Szechuan peppercorns and a teaspoon of chili oil during the aromatics stage. This gives the dish a numbing heat that pairs beautifully with the savory sauce. It’s perfect for those who love a bit of kick with their comfort food.
Herb‑Infused Salpic
Stir in a handful of fresh thyme or rosemary at the end of cooking. The herbs add a fragrant, earthy note that complements the beef’s richness. This variation works wonderfully when serving with roasted vegetables.
Vegetarian Salpic (Using Seitan)
Replace the beef with cubed seitan for a plant‑based version. The seitan absorbs the sauce just like meat, offering a chewy texture that satisfies. It’s a great option for those looking to reduce meat consumption without sacrificing flavor.
Salpic with Coconut Milk
Swap the chicken stock for coconut milk to add a creamy, tropical twist. The coconut’s sweetness balances the savory sauces and gives the dish a silky mouthfeel. Serve over jasmine rice for a complete Southeast Asian experience.
Salpic with Garlic‑Infused Oil
Before searing the beef, heat a tablespoon of oil with whole garlic cloves until fragrant. This infuses the oil with garlic flavor, which then permeates the entire dish. The result is a deeper, more complex garlic profile.
Salpic with Pineapple Juice
Add a splash of pineapple juice during the sauce reduction for a hint of tropical sweetness. The acidity cuts through the richness, creating a balanced, refreshing finish. This variation is ideal for summer gatherings.
Storing and Bringing It Back to Life
Fridge Storage
Cool the dish completely before transferring it to an airtight container. Store in the refrigerator for up to 3 days. The sauce will thicken slightly, so reheat gently to restore its silky texture.
Freezer Friendly
Divide the dish into individual portions and place in freezer‑safe bags. Freeze for up to 2 months. Thaw overnight in the refrigerator before reheating.
Best Reheating Method
Reheat in a skillet over low heat, adding a splash of water or broth to loosen the sauce. Stir frequently to prevent sticking and to ensure even heating. The tiny splash of liquid helps the beef retain its juiciness and brings the sauce back to its original sheen.
Now that you’ve mastered the basics, you’re ready to experiment and make this dish your own. Whether you stick to the classic version or try one of the creative twists, the key is to trust the process and enjoy the journey. This Beef Salpic is more than just a meal; it’s a celebration of flavor, texture, and culinary confidence.