Love this? Pin it for later! 📌
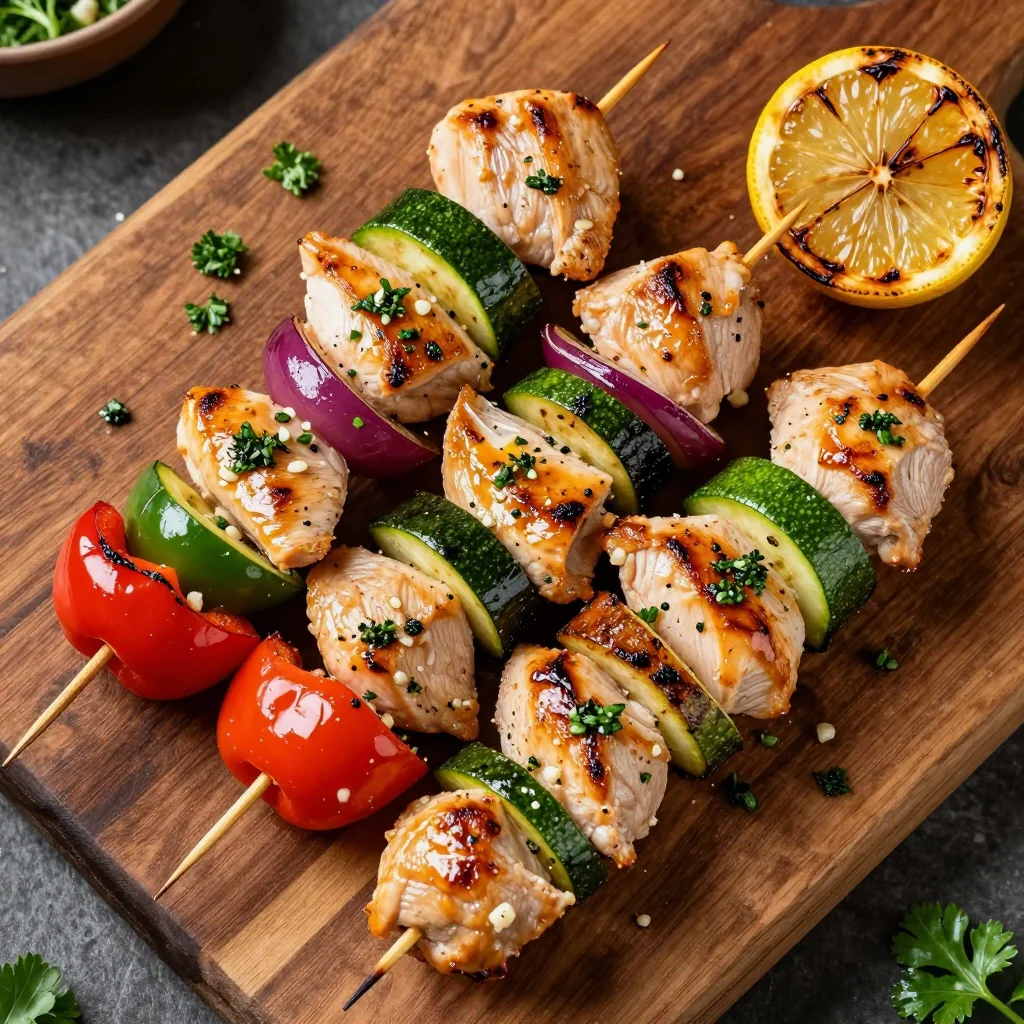
Imagine this: it's 5:30 PM on a Tuesday, the kids are hungry, you're exhausted from work, and the last thing you want to do is spend an hour prepping dinner. Now picture yourself pulling perfectly marinated chicken and vegetable skewers from your freezer, letting them thaw for 20 minutes while you change into comfy clothes, then effortlessly grilling them to perfection. That's the magic of these freezer-friendly chicken and veggie skewers, and they've been my family's dinner lifesaver for the past three years.
I discovered this recipe during what I call my "meal prep awakening" – that moment when I realized that spending two hours on Sunday could save me countless stressful weeknight dinners. My neighbor Sarah, who somehow manages to feed her family of six delicious home-cooked meals despite working full-time, shared her secret: freezer marinades. The concept was revolutionary to me. Instead of freezing plain chicken and hoping for inspiration later, I could prepare complete, perfectly seasoned skewers that would taste even better after their time in the freezer.
What makes these skewers special isn't just their convenience (though that's certainly a major perk). It's how the freezing process actually enhances the flavor. The marinade penetrates deeper into the chicken as it freezes and thaws, resulting in incredibly tender, flavorful meat that tastes like it's been marinating for days. Plus, having these ready-to-go skewers means spontaneous backyard gatherings are a breeze, camping trips are simplified, and even weeknight dinners feel special and intentional rather than frantic.
Why This Recipe Works
- Freezer Magic: The freezing process allows the marinade to penetrate deeply into the chicken, creating incredibly flavorful and tender results that taste like they've been marinating for days.
- Weeknight Convenience: With just 20 minutes of thawing time, you can have a complete, healthy dinner on the table faster than ordering takeout.
- Customizable Veggies: The recipe works with any combination of vegetables, making it perfect for using up produce before it goes bad.
- Batch Cooking Friendly: One afternoon of prep can yield 8-12 servings, perfect for meal planning or feeding unexpected guests.
- Kid-Approved: The mild Mediterranean-style marinade appeals to picky eaters while still being sophisticated enough for adults.
- Healthy & Balanced: Each skewer provides lean protein and vegetables in perfect portions, making healthy eating effortless.
- Grill or Oven Versatile: Works perfectly on outdoor grills, indoor grill pans, or even roasted in the oven during colder months.
Ingredients You'll Need
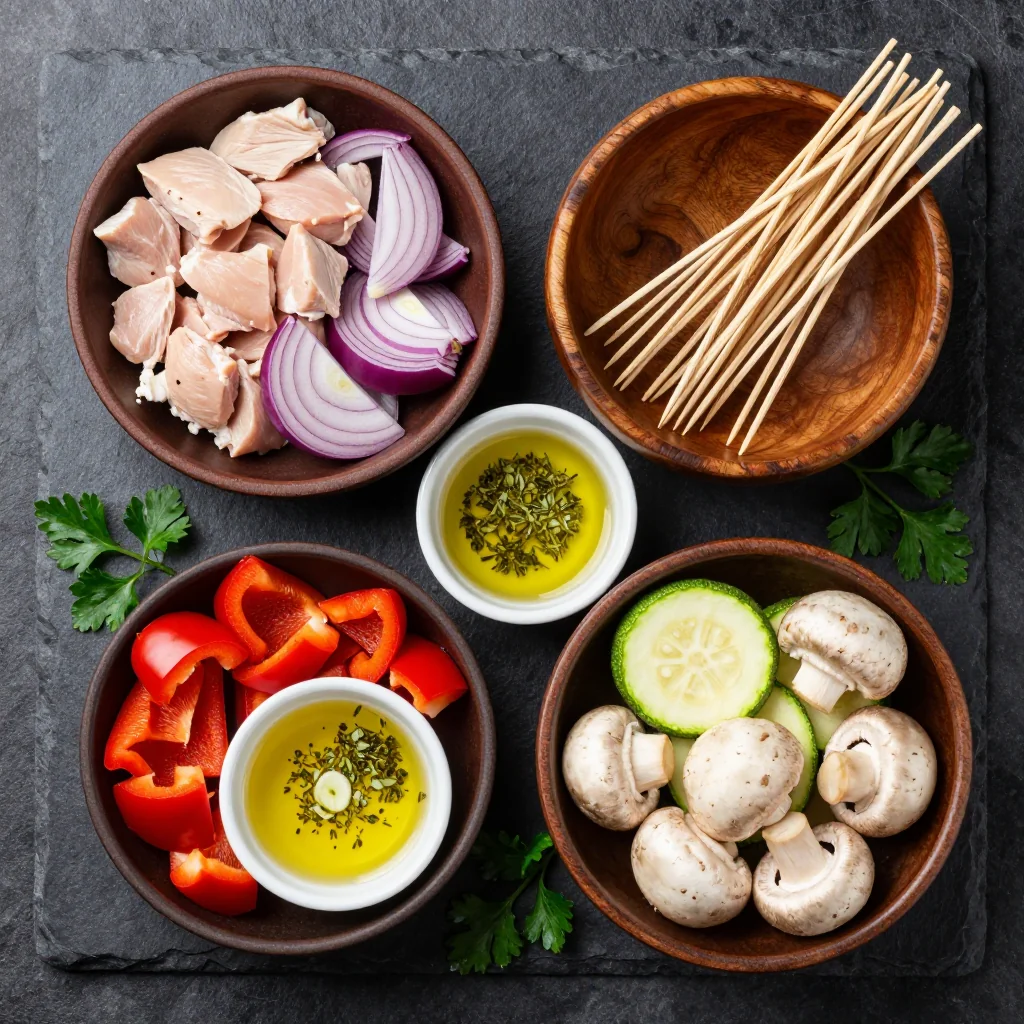
Creating these freezer-friendly skewers starts with selecting the right ingredients. Each component plays a crucial role in both flavor development and freezer success. I've tested dozens of combinations over the years, and this particular mix delivers the best results in terms of taste, texture, and freezer performance.
Chicken Breast (2 pounds): I prefer boneless, skinless chicken breast for its lean protein and ability to absorb marinades beautifully. However, chicken thighs work wonderfully too if you prefer darker meat. The key is cutting the pieces into uniform 1-inch cubes – this ensures even cooking and prevents smaller pieces from drying out while larger pieces remain undercooked. When selecting chicken, look for plump, moist pieces without any off odors. I typically buy family packs when they're on sale and prep multiple batches at once.
Bell Peppers (3 large): A colorful mix of red, yellow, and orange bell peppers not only creates visual appeal but also provides different flavor profiles. Red peppers are sweetest, yellow has a mild sweetness, and orange falls somewhere in between. Green peppers are too bitter for this recipe in my opinion. Cut them into 1-inch pieces, removing the white pith completely as it can become tough when frozen and thawed.
Zucchini (2 medium): Zucchini is a freezer-friendly vegetable that holds up well to the freezing and thawing process. Select firm, smaller zucchini as they have fewer seeds and less water content. Cut into ½-inch rounds – too thin and they'll become mushy, too thick and they won't cook through properly. No need to peel them; the skin helps maintain structure.
Red Onion (1 large): Red onion provides a beautiful color contrast and milder flavor than yellow onions. Cut into 1-inch pieces, separating the layers. The onion adds moisture and natural sweetness that complements the chicken perfectly. If you're sensitive to onions, you can soak the pieces in cold water for 10 minutes before assembling to mellow the flavor.
Extra Virgin Olive Oil (⅓ cup): The foundation of our marinade. Don't substitute with vegetable oil – the olive oil provides essential flavor compounds and helps the marinade adhere to the ingredients. A good quality extra virgin olive oil makes a noticeable difference in the final taste.
Lemon Juice (¼ cup fresh): Fresh lemon juice tenderizes the chicken while adding bright, fresh flavor. The acidity helps break down proteins in the chicken, resulting in more tender meat after freezing and cooking. Never use bottled lemon juice – the chemical preservatives can affect both taste and texture.
Garlic (6 cloves, minced): Fresh garlic is essential for that authentic Mediterranean flavor. I use a microplane to grate it finely, which distributes the flavor more evenly throughout the marinade. If you're sensitive to garlic, you can reduce to 4 cloves, but I wouldn't recommend omitting it entirely as it's crucial to the flavor profile.
How to Make Freezer Friendly Chicken and Veggie Skewers for Easy Grilling
Prepare the Marinade Base
In a large bowl, whisk together the olive oil, lemon juice, minced garlic, oregano, basil, salt, and pepper. The key here is to create an emulsion – keep whisking until the oil and lemon juice combine into a smooth, slightly thickened mixture. This should take about 30-45 seconds of vigorous whisking. The marinade should coat the back of a spoon. If it separates, keep whisking. This emulsion ensures the marinade adheres evenly to all ingredients.
Prep and Marinate the Chicken
Pat the chicken breast completely dry with paper towels – this is crucial for the marinade to adhere properly. Cut into uniform 1-inch cubes, trimming any excess fat. Add the chicken to the marinade, ensuring every piece is well-coated. Use your hands (with gloves if preferred) to massage the marinade into the chicken. This physical manipulation helps tenderize the meat. Cover the bowl with plastic wrap, pressing it directly onto the surface of the chicken to prevent air exposure.
Prepare the Vegetables
While the chicken marinates, prep your vegetables. Cut bell peppers into 1-inch squares, removing all white pith. Slice zucchini into ½-inch rounds. Cut red onion into 1-inch pieces, separating the layers. The key is maintaining consistent sizing so everything cooks evenly. Place vegetables in a separate bowl and toss with 2 tablespoons of the marinade from the chicken – just enough to lightly coat them. Over-marinating vegetables can make them soggy.
Assemble the Skewers
Thread ingredients onto metal or soaked wooden skewers in a consistent pattern: chicken, bell pepper, zucchini, onion, repeat. This pattern ensures even cooking and creates beautiful presentation. Don't pack too tightly – leave small gaps between pieces for heat circulation. For freezer storage, I prefer metal skewers as they're more durable. If using wooden skewers, soak them for at least 30 minutes to prevent burning during grilling.
Flash Freeze for Best Results
Place assembled skewers on a parchment-lined baking sheet, ensuring they don't touch. Flash freeze for 2-3 hours until solid. This step prevents the skewers from sticking together in storage and maintains their shape. Don't skip this step – it makes a significant difference in the final texture and prevents the marinade from pooling at the bottom of your storage container.
Package for Long-term Storage
Once flash frozen, wrap each skewer individually in plastic wrap, then place 4-6 skewers in a labeled freezer bag. Remove as much air as possible using the water displacement method (partially seal bag, submerge in water to push out air, then seal completely). Label with contents, date, and cooking instructions. Properly stored, these skewers maintain optimal quality for up to 3 months, though they're safe indefinitely if kept at 0°F.
Thaw Properly for Best Results
Remove desired number of skewers from freezer. You have two options: quick thaw in cold water (20-30 minutes in a sealed bag, changing water every 10 minutes) or overnight thaw in refrigerator. The quick method works perfectly and doesn't affect quality. Don't microwave thaw – it creates hot spots that can start cooking the chicken. The skewers should be pliable but still cold to the touch before grilling.
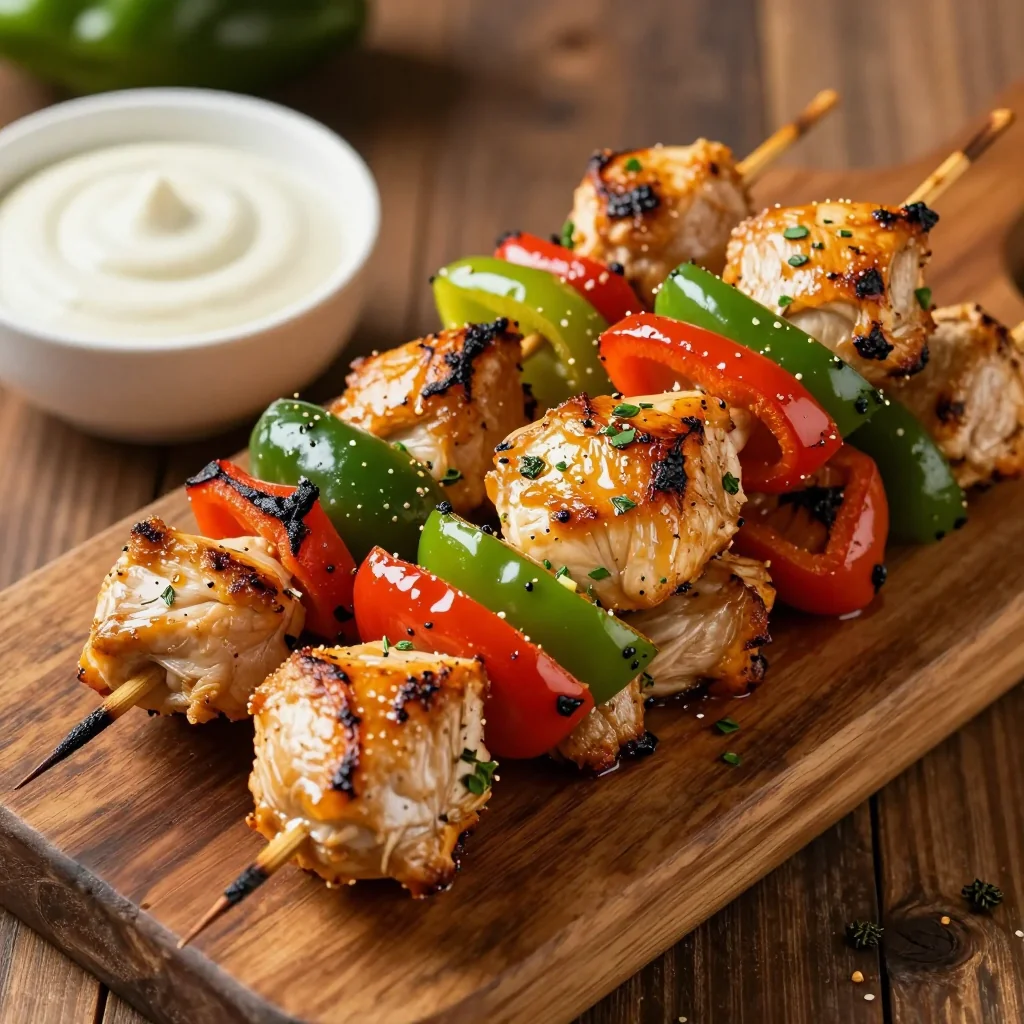
Grill to Perfection
Preheat grill to medium-high (400-425°F). Clean grates and oil them well. Grill skewers for 12-15 minutes total, turning every 3-4 minutes. Look for chicken that's opaque throughout and vegetables with nice char marks. The internal temperature should reach 165°F. Don't overcook – the chicken will continue cooking slightly after removal. Let rest for 5 minutes before serving to allow juices to redistribute.
Expert Tips
Temperature Matters
Always use a meat thermometer to check doneness. Chicken breast can dry out quickly if overcooked. Pull at 160°F and let rest – it will reach 165°F during resting. Dark meat can go to 175°F for optimal texture.
Oil Your Grates
After cleaning your grill, oil the grates well using a paper towel dipped in oil held with tongs. This prevents sticking and creates beautiful grill marks. Do this just before adding the skewers.
Don't Rush Thawing
If you have time, overnight thawing in the fridge produces the best texture. The marinade continues working during the slow thaw, resulting in incredibly tender chicken. Plan ahead for special occasions.
Mix Up the Order
Vary your skewer patterns – some starting with chicken, others with vegetables. This ensures even cooking and prevents all the chicken pieces from being in the same heat zone on the grill.
Save Vegetable Scraps
Keep vegetable scraps from cutting in a freezer bag for stock. The pepper tops, zucchini ends, and onion peels make excellent vegetable broth. Zero waste cooking at its finest!
Double the Batch
Always make double what you think you'll need. These skewers are perfect for quick lunches (chop off the cold chicken and veggies for salads) or impromptu entertaining.
Variations to Try
Spicy Mediterranean
Add 1 teaspoon of red pepper flakes and ½ teaspoon of smoked paprika to the marinade. Include cherry tomatoes and use chicken thighs instead of breast for a more robust flavor that pairs beautifully with the heat.
Asian-Inspired
Replace oregano with 2 tablespoons of fresh ginger, use rice vinegar instead of lemon juice, and add 2 tablespoons of soy sauce. Include mushrooms and snow peas, and finish with a sesame oil drizzle after grilling.
Herb Garden
Use whatever fresh herbs you have growing: rosemary, thyme, parsley, and chives all work beautifully. Double the fresh herbs and skip the dried ones. Add lemon zest for extra brightness.
Moroccan Spice
Add 1 teaspoon each of cumin, coriander, and cinnamon to the marinade. Include sweet potato cubes (parboiled first) and dried apricots between the meat and vegetables for a sweet-savory combination.
Lemon-Garlic Supreme
Double the lemon juice and add the zest of 2 lemons. Increase garlic to 8 cloves and add 2 tablespoons of capers to the marinade. This variation is particularly good with fish skewers too.
Summer Peach
During peach season, add peach wedges between the vegetables. The fruit caramelizes beautifully on the grill and provides a sweet contrast to the savory chicken. Add a pinch of cayenne for heat.
Storage Tips
Freezer Storage
Properly wrapped skewers maintain optimal quality for 3 months in a standard freezer, 6 months in a deep freezer. Always label with the date and contents. Remove as much air as possible from storage bags to prevent freezer burn.
Pro tip: Store skewers flat for the first 24 hours, then you can stack them to save space.
Refrigerator Thawing
Thawed skewers can be kept in the refrigerator for up to 2 days before cooking. If you thaw more than you need, you can safely refreeze them within 24 hours, though there may be slight quality loss.
Never thaw at room temperature – this creates a breeding ground for bacteria.
Meal Prep Containers
For individual servings, freeze skewers in meal prep containers with compartments. This makes it easy to grab exactly what you need. Add a small container of extra marinade or sauce for serving.
Glass containers work well but leave 1 inch of space for expansion during freezing.
Cooked Leftovers
Cooked skewers can be refrigerated for up to 4 days. Remove ingredients from skewers for easier storage. The chicken makes excellent additions to salads, wraps, or grain bowls.
Reheat gently in the microwave with a damp paper towel, or enjoy cold – the flavors actually develop further overnight!
Frequently Asked Questions
Yes, but with caveats. Soak wooden skewers for at least 30 minutes before assembling, then wrap the exposed ends in foil before freezing to prevent splintering. Metal skewers are more practical for freezing as they conduct heat better during cooking and are reusable. If using wooden skewers, consider buying high-quality bamboo ones that are less likely to split.
The key is minimal marination time for vegetables and proper cutting technique. Don't marinate vegetables for more than 30 minutes before assembling. Cut zucchini slightly thicker (½ inch) than other vegetables. Also, ensure your grill is hot enough – medium-high heat sears the outside quickly, preventing moisture loss. Finally, don't overcrowd the skewers; space allows steam to escape.
I don't recommend cooking from frozen as the outside will burn before the inside cooks through. However, if you're in a pinch, you can bake them from frozen at 375°F for 25-30 minutes, turning once. They won't have the same char as grilled, but they'll be safe and tasty. For best results, always thaw at least partially before grilling.
Remove ingredients from skewers and reheat in a skillet over medium heat with a splash of water or chicken broth. Cover for 3-4 minutes until heated through. This method prevents drying better than microwaving. Alternatively, chop cold leftovers for salads – they're delicious at room temperature. If microwaving, use 50% power with a damp paper towel covering.
Absolutely! Preheat oven to 425°F. Line a baking sheet with foil and place a rack on top. Arrange thawed skewers on the rack and bake for 15-20 minutes, turning once halfway through. For extra char, broil for the last 2-3 minutes. The rack allows air circulation, preventing soggy bottoms. You won't get the same smoky flavor as grilling, but they're still delicious.
The marinade can be made up to 5 days ahead and stored in an airtight container in the refrigerator. If you've used it for raw chicken, never reuse it as a sauce unless you boil it for at least 3 minutes to kill any bacteria. For extra flavor, reserve some marinade before adding chicken to use as a basting sauce during grilling.
Freezer Friendly Chicken and Veggie Skewers for Easy Grilling
Ingredients
Instructions
- Make marinade: Whisk olive oil, lemon juice, garlic, oregano, basil, salt, and pepper until emulsified.
- Marinate chicken: Add chicken cubes to marinade, coat well, cover and refrigerate 30 minutes.
- Prep vegetables: Cut vegetables as directed, toss with 2 tablespoons of marinade.
- Assemble: Thread chicken and vegetables onto skewers in alternating pattern.
- Flash freeze: Place skewers on parchment-lined baking sheet, freeze 2-3 hours until solid.
- Package: Wrap individually in plastic wrap, store in labeled freezer bags up to 3 months.
- Thaw: Thaw in cold water 20-30 minutes or overnight in refrigerator.
- Grill: Grill over medium-high heat 12-15 minutes, turning every 3-4 minutes until chicken reaches 165°F.
Recipe Notes
For best results, don't skip the flash freezing step - it prevents skewers from sticking together. Always thaw completely before grilling for even cooking. These skewers work great baked at 425°F for 15-20 minutes if weather doesn't permit grilling.