Tender, smoky pork ribs baked to perfection with a bold, aromatic dry rub that will make your kitchen smell like a summer barbecue.
There’s something magical about the first bite of a perfectly cooked rib— the crackle of caramelized sugar, the smoky whisper of spices, and the tender meat that practically falls off the bone. I still remember the first time I tried my uncle’s backyard ribs; the aroma drifted through the neighborhood, drawing curious neighbors to our porch and turning a simple family dinner into a celebration. That memory sparked a lifelong fascination with the art of dry rubs, where a handful of pantry staples can transform a humble cut of pork into a masterpiece.
Ribs have deep roots in American barbecue culture, especially in the Southern states where low‑and‑slow cooking is a ritual. Traditionally, ribs are smoked over wood for hours, but not everyone has access to a smoker. This oven‑baked version captures that smoky essence using a meticulously balanced dry rub and a finishing glaze, delivering the same depth of flavor without the need for expensive equipment.
In this guide, you’ll learn how to create a dry rub that layers sweet, spicy, and earthy notes, how to properly prep the ribs for maximum tenderness, and how to finish them with a glossy BBQ sauce that adds just the right amount of tang. By the end, you’ll have a reliable, repeatable method that works year‑round, rain or shine.
So roll up your sleeves, preheat that oven, and let’s embark on a flavor adventure that will make every dinner feel like a backyard celebration.
🌟 Why This Recipe Will Capture Your Heart
Whether you’re a seasoned grill master or a kitchen novice, this oven‑baked rib recipe offers unbeatable flavor, simplicity, and a touch of culinary drama that will impress any guest.
- ✨ Effortless Smoke‑Free Barbecue: The dry rub’s blend of smoked paprika, cumin, and a hint of brown sugar recreates that classic smoker aroma without the need for a backyard pit.
- ✨ Perfectly Tender Meat: A low, slow bake at 275°F (135°C) breaks down collagen, ensuring each bite is juicy and fall‑off‑the‑bone tender.
- ✨ Versatile Flavor Profile: The rub can be tweaked with extra heat or sweetness, making it adaptable to any palate or occasion.
- ✨ Minimal Cleanup: One sheet pan, one foil wrap, and a quick wipe of the oven—no messy grills or charcoal residue.
- ✨ Budget‑Friendly Ingredients: All components are pantry staples; you won’t need exotic spices or pricey sauces.
- ✨ Crowd‑Pleaser Every Time: The glossy, caramelized finish looks as impressive as it tastes, guaranteeing compliments from family and friends.
🥗 Ingredients
📝 Complete Ingredient List
For the Dry Rub:
For the Ribs:
For the Glaze (optional but recommended):
🔍 Focus on Key Ingredients
Brown Sugar
Brown sugar adds a deep caramel note that balances the heat from the chili powder and the earthiness of cumin. Choose a dark variety for richer flavor, and make sure it’s loosely packed when measuring to avoid over‑sweetening.
Smoked Paprika
Smoked paprika is the secret behind the “smoked” aroma without a smoker. Its subtle wood‑smoke flavor penetrates the meat during the low‑and‑slow bake, creating that classic BBQ scent. If you can’t find smoked paprika, a pinch of liquid smoke can be used, but be careful—it’s potent.
Pork Spare Ribs
Spare ribs have a higher fat content than back ribs, which makes them forgiving and juicy. Look for ribs that have a thin, white membrane on the bone side; removing it before cooking improves flavor absorption and texture.
🔄 Quick Substitutions
| If you don’t have… | Use instead… |
|---|---|
| Brown sugar | Maple sugar or dark muscovado |
| Smoked paprika | Regular paprika + a drop of liquid smoke |
| Pork spare ribs | Pork back ribs (adjust cooking time slightly) |
👨🍳 Step‑by‑Step Instructions
Follow these detailed steps to achieve ribs that are both tender and packed with flavor. Each phase is designed to build layers of taste while keeping the process approachable.
📋 Phase 1: Preparation & Mise en Place
Begin by gathering tools and preparing the ribs for seasoning.
Trim and Remove the Membrane
Place each rack bone‑side up on a cutting board. Slide a butter knife under the thin, translucent membrane that covers the bone surface. Grasp the edge with a paper towel and gently pull it off in one piece. Removing this layer allows the dry rub to penetrate directly into the meat, resulting in a deeper flavor profile.
Pat Dry and Lightly Oil
Using paper towels, pat the ribs completely dry. Drizzle the olive oil over the meat and rub it in with your hands, ensuring an even coating. The oil helps the dry rub adhere and promotes a glossy finish during the final glaze.
Mix the Dry Rub
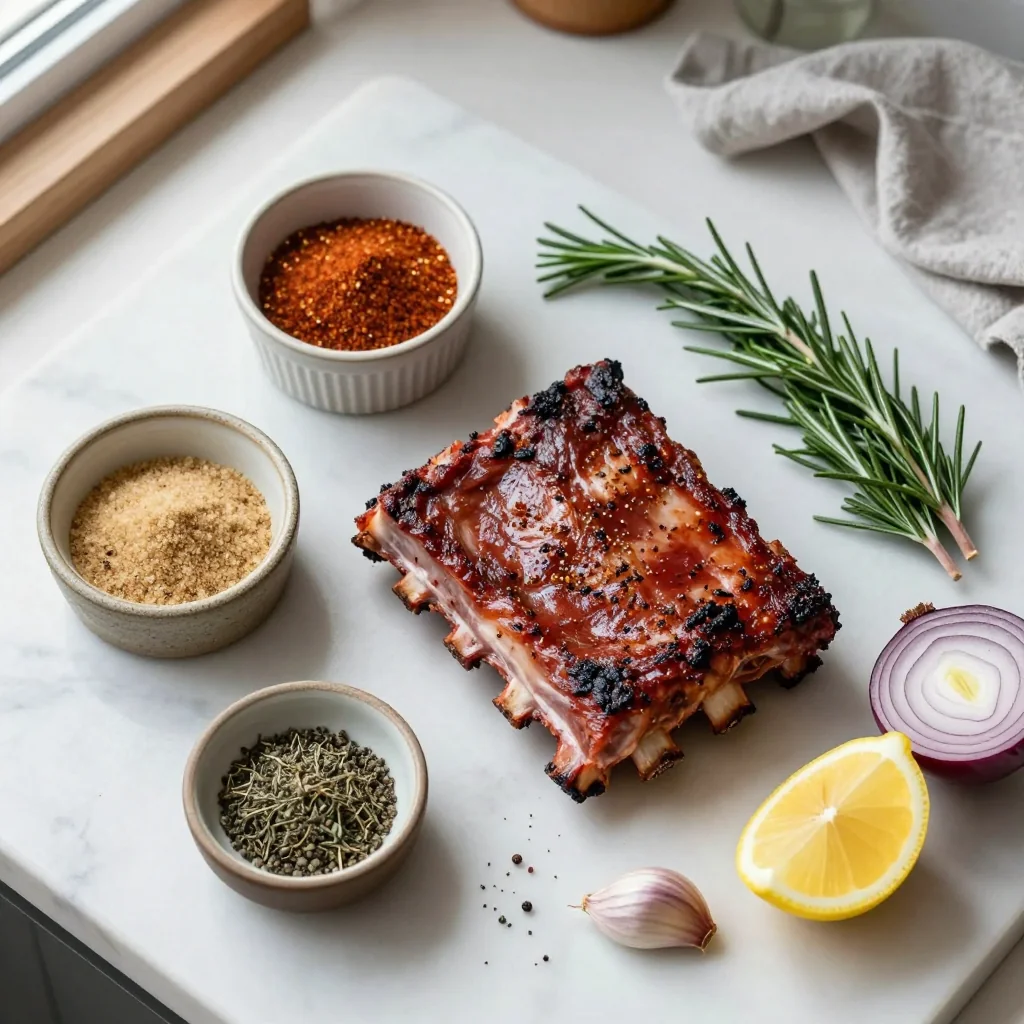
In a medium bowl, combine brown sugar, paprika, garlic powder, onion powder, black pepper, sea salt, chili powder, cumin, and smoked paprika. Stir until the mixture is uniform and slightly crumbly. This blend balances sweet, savory, and smoky notes.
🔥 Phase 2: Baking & Caramelization
Low‑and‑slow baking creates tenderness; the final glaze adds caramelized depth.
Season the Ribs
Generously sprinkle the dry rub over both sides of the ribs, pressing it into the meat with your hands. Ensure an even coating; the rub should cling without clumping.
Wrap and Bake
Lay the seasoned ribs on a large sheet of heavy‑duty aluminum foil, meat side up. Fold the foil tightly to create a sealed packet, preventing moisture loss. Place the packet on a rimmed baking sheet and bake in a preheated oven at 275°F (135°C) for 2 hours. The low temperature breaks down collagen, rendering the meat juicy.
Prepare the Glaze (Optional)
While the ribs bake, whisk together BBQ sauce, honey, and apple cider vinegar in a small saucepan. Simmer over low heat for 5 minutes, allowing the flavors to meld and the sauce to thicken slightly.
✨ Phase 3: Finishing & Plating
The final stage brings color, texture, and the perfect serving presentation.
Unwrap and Glaze
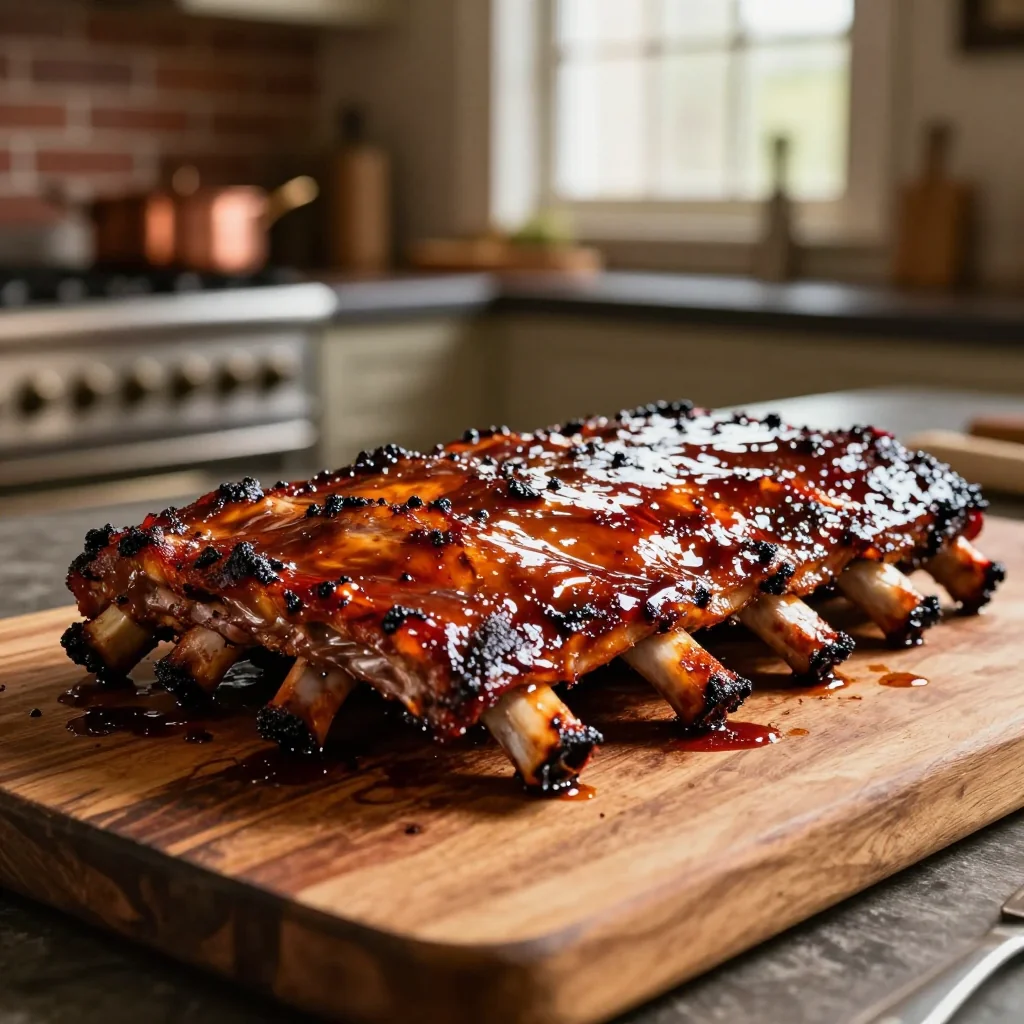
After 2 hours, carefully remove the foil (watch for hot steam). Brush the glaze liberally over the ribs, ensuring every surface is coated. Return the ribs to the oven, uncovered, and increase the temperature to 425°F (220°C). Bake for an additional 15‑20 minutes, or until the glaze caramelizes and forms a sticky, glossy crust.
Rest the Ribs
Remove the ribs from the oven and let them rest for 10 minutes on a cutting board. Resting allows the juices to redistribute, preventing them from spilling out when you cut the meat.
Slice and Serve
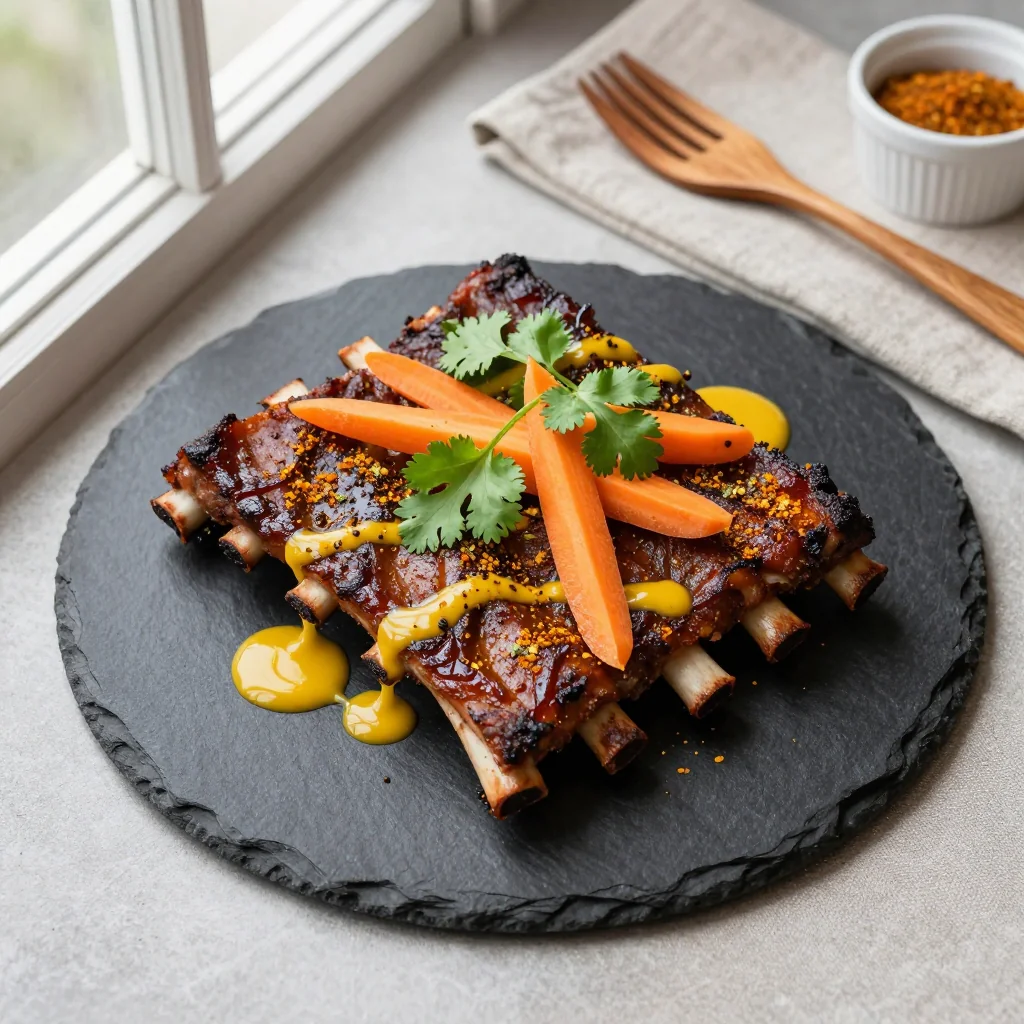
Using a sharp knife, cut between the bones to separate individual ribs. Arrange them on a serving platter, garnish with freshly chopped parsley or cilantro for a pop of color, and serve alongside your favorite sides.
💡 Expert Tips & Tricks
🛒 Choosing the Right Ingredients
Select pork spare ribs with a uniform thickness; this ensures even cooking. Look for a pinkish‑red color and a slight marbling of fat—these are signs of freshness. If possible, ask your butcher to remove the thin membrane for you; it saves time and guarantees better flavor penetration.
🔪 Preparation Techniques
After trimming the membrane, lightly score the meat surface in a crosshatch pattern. This not only helps the rub soak in but also creates a pleasing texture when the glaze caramelizes. Keep a bowl of water nearby to dampen your hands—this prevents the rub from sticking to your skin.
🌡️ Mastering the Cooking Process
Maintain a consistent oven temperature; fluctuations can cause the meat to dry out. Use an oven thermometer to verify the set temperature. For an extra smoky hint, place a small pan of wood chips (soaked in water) on the lower rack; the gentle smoke will infuse the ribs without overwhelming the flavor.
🍽️ Presentation & Service
Serve the ribs on a rustic wooden board to highlight the caramelized glaze. Add a side of coleslaw, corn on the cob, or baked beans for a classic barbecue feel. A drizzle of extra glaze in a small bowl allows guests to add more sweetness if desired.
🏆 Pro Secrets
Elevate your rib game from home‑cooked good to restaurant‑level spectacular with these professional insights.
- 🎯 Brining Before Rub: Submerge the ribs in a simple brine (1 cup salt, 1 cup sugar, 4 cups water) for 4‑6 hours. The brine increases moisture retention, resulting in juicier ribs even after long cooking.
- 🎯 Layered Sugar Caramelization: Sprinkle a thin layer of additional brown sugar on the ribs just before the final high‑heat blast. The sugar melts and forms a crisp, caramelized crust that adds texture.
- 🎯 Resting on a Wire Rack: After the low‑and‑slow bake, place the ribs on a wire rack for 5 minutes before glazing. This allows excess steam to escape, preventing soggy surfaces.
- 🎯 Dual‑Temperature Cooking: Start at 250°F (121°C) for the first hour to melt connective tissue, then increase to 350°F (177°C) for the final hour to develop a deeper crust.
- 🎯 Smoke Infusion via Liquid Smoke: If you crave an authentic smoked flavor without a smoker, add ½ tsp of high‑quality liquid smoke to the dry rub. Use sparingly; its potency can dominate other flavors.
- 🎯 Finish with Butter Baste: In the last 5 minutes, melt a tablespoon of butter mixed with a dash of hot sauce and brush over the ribs. This adds richness and a subtle heat that balances the sweet glaze.
"The secret to unforgettable ribs is patience and balance—let the meat breathe, season boldly, and finish with a touch of sweetness." — Chef Thomas Keller
🔄 Variations & Adaptations
The core technique is flexible; feel free to tailor the flavor profile to suit dietary needs, cultural influences, or personal preferences.
🥬 Vegetarian / Vegan Version
Replace pork ribs with thick-cut cauliflower steaks or king oyster mushroom “ribs.” Use the same dry rub and glaze, but increase baking time to 45 minutes at 350°F (177°C) to achieve a tender, caramelized exterior.
- Substitution 1: 2 large cauliflower heads, cut into 1‑inch thick “steaks.”
- Substitution 2: 4 king oyster mushroom “ribs,” sliced lengthwise.
🌶️ Flavor Variations
Play with global spice blends to create new taste experiences while keeping the cooking method intact.
Spicy Heatwave
Add 1 tsp of cayenne pepper and a drizzle of sriracha to the glaze. Serve with pickled jalapeños for an extra kick.
Mediterranean Twist
Swap cumin for dried oregano, add 1 tsp of sumac to the rub, and finish with a squeeze of lemon juice right before serving.
Asian Fusion
Replace paprika with Chinese five‑spice powder, incorporate 1 tbsp of hoisin sauce into the glaze, and garnish with toasted sesame seeds and sliced scallions.
⚠️ Dietary Adaptations
Gluten‑Free
All ingredients are naturally gluten‑free; just verify that your BBQ sauce contains no hidden wheat.
Lactose‑Free
No dairy is used in this recipe, making it suitable for lactose‑intolerant diners.
Low‑Calorie
Reduce the brown sugar to 1 tbsp, use a sugar‑free BBQ sauce, and trim excess fat from the ribs before cooking. This can lower the calorie count by roughly 150 kcal per serving.
👶 Family / Kid‑Friendly Version
Kids often prefer milder flavors. Omit the chili powder and reduce the black pepper to a pinch. Serve with a side of apple sauce or a mild coleslaw to balance the savory notes.
📦 Storage & Reheating
🧊 Conservation
Refrigerator
- Duration: 3–4 days
- Recommended container: Airtight glass or BPA‑free plastic container
- Tip: Place a paper towel on top to absorb excess moisture and keep the glaze from getting soggy.
Freezer
- Duration: Up to 3 months
- Method: Wrap each rack tightly in freezer‑grade foil, then place in a zip‑top bag.
- Defrosting: Transfer to the refrigerator overnight; reheat using the oven method below.
💡 For best texture, reheat ribs in the oven rather than the microwave to preserve the caramelized crust.
♨️ Reheating
🔥 Oven (Recommended)
- Preheat to 300°F (150°C).
- Cover ribs loosely with aluminum foil to prevent drying.
- Heat for 15‑20 minutes, then uncover and bake an additional 5 minutes to re‑crisp the glaze.
⚡ Microwave (Quick)
- Place a slice on a microwave‑safe plate, cover with a microwave‑safe lid.
- Heat on medium power for 1‑2 minutes, checking halfway.
- If needed, finish under a broiler for 2‑3 minutes to restore crispness.
🍳 Stovetop
Heat a skillet over medium‑low, add a splash of water or broth, and cover. Warm for 5‑7 minutes, then uncover and brush with extra glaze to finish.
🍷 Perfect Pairings
🥗 Side Dishes
- Classic Coleslaw: The creamy, tangy crunch balances the sweet‑spicy ribs.
- Grilled Corn on the Cob: Charred kernels echo the smoky notes and add a buttery sweetness.
- Sweet Potato Fries: Their natural sweetness mirrors the caramelized glaze while providing a satisfying crunch.
🍷 Wine & Beverage Pairings
- Zinfandel: Its bold fruit character and subtle spice complement the rib’s smoky profile.
- American Amber Ale: The malt sweetness and gentle hop bitterness enhance the caramel notes.
- Non‑Alcoholic: Sparkling apple cider with a splash of ginger offers a refreshing, slightly spicy contrast.
🍰 To Complete the Meal
Start with a light mixed greens salad dressed with citrus vinaigrette, follow with the ribs and sides, and finish with a warm peach cobbler or a scoop of vanilla bean ice cream. The dessert’s fruitiness ties the whole experience together.
❓ Frequently Asked Questions
Q: Can I use a different cut of pork, like baby back ribs?
A: Absolutely! Baby back ribs are leaner and cook slightly faster. Reduce the low‑and‑slow baking time to about 1 hour 45 minutes, and keep an eye on the glaze to avoid burning.
Q: How do I know when the ribs are done?
A: The meat should be tender enough that a fork slides in with little resistance, and the internal temperature should reach at least 190°F (88°C) for optimal collagen breakdown. The glaze should be glossy and slightly caramelized.
Q: My ribs turned out dry—what went wrong?
A: Dry ribs are often caused by over‑cooking or insufficient moisture. Ensure you wrap the ribs tightly in foil for the low‑and‑slow phase, and keep the oven temperature low. A brine step (see Pro Tips) also helps retain moisture.
Q: Can I add wood smoke flavor without a smoker?
A: Yes! Place a small pan of soaked wood chips on the lower oven rack while the ribs bake. The gentle smoke will infuse the meat without overwhelming the dry rub.
Q: Is it okay to skip the glaze?
A: You can, but the glaze adds a glossy, caramelized finish that enhances both flavor and visual appeal. If you skip it, consider brushing the ribs with a thin layer of olive oil and extra dry rub before the final high‑heat blast.
Q: How far in advance can I prepare the dry rub?
A: The dry rub can be mixed up to a week ahead and stored in an airtight container. Its flavors actually meld and become more harmonious over time.
🎉 Let’s Get Cooking!
These oven‑baked BBQ ribs prove that you don’t need a smoker to achieve that coveted smoky, caramelized crust. By mastering the balance of sweet, savory, and smoky spices, you’ll create a dish that’s both comforting and impressive—perfect for weekend gatherings, holiday feasts, or a simple family dinner. Remember, the key lies in low‑and‑slow baking, a well‑balanced dry rub, and a finishing glaze that adds that irresistible shine.
If you follow each step, adjust the portions with the handy slider, and experiment with the suggested variations, you’ll discover a new favorite that will quickly become a staple in your culinary repertoire. Don’t be shy—make it your own, share it with loved ones, and enjoy the smiles that follow each bite.
Have you tried this recipe?
Leave a comment and rating below! Share your photos on Instagram with #BBQRibsOven for a chance to be featured on our site.
BBQ Ribs in Oven with Dry Rub Seasoning
Tender ribs baked low and slow, finished with a sweet‑smoky glaze that dazzles the palate.
📝 Ingredients
Dry Rub
Ribs
Glaze (optional)
👨🍳 Instructions
- 1
Trim the membrane from the back of each rib rack and pat the meat dry.
- 2
Rub olive oil over the ribs, then coat evenly with the prepared dry rub.
- 3
Wrap the seasoned ribs tightly in heavy‑duty foil and place on a baking sheet.
- 4
Bake at 275°F (135°C) for 2 hours, allowing the meat to become tender.
- 5
While the ribs bake, combine BBQ sauce, honey, and apple cider vinegar; simmer 5 minutes.
- 6
Remove the foil, brush the glaze over the ribs, and increase oven temperature to 425°F (220°C). Bake 15‑20 minutes until caramelized.
- 7
Rest the ribs for 10 minutes before slicing.
- 8
Slice between the bones, garnish with fresh herbs, and serve.
- 9
Enjoy with your favorite sides and a glass of Zinfandel.
- 10
Store leftovers according to the storage guidelines.
🥗 Nutritional Information (per serving)
*Nutritional values are estimates based on standard ingredient data.
📚 You Might Also Like
Smoked Brisket with Coffee Rub
Honey Garlic Glazed Chicken Wings
Maple‑Bourbon Pulled Pork


💬 Comments & Reviews
Leave a Comment
No comments yet. Be the first to share your thoughts!