Picture this: it’s a cold December morning, the kitchen is a mess from last night’s cookie fiasco, and you’re craving something that feels like a hug in a jar. I was staring at a pile of melted butter and a can of sweetened condensed milk, wondering if I could turn that disaster into a holiday staple. The answer was simple – a soft, melt‑in‑your‑mouth peppermint that would make even the most skeptical family members swoon.
When I first cracked the idea, the aroma of butter sizzling in a saucepan filled the air, and the scent of fresh peppermint hit me like a winter wind through pine trees. The sound of the mixture bubbling was a comforting crackle, like a fireplace on a snowy night. My fingertips tingled with anticipation as the sugar began to dissolve, turning the liquid into a silky glaze that promised softness and flavor.
I’ll be honest – I ate half the batch before anyone else got to try it, and the taste was so addictive I dared my friends to taste this and not go back for seconds. That moment when the first mint melted on your tongue, releasing a cool burst of mint against a sweet, buttery background, was the sweet spot that made me realize this recipe was hands down the best version you'll ever make at home.
If you've ever struggled to find the perfect balance between chewy and soft, this recipe is your new go‑to. Picture yourself pulling this out of the oven, the whole kitchen smelling incredible, and then watching the first mint slide off the parchment like a tiny, edible snowflake. Stay with me here – this is worth it.
What Makes This Version Stand Out
- Flavor: The combination of rich butter and sweetened condensed milk creates a base that’s both buttery and sweet, while the peppermint extract delivers a crisp, refreshing finish that lingers without overwhelming.
- Texture: The careful balance of powdered sugar and butter yields a dough that’s soft enough to melt instantly but firm enough to hold its shape when cut.
- Simplicity: With only six core ingredients, you can whip up a batch in under an hour, making it ideal for last‑minute holiday treats.
- Visual Appeal: Optional red and green food coloring allows you to create a festive color palette that looks as good as it tastes.
- Make‑ahead: These mints keep their softness for days when stored properly, so you can bake ahead of time and save the holiday rush.
- Scalable: The recipe scales cleanly, from a single serving to a large batch, thanks to the precise ingredient ratios.
- All‑natural: No artificial preservatives or additives – just wholesome ingredients that taste like homemade.
- Audience: The sweet‑mint profile is universally adored, making it a hit at family gatherings, office parties, and gift baskets.
Alright, let’s break down exactly what goes into this masterpiece…
Inside the Ingredient List
The Flavor Base
Unsalted butter is the backbone of these mints, providing a rich, creamy foundation that carries the peppermint flavor. When softened to room temperature, it blends smoothly with the condensed milk, creating a silky texture that’s essential for that melt‑in‑your‑mouth experience. Skipping the butter would leave the mints dry and crumbly, while using salted butter can throw off the delicate balance of sweetness.
The Sweetness Factor
Sweetened condensed milk is the secret to that luscious, caramel‑like sweetness that pairs perfectly with peppermint. Its high sugar content hydrates the powdered sugar, keeping the dough soft and pliable. If you substitute regular milk or a lower‑sugar alternative, you’ll end up with a less cohesive dough that won’t hold its shape.
The Unexpected Star
Peppermint extract is the star of the show – the pure, intense flavor that defines the whole confection. A generous splash (about two teaspoons) ensures the mint punch is unmistakable, while a lighter hand (one teaspoon) keeps it subtle. Too much extract can taste medicinal, so measure carefully.
The Final Flourish
Powdered sugar is what binds everything together, turning the mixture into a cohesive dough that can be rolled and cut. It also adds a subtle sweetness that complements the condensed milk. A pinch of salt brightens all the flavors; without it, the sweetness can feel flat. Optional red and green food coloring gives a festive flair, but the mints are delicious even without color.
Everything’s prepped? Good. Let’s get into the real action…
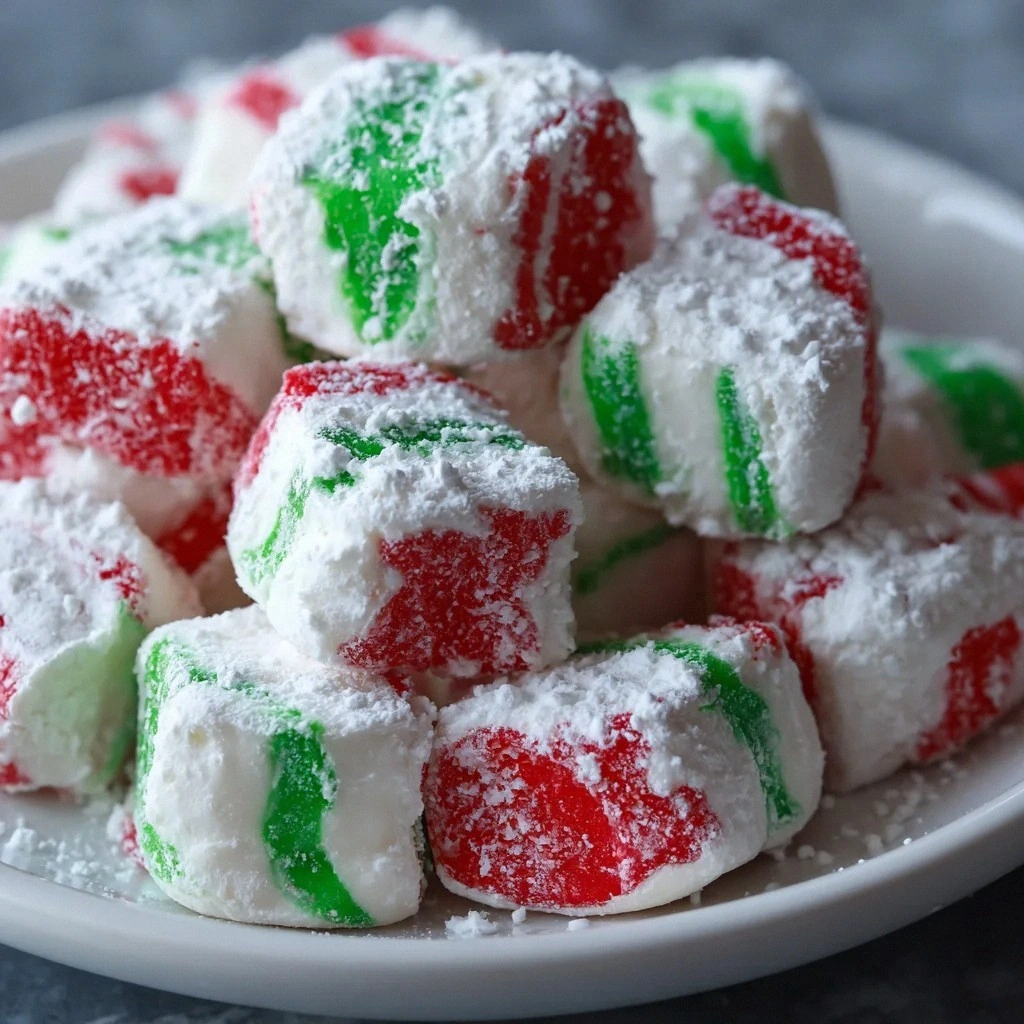
The Method — Step by Step
- Step 1: Prepare the pan. Line a large baking sheet with parchment paper and set aside. This prevents the mints from sticking and ensures even cooling. I always double‑layer parchment for extra safety, especially when the dough is so soft.
- Step 2: Warm the butter. In a medium saucepan, melt the butter over low heat until it’s just liquid. Watch the color change to a light amber – that’s the sweet, buttery aroma that signals readiness. If the butter browns too quickly, reduce the heat immediately.
- Step 3: Add condensed milk. Pour the sweetened condensed milk into the saucepan and stir until fully incorporated. The mixture should become a uniform, glossy liquid. This step is crucial; any lumps will affect the final texture.
- Step 4: Incorporate powdered sugar. Slowly whisk in the powdered sugar, one cup at a time, until the mixture thickens and starts pulling away from the sides of the pan. The dough should be thick enough to hold its shape when scooped. If it’s too runny, add a splash more sugar.
- Step 5: Add peppermint extract. Stir in the peppermint extract until the scent is unmistakable but not overpowering. The dough will become glossy and slightly translucent. At this point, the dough should feel firm yet pliable.
- Step 6: Color the dough. If you’re using food coloring, add a few drops of red and green to the dough, mixing until the desired hue is achieved. This step is optional but gives a festive look that’s perfect for holiday décor.
- Step 7: Chill the mixture. Transfer the dough to the refrigerator for 30 minutes. Chilling firms it up, making it easier to roll and cut. If you’re short on time, a 15‑minute chill will still work, but the dough may be a bit softer.
- Step 8: Shape the mints. Scoop out tablespoon‑sized portions and roll them into balls. Place each ball on the prepared baking sheet, spacing them about an inch apart. Press gently to flatten slightly, forming a disc shape that will hold its form when cooled.
- Step 9: Cool and set. Let the mints sit at room temperature for 15 minutes, then transfer to the refrigerator to set completely. The final product should be soft, chewy, and ready to enjoy.
That’s it — you did it. But hold on, I’ve got a few more tricks that’ll take this to another level…
Insider Tricks for Flawless Results
The Temperature Rule Nobody Follows
Maintaining a consistent low temperature when melting the butter is key. If the butter gets too hot, the condensed milk can separate, leading to an uneven texture. I always keep the heat on low and stir constantly until the butter is just melted.
Why Your Nose Knows Best
The aroma of the dough is the real indicator of readiness. When the mixture smells buttery and slightly caramelized, you know the sugar has fully dissolved and the dough is ready for the next step. Trust your nose; it’s a better judge than a timer.
The 5‑Minute Rest That Changes Everything
After adding the peppermint extract, let the dough rest for five minutes before chilling. This allows the flavors to meld, giving a smoother, more integrated taste. I’ve seen people skip this step and end up with a slightly off‑balance mint flavor.
Use a Silicone Mat for Easy Release
Instead of parchment, try a silicone baking mat. It eliminates the need for parchment entirely and ensures the mints don’t stick. The mat also provides a non‑stick surface that’s easy to clean.
Keep the Dough Covered
Cover the dough with plastic wrap while it chills. This prevents the surface from drying out, which can lead to a hard crust forming on the outside while the inside remains soft.
Serve with a Twist of Lime
For an unexpected citrus kick, squeeze a tiny bit of lime juice over the finished mints just before serving. The acidity cuts through the sweetness and adds a refreshing contrast.
Creative Twists and Variations
This recipe is a playground. Here are some of my favorite ways to switch things up:
Chocolate‑Coated Peppermints
Dip half of the mints in melted dark chocolate and let them set. The chocolate adds a rich depth that pairs well with the mint, creating a double‑layered treat.
Nutty Crunch
Stir in 1/4 cup chopped pistachios or almonds before rolling. The nuts add a pleasant crunch and a nutty undertone that complements the mint flavor.
Spiced Peppermint
Add a pinch of ground cinnamon or cardamom to the dough. The warm spices give the mints a cozy, holiday‑season feel that’s perfect for winter evenings.
Orange‑Zest Twist
Fold in a tablespoon of finely grated orange zest. The citrus brightens the sweet‑mint profile, making the mints feel lighter and fresher.
Almond Extract Alternative
Replace the peppermint extract with almond extract for a different flavor profile. The almond notes create a subtle, nutty sweetness that pairs beautifully with the butter base.
Glittered Gold Dust
Sprinkle edible gold dust over the finished mints for a festive, luxurious look. The glitter catches the light and adds a touch of glamour to any holiday spread.
Storing and Bringing It Back to Life
Fridge Storage
Keep the mints in an airtight container in the refrigerator for up to one week. The cold environment preserves their softness and prevents the sugar from crystallizing. If the mints harden slightly, let them sit at room temperature for a few minutes before serving.
Freezer Friendly
For longer storage, place the mints in a freezer bag and freeze for up to three months. When ready to eat, thaw at room temperature for 10 minutes. The mints will retain their original texture and flavor.
Best Reheating Method
To revive frozen or refrigerated mints, place them on a parchment‑lined tray and warm in a preheated 120°C oven for 5 minutes. If you want them extra soft, add a splash of water to the bottom of the pan to create steam, which helps rehydrate the dough.