Picture this: you’re halfway through a marathon of late‑night cravings, the fridge is a barren wasteland, and you’re staring at a handful of pantry staples that look more like a science experiment than a dessert. You reach for the almond flour, protein powder, and that jar of maple syrup you keep forgetting to buy, and suddenly a spark of genius lights up the kitchen. This is the moment when the ordinary turns extraordinary, and the humble ingredients whisper, “We’re about to create something unforgettable.”
I was on a mission to turn a classic chocolate treat into a guilt‑free, plant‑based version that didn’t sacrifice flavor. I tossed a pinch of salt into the almond flour, stirred in protein powder until the batter thickened like a silky mousse, and let the maple syrup drizzle in like liquid gold. The kitchen filled with a warm, buttery aroma that made my mouth water and my taste buds tingle with anticipation. I could already hear the crunch of chocolate chips as they melted into the base, promising a finish that’s both crunchy and velvety. The anticipation was palpable, and I knew I was about to discover a new favorite.
That night, the first bite was a revelation. The texture was airy yet dense, the sweetness balanced by a subtle nutty undertone, and the chocolate chips added a satisfying snap that lingered on the palate. It was the kind of moment that makes you wonder how you ever survived without it. I was so excited that I immediately grabbed a second cup, then a third, and before I knew it, the entire batch was gone in minutes. My friends were stunned when they tasted it—they had never imagined a dessert could feel so light yet so indulgent.
If you’re a fan of chocolate, you’re going to love this. If you’re watching your waistline, you’re going to love the low calorie count. If you’re craving something that feels like a treat but won’t leave you feeling guilty, you’re going to love this. I dare you to taste this and not go back for seconds. This is hands down the best version you’ll ever make at home, and I’m about to show you how to recreate it from scratch.
I’ve spent years tweaking recipes to find the perfect balance of flavor, texture, and nutrition. I’ve experimented with different flours, sweeteners, and binding agents until I found a combination that works like magic. The result is a dessert that’s as satisfying as it is healthy, and it’s so simple you’ll wonder why you didn’t try it sooner. The key to this recipe is the synergy between the almond flour, protein powder, and peanut butter, which together create a base that’s both firm and tender.
Now, let’s dive into the details. I’ll walk you through every single step, from prepping the ingredients to the final garnish. By the end, you’ll wonder how you ever made it any other way. Let’s get started.
What Makes This Version Stand Out
- Flavor: The combination of almond flour and protein powder creates a subtle nutty base that pairs perfectly with the sweet maple syrup. The chocolate chips melt into the batter, forming pockets of gooey chocolate that burst with every bite. This depth of flavor is achieved without any artificial additives.
- Texture: The batter’s consistency is airy yet firm, thanks to the protein powder’s binding properties. The result is a cake‑like center with a crisp, caramelized top that cracks when you bite into it. It’s the texture you’d expect from a bakery treat but with a healthier twist.
- Simplicity: With only eight ingredients, the recipe is a breeze to assemble. No need for a fancy mixer or a dozen measuring cups—just grab your pantry staples and you’re ready to go. This simplicity makes it a go‑to option for busy nights.
- Uniqueness: The use of protein powder not only boosts nutrition but also improves the structure of the batter, giving it a lightness that’s hard to replicate with traditional recipes. It’s a secret ingredient that elevates the entire dessert.
- Audience Appeal: Whether you’re vegan, gluten‑free, or just health‑conscious, this dessert satisfies cravings without compromising dietary restrictions. It’s a crowd‑pleaser for parties, potlucks, or a quiet night in.
- Make‑Ahead Potential: Once baked, the cups can be stored in an airtight container for up to a week, making them perfect for meal prep or for guests who want a quick dessert. The flavors only deepen over time.
Alright, let’s break down exactly what goes into this masterpiece…
Inside the Ingredient List
The Flavor Base
Almond flour is the backbone of this recipe, providing a mild, nutty flavor that complements the sweet maple syrup. It also adds healthy fats and protein, keeping the dessert satiating. If you can’t find almond flour, you can substitute with oat flour, but the texture will be slightly denser.
Maple syrup is the sweetener of choice, offering a natural sweetness with a hint of caramel. It also contributes to the moistness of the batter. If you prefer a different sweetener, consider agave nectar or a sugar‑free maple syrup alternative, but adjust the amount to taste.
The Texture Crew
Protein powder or coconut flour is the secret weapon that gives the batter its structure. Protein powder keeps the cups from collapsing, while coconut flour absorbs moisture, creating a light yet firm crumb. If you’re using coconut flour, start with a smaller amount and add more as needed to reach the right consistency.
Peanut butter or almond butter adds richness and a creamy texture that balances the dryness of the flour. It also introduces a subtle nutty undertone that enhances the overall flavor profile. For a dairy‑free option, choose a plant‑based butter that’s free from added sugars.
The Unexpected Star
Chocolate chips are the star of the show, providing that classic chocolatey crunch. The chips melt into the batter, forming pockets of molten chocolate that create a delightful contrast with the airy base. If you prefer dark chocolate, use dark chocolate chips for a more intense flavor.
Olive oil, in its small quantity, helps bind the ingredients together and adds a subtle fruity note. It also prevents the batter from sticking to the pan, ensuring a clean release. Extra virgin olive oil works best for flavor, but any neutral oil will do.
The Final Flourish
Vanilla extract ties all the flavors together, adding warmth and depth. A teaspoon is enough to lift the sweetness without overpowering the other ingredients. If you’re vegan, look for a plant‑based vanilla extract for the best results.
A pinch of salt is essential—it balances the sweetness and enhances the chocolate’s richness. Without it, the dessert would taste flat. If you’re on a low‑sodium diet, a small pinch will still do the trick.
Everything's prepped? Good. Let's get into the real action…
The Method — Step by Step
- Preheat your oven to 350°F (175°C) and line a silicone muffin pan with four paper liners. The silicone helps with even heat distribution and makes cleanup a breeze. If you don’t have a silicone pan, a regular baking tray works fine, but you’ll need to grease it lightly with oil.
- In a large mixing bowl, whisk together almond flour, protein powder, and a pinch of salt. This dry mixture is the foundation of the batter. Make sure to sift the flour if it’s not already finely ground to avoid lumps.
- In a separate bowl, blend maple syrup, olive oil, vanilla extract, and peanut butter until smooth. The mixture should be glossy and pourable, like a light batter. This step is crucial for achieving the right consistency; if it’s too thick, add a splash of almond milk.
- Pour the wet mixture into the dry ingredients and stir until just combined. Be careful not to overmix; the batter should be slightly lumpy. Overmixing can make the cups dense and heavy.
- Fold in the chocolate chips gently, ensuring they’re evenly distributed. The chips should be scattered throughout the batter, not clumped together. This step is where the magic happens, creating pockets of molten chocolate.
- Fill each paper liner about three-quarters full with the batter. The batter should sit slightly above the rim of the liners to allow for expansion. This ensures the cups rise evenly without spilling over.
- Bake for 18-22 minutes, or until the tops are lightly browned and a toothpick inserted in the center comes out clean. The scent of chocolate and maple syrup will fill your kitchen, making the anticipation almost unbearable. Keep a close eye on the final minutes; the cups can go from perfect to burnt in seconds.
- Remove from the oven and let the cups cool in the pan for 5 minutes before transferring them to a wire rack to cool completely. This resting period allows the structure to set, preventing the cups from becoming soggy. Once cooled, you can add a drizzle of melted dark chocolate or a dusting of powdered sugar if desired.
That's it — you did it. But hold on, I've got a few more tricks that'll take this to another level. Stay tuned for insider tips that will make these cups even more irresistible.
Insider Tricks for Flawless Results
The Temperature Rule Nobody Follows
Many people bake at a lower temperature to keep the cups from drying out, but that actually prolongs the baking time and can result in a gummy center. Stick to 350°F; the heat is just enough to set the structure while keeping the interior moist. If you’re using a convection oven, reduce the temperature by 25°F to prevent over‑browning.
Why Your Nose Knows Best
The aroma of chocolate and maple syrup is a powerful indicator of doneness. When the scent is strong but not overpowering, the cups are ready to come out of the oven. If you’re unsure, use the toothpick test, but trust your nose—it’s a reliable guide.
The 5-Minute Rest That Changes Everything
Letting the cups rest in the pan for a few minutes before moving them to a wire rack allows the structure to set, preventing them from collapsing. This short pause also lets the chocolate chips melt slightly, creating a gooey center that’s perfect for a bite. Skipping this step can leave the cups a little soggy.
The Secret to a Crunchy Edge
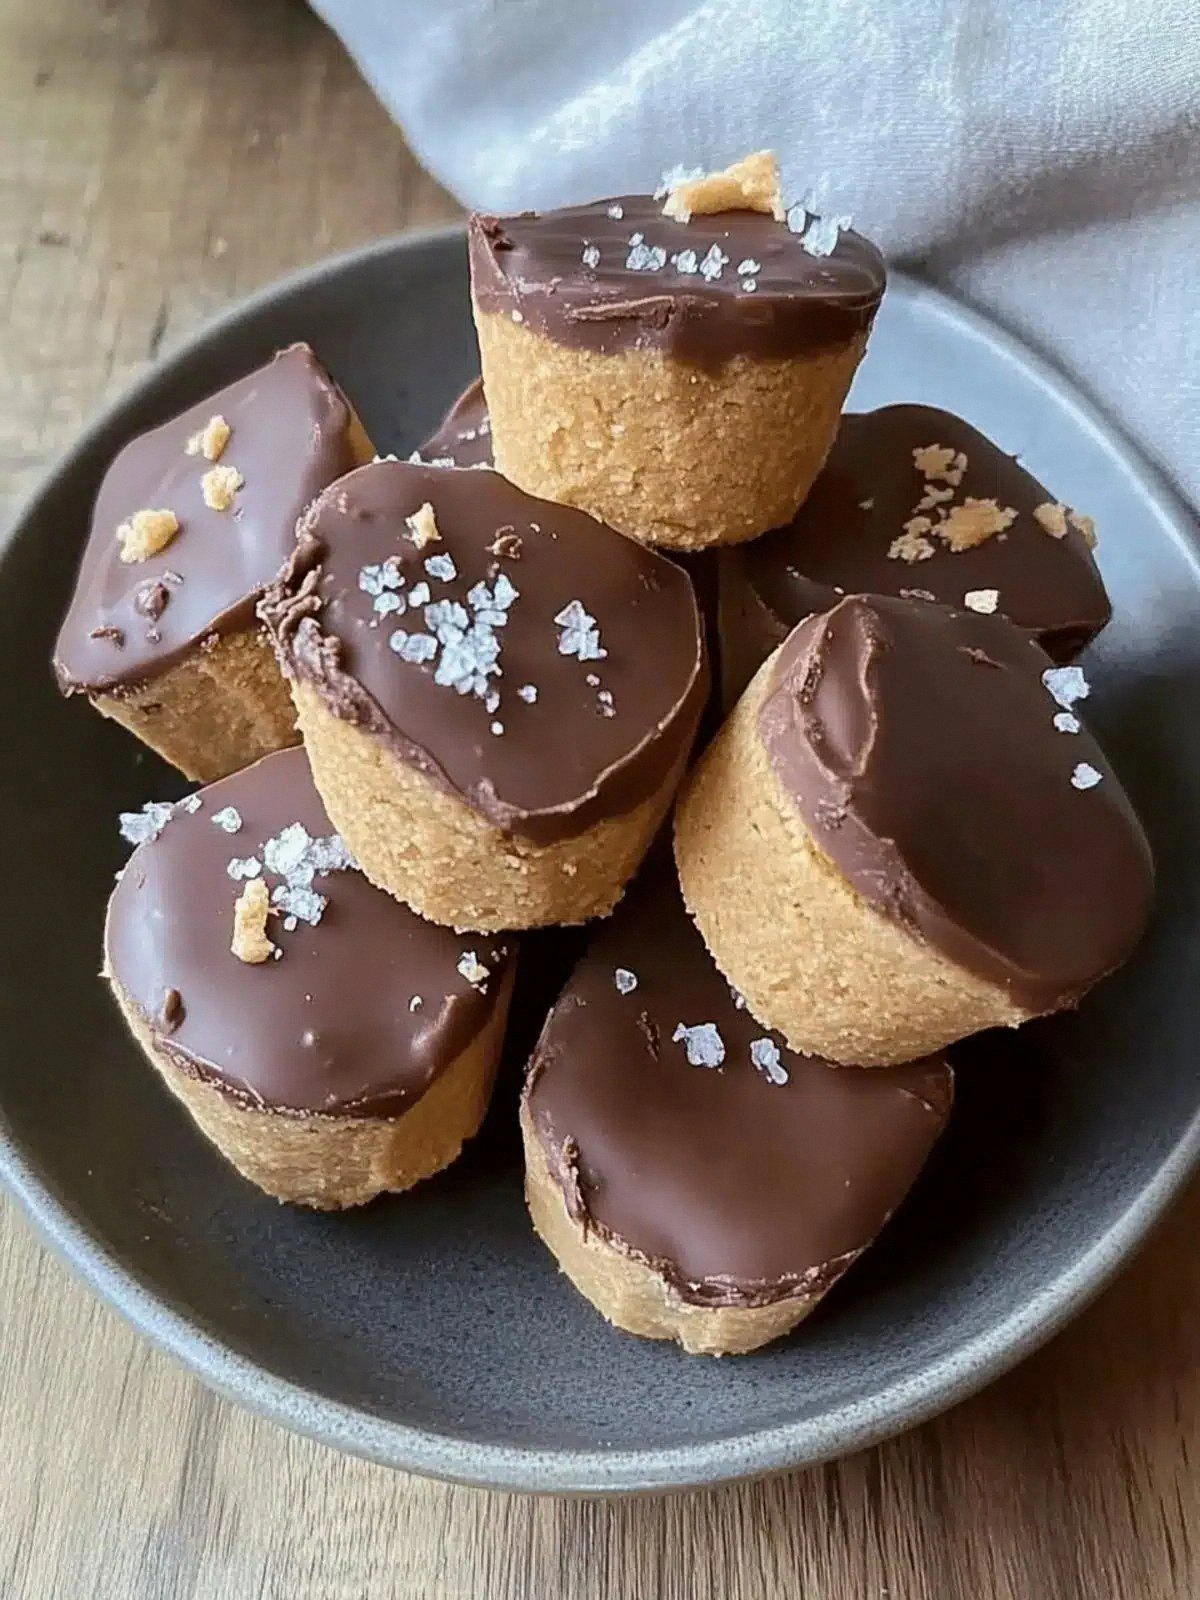
If you love a crispy edge, sprinkle a pinch of sea salt on top of the batter before baking. The salt will caramelize and create a delightful crunch that contrasts with the soft interior. This is a simple tweak that adds a gourmet touch.
The Quick Chill Trick
After cooling, place the cups in the refrigerator for 10 minutes to firm up the chocolate. This makes slicing easier and gives the cups a more professional appearance. Just remember to let them sit at room temperature for a few minutes before serving to restore their softness.
Creative Twists and Variations
This recipe is a playground. Here are some of my favorite ways to switch things up:
Coconut Crunch
Swap the almond flour for coconut flour and add shredded coconut to the batter. The coconut adds a tropical flavor and a pleasant chewiness. It’s perfect for a beach‑inspired dessert.
Berry Burst
Fold in a handful of dried cranberries or raisins before baking. The dried fruit adds a chewy texture and a burst of tartness that balances the sweetness. For a fresh twist, top the cooled cups with a spoonful of fresh berries.
Spiced Delight
Add a pinch of cinnamon or nutmeg to the dry mix for a warm, aromatic flavor profile. The spices complement the maple syrup and chocolate, creating a cozy dessert. This variation is especially comforting during the fall.
Nutty Swirl
Create a nutty swirl by mixing a tablespoon of almond butter into the batter and swirling it with a skewer before baking. The swirl adds visual appeal and a burst of nutty flavor in every bite. It’s a simple way to elevate the presentation.
Chocolate Ganache Finish
Top each cup with a drizzle of dark chocolate ganache after it cools. The ganache adds a silky texture and intensifies the chocolate flavor. This finish is perfect for a special occasion or a dessert that’s meant to impress.
Minty Fresh
Add a few drops of mint extract to the batter for a refreshing twist. The mint pairs beautifully with chocolate, creating a balanced flavor that’s reminiscent of classic mint chocolate. It’s a great way to add a pop of color and freshness.
Storing and Bringing It Back to Life
Fridge Storage
Store the cups in an airtight container in the refrigerator for up to a week. The cool temperature keeps the chocolate from melting and preserves the texture. When you’re ready to serve, let them sit at room temperature for a few minutes to soften slightly.
Freezer Friendly
Freeze the cups individually on a parchment paper tray for up to three months. Once frozen, transfer them to a freezer bag for longer storage. To thaw, let them sit at room temperature for 20-30 minutes; they’ll retain their flavor and texture.
Best Reheating Method
To reheat, place the cups in a preheated oven at 300°F (150°C) for 5-7 minutes. Alternatively, microwave on low for 20-30 seconds. Add a tiny splash of water before reheating to create steam, which helps restore the cups’ moisture and prevents them from becoming dry.