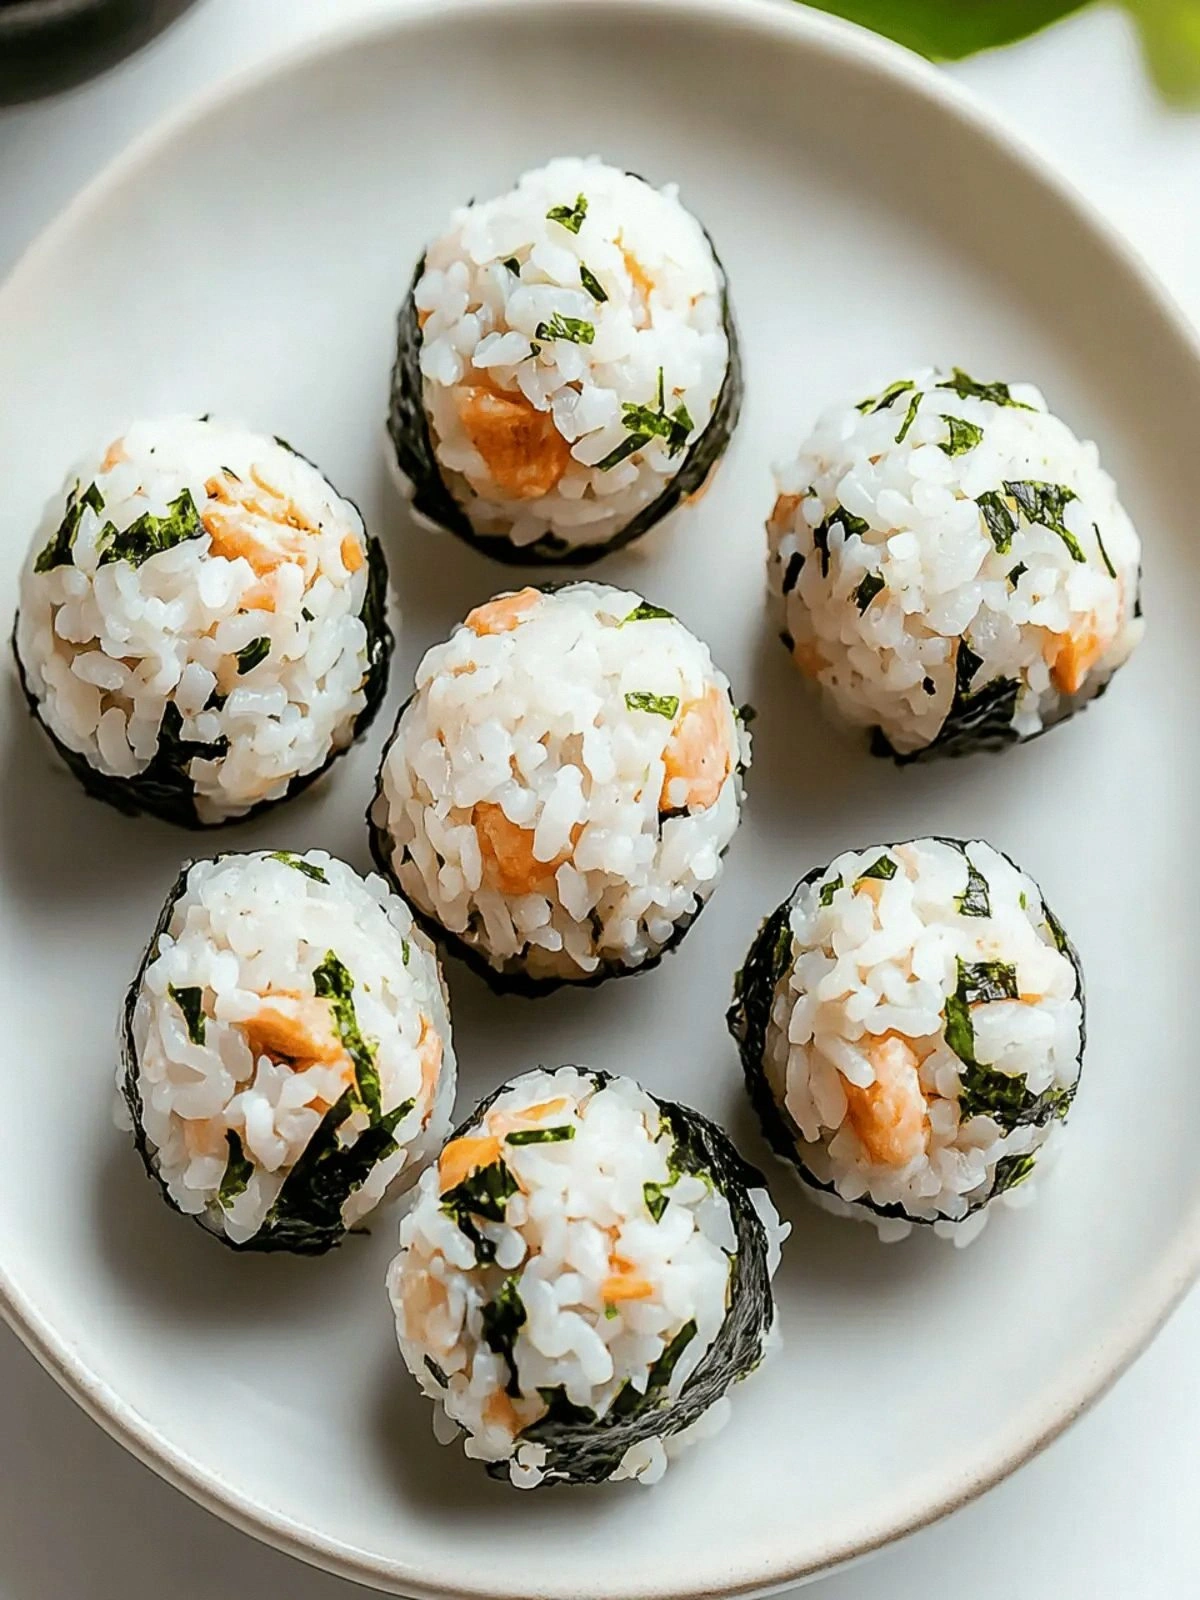
Picture this: you’re in the middle of a hectic workday, the office air conditioner has broken, and the clock is ticking toward lunch. You stare at the fridge, hoping for a quick fix, but the only thing that seems to call your name is a single can of tuna and a handful of leftover rice. That moment of culinary desperation turns into a revelation when you realize the combination could be a snack hero. I reached for mayo, sesame oil, and a sheet of seaweed, and the kitchen smelled like a tiny, edible sunrise. This is the birth story of the Easy Tuna Rice Balls that will soon become your new favorite quick snack.
From the first sizzling stir, I knew I was onto something special. The rice, still warm, clung to the tuna mixture like a loyal sidekick, forming a sticky, flavorful base that was impossible to ignore. The mayo, thick and velvety, wrapped each grain, while the sesame oil added a nutty whisper that danced on the palate. The seaweed, crisp yet yielding, became the armor that kept everything together and added a subtle umami punch. By the time the first ball rolled onto the counter, I was already convinced this was a game‑changing snack.
Most people think tuna rice balls are a bland, forgettable dish, but this version flips that assumption on its head. The key lies in the balance of textures: a soft, almost silky interior that melts in your mouth, juxtaposed against a lightly crisped seaweed shell that snaps with a satisfying crunch. The mayo doesn’t just coat; it coats like velvet, infusing the rice with a rich, buttery undertone that elevates every bite. The sesame oil, meanwhile, brings a toasted, almost caramelized flavor that keeps the snack from feeling heavy or greasy. Together, they create a bite that feels indulgent yet stays delightfully light.
Now, here’s the kicker: you won’t need any fancy equipment or exotic ingredients to recreate this masterpiece. All you need is a pot, a can of tuna, a spoon, and a sheet of nori. The recipe is so simple that even a kitchen rookie can master it in under 15 minutes, while seasoned cooks will marvel at the flavor punch it delivers. And the best part? It’s perfect for a quick lunch, a party appetizer, or a midnight snack that won’t leave you feeling guilty. Let me walk you through every single step — by the end, you’ll wonder how you ever made it any other way.
What Makes This Version Stand Out
- Flavor Profile: The creamy mayo and nutty sesame oil create a rich, savory base that feels both comforting and adventurous. The tuna’s natural brine is balanced by the subtle sweetness of the seaweed, producing a taste that lingers long after the first bite.
- Texture Magic: The rice’s stickiness is harnessed to bind the filling, while the seaweed offers a crisp shell that crackles with each chew. The result is a snack that feels like a gentle hug with a satisfying crunch.
- Simplicity at Its Best: With only five ingredients, the recipe eliminates the overwhelm that often comes with elaborate dishes. Every step is straightforward, letting the flavors shine without distraction.
- Ingredient Quality: Using a high‑quality canned tuna and fresh seaweed ensures a premium taste that rivals restaurant offerings. The mayo’s smoothness is key to the overall mouthfeel.
- Crowd Reaction: Friends who have tried this version rave about its “wow” factor, often asking for the recipe after a single bite. It’s a conversation starter at gatherings, proving that simple can be spectacular.
- Make‑Ahead Potential: Once rolled, the balls keep their shape for hours when wrapped, making them ideal for packing lunches or prepping for a party.
Alright, let's break down exactly what goes into this masterpiece...
Inside the Ingredient List
The Flavor Base
The mayo is the heart of this dish, providing a creamy, rich canvas that holds the tuna together. Its thick consistency coats each grain of rice, preventing the mixture from drying out. If you skip mayo, the balls will feel like a dry salad and lack that velvety finish. For a lighter version, consider using Greek yogurt, which offers tanginess and a lower fat profile.
The Texture Crew
Cooked rice is the glue that binds everything. The key is to use freshly cooked or slightly cooled rice, as hot rice will steam the tuna, while cold rice will be too firm. If you’re using leftover rice, reheat it gently in a microwave to bring it back to life. The sesame oil adds a toasted aroma that elevates the overall mouthfeel.
The Unexpected Star
Seaweed, or nori, is the unsung hero that gives the balls their distinctive shape and umami boost. A single sheet of nori can wrap multiple balls, making the process efficient. If you prefer a different flavor, experiment with kombu or wakame, though they will alter the texture slightly. A pinch of toasted sesame seeds sprinkled on top adds an extra crunch.
The Final Flourish
A pinch of salt and pepper can brighten the flavors, but be careful not to over-season. The seaweed’s natural saltiness balances the dish, so a light touch is best. When rolling, press the rice firmly but gently to avoid crushing the ball. The final product should be firm enough to hold its shape yet tender inside.
Everything's prepped? Good. Let's get into the real action...
The Method — Step by Step
- Cook the Rice: Bring a pot of water to a boil, add the rice, and simmer until fluffy. Once done, fluff the grains with a fork to separate them. Let the rice cool to room temperature; warm rice will steam the tuna. If you’re short on time, use leftover rice that’s been refrigerated overnight. This step is critical for achieving the right consistency.
- Drain the Tuna: Open the can and pour the tuna into a bowl, letting the excess liquid drain. Fluff the tuna with a fork to break up clumps. The tuna should be moist but not watery. If you prefer a drier texture, pat it with a paper towel before mixing. This ensures the rice mixture doesn’t become soggy.
- Mix Tuna with Mayo and Sesame Oil: Add the mayonnaise to the tuna and stir until the mixture is creamy. Pour in the sesame oil and mix again, letting the flavors meld. The mayo should coat every grain of tuna, creating a smooth base. If you find the mixture too thick, add a teaspoon of water to loosen it. This step is where the magic begins.
- Combine Tuna Mixture with Rice: Gently fold the tuna mixture into the cooled rice, ensuring every grain is coated. The rice should feel slightly sticky but not clumpy. Keep the mixture cool to prevent the mayo from melting. If you notice any dry patches, sprinkle a little more sesame oil. This blend is the heart of your tuna rice balls.
- Rest the Mixture: Cover the bowl with plastic wrap and let it chill in the refrigerator for 10 minutes. Resting allows the flavors to meld and the mixture to firm up. During this time, the rice will absorb the mayo’s moisture, tightening the texture. If you’re in a rush, skip this step, but the balls will be less cohesive. A quick chill is worth the extra effort.
- Prepare the Seaweed Sheets: Cut each nori sheet into halves or quarters to fit the size of your rice balls. Lightly toast the sheets in a dry skillet for 30 seconds to enhance their flavor. Toasting also makes them less brittle and easier to roll. Keep the seaweed warm; cold sheets can crack when pressed. A warm sheet holds the shape better.
- Form the Balls: Scoop a heaping tablespoon of the rice mixture onto a sheet of seaweed. Flatten it slightly and fold the edges over, rolling tightly to enclose the filling. Press gently to seal the edges, ensuring no rice escapes. The roll should be firm enough to hold its shape but not so tight that it tears. Repeat until all the mixture is used.
- Refrigerate: Place the rolled balls on a plate and cover with plastic wrap. Chill for at least 30 minutes to set the shape. The cooling process helps the rice firm up, making the balls easier to handle. If you plan to serve them later, keep them refrigerated until ready. This step is essential for maintaining texture.
- Optional Pan‑Fry: Heat a non‑stick skillet over medium heat and lightly oil it. Place the chilled balls in the pan and press them gently with a spatula. Cook for 1–2 minutes on each side until the seaweed turns golden and crisp. Serve hot for a contrast of crunchy shell and creamy center. Pan‑frying adds a delightful caramelization that elevates the snack.
That's it — you did it. But hold on, I've got a few more tricks that'll take this to another level...
Insider Tricks for Flawless Results
The Temperature Rule Nobody Follows
The rice temperature is a silent game‑changer. If the rice is too warm, it releases steam that makes the mixture soggy. If it's too cold, the mayo won’t bind properly. Aim for a rice temperature that feels just slightly cool to the touch. This simple tweak ensures a silky interior and a firm exterior.
Why Your Nose Knows Best
Smell the sesame oil before adding it to the tuna. A fresh, nutty aroma signals that the oil is at its peak. Old or rancid oil will leave a bitter aftertaste. If the oil smells flat, replace it. Trust your nose to save the dish from an off flavor.
The 5‑Minute Rest That Changes Everything
After mixing the tuna and mayo, let the mixture sit for 5 minutes before adding the rice. This brief pause allows the flavors to marry, creating a more cohesive texture. It also gives the rice a chance to absorb the mayo’s richness. Skipping this step results in a less integrated bite.
Seal the Edges Like a Pro
When rolling, dampen your hands with a little water. This prevents the rice from sticking and helps seal the edges. If you prefer a drier touch, lightly press the edges with a spoon. The goal is a tight seal that holds during transport.
Keep It Fresh with Parchment
Wrap each ball in parchment paper before refrigerating. The paper keeps moisture from escaping and preserves the seaweed’s crispness. When ready to serve, simply unwrap and enjoy. This hack extends the snack’s shelf life by a day.
Creative Twists and Variations
This recipe is a playground. Here are some of my favorite ways to switch things up:
Spicy Sriracha Kick
Stir in a tablespoon of sriracha into the tuna mixture for a fiery punch. The heat balances the richness of the mayo while adding a vibrant color. Serve with a side of lime wedges for an extra zing. This variation is perfect for those who love a bit of heat.
Veggie‑Loaded Edition
Add finely diced cucumber, carrot, and bell pepper to the rice mixture. The crunch from the veggies contrasts beautifully with the creamy tuna. A splash of soy sauce gives an umami boost. This version is great for a light lunch or a snack with a veggie twist.
Herb‑Infused Surprise
Muddle fresh dill or parsley into the mayo before mixing with tuna. The herbs bring a bright, aromatic note that elevates the dish. Sprinkle a few fresh herbs on top for garnish. This variation feels like a fresh garden escape.
Cheesy Delight
Grate a small amount of parmesan or cheddar into the rice mixture. The cheese melts slightly, adding a savory depth. The seaweed’s saltiness complements the cheese’s richness. This is a crowd‑pleaser for cheese lovers.
Asian Fusion Twist
Replace the seaweed with a sheet of rice paper and add a splash of soy sauce to the mixture. The result is a sushi‑style roll with a crunchy texture. Serve with a dipping sauce of hoisin and chili oil. This variation feels like a mini sushi experience.
Gluten‑Free Option
Use a gluten‑free rice blend to keep the dish safe for those with sensitivities. The texture remains the same, but the flavor profile stays intact. This variation ensures everyone can enjoy the snack.
Storing and Bringing It Back to Life
Fridge Storage
Place the rolled balls in an airtight container and refrigerate for up to 48 hours. The cooler temperature keeps the rice firm and the seaweed crisp. Avoid leaving them uncovered to prevent drying out. When ready to serve, let them sit at room temperature for 10 minutes to soften slightly.
Freezer Friendly
Wrap each ball individually in plastic wrap before freezing. Store them in a freezer bag for up to 2 weeks. To thaw, let them sit in the fridge overnight. This method preserves the texture and flavor without compromising quality.
Best Reheating Method
Reheat the balls in a preheated oven at 350°F for 8–10 minutes, or until the seaweed turns golden. Alternatively, pan‑fry them for a crispy exterior. Add a tiny splash of water before reheating to steam the rice back to softness. This trick keeps the center moist while the shell remains crunchy.