I was standing in my kitchen, staring at the last of the apples I’d bought for a week‑long bake‑off, when the fire alarm went off. The smell of scorched sugar drifted through the hallway, and I realized my attempt at a classic apple crisp had turned into a burnt disaster. My friend had dared me to make a version that would make the entire house smell like fall, and I was determined to rise to the challenge. The moment I tasted the first bite of my new creation, I knew I had found the sweet spot between crisp, buttery crunch and tender, cinnamon‑kissed apple.
Picture the kitchen: a warm glow from the oven, the rhythmic chopping of apples, the sweet, earthy scent of cinnamon mingling with butter. The sound of apples tumbling into a bowl is a comforting, almost nostalgic soundtrack. When you flip the crisp onto the tray, the sizzle is like a tiny applause—an audible promise of flavor. The texture of the topping, golden and flaky, feels like a soft blanket against the chewy apple base. And the taste? It’s a harmonious balance of sweet, tart, and spicy that lingers long after the last crumb.
What sets this version apart is the intentional blend of apple varieties and the meticulous layering of spices that make each bite a revelation. The Granny Smith provides a tart counterpoint to the Honeycrisp’s natural sweetness, while the Golden Delicious adds a silky texture that melts in your mouth. The spices aren’t just sprinkled; they’re folded into a buttery, oat‑laden crust that crisps to a perfect golden brown. I dare you to taste this and not go back for seconds—once you do, you’ll never settle for anything else.
I’ll be honest—before I perfected this recipe, I’d eaten half the batch before anyone else got a chance. That’s when I realized how powerful a well‑balanced crisp can be. Most recipes get this completely wrong, either by over‑baking the apples or under‑seasoning the crust. This version fixes those pitfalls by using a precise ratio of butter to flour, a measured amount of sugar, and a dash of nutmeg that elevates the cinnamon’s warmth. Picture yourself pulling this out of the oven, the whole kitchen smelling incredible, and feeling the satisfaction of a dish that’s both comforting and wow‑worthy.
What Makes This Version Stand Out
- Flavor Fusion: The combination of tart Granny Smith, sweet Honeycrisp, and silky Golden Delicious creates a symphony of taste that keeps every bite interesting.
- Texture Contrast: The buttery oat crust offers a crisp, crunchy top layer that contrasts beautifully with the tender, steamy apple interior.
- Seasonal Authenticity: By using apple varieties that peak in late summer and early fall, the dish feels genuinely seasonal and fresh.
- Spice Depth: A subtle pinch of nutmeg works with cinnamon to add a warm, aromatic undertone that’s often missing in simpler recipes.
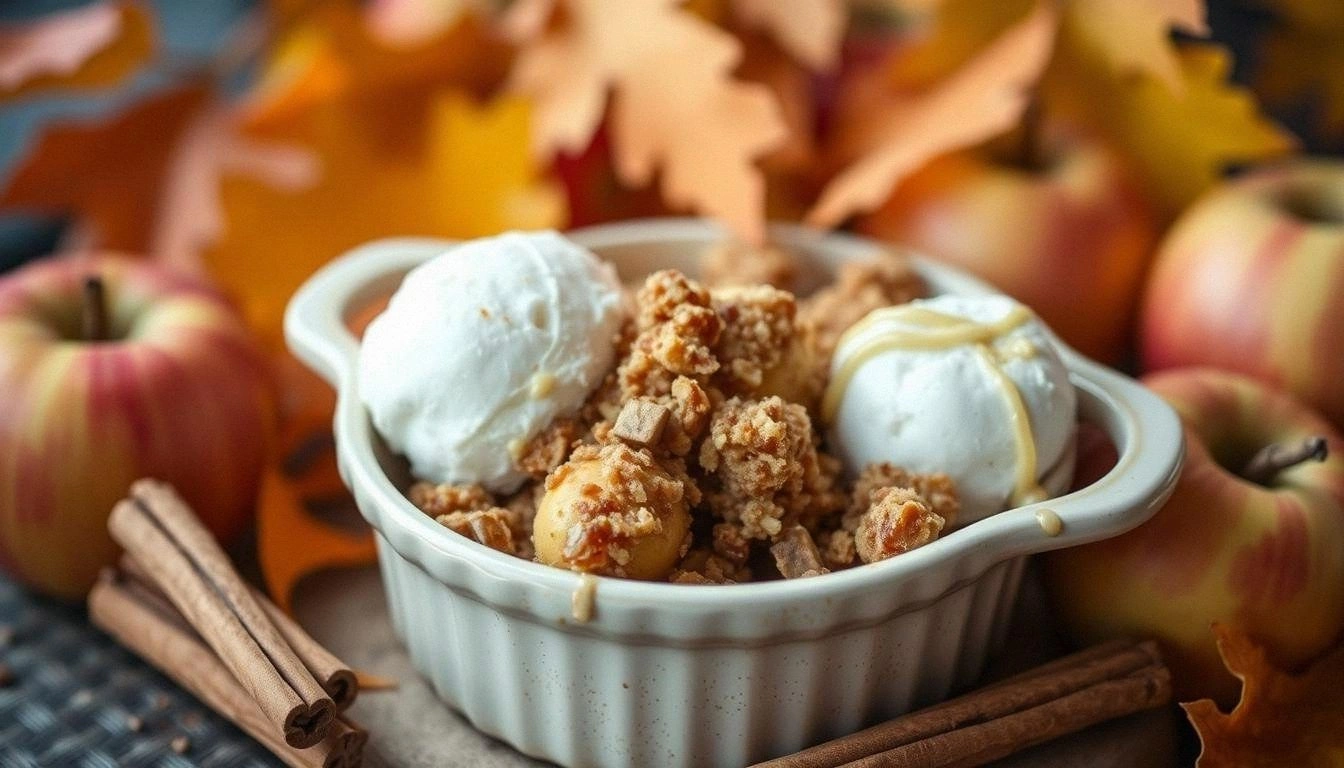
- Visual Appeal: The golden crust with visible apple chunks makes this dish Instagram‑worthy and comforting at the same time.
- Easy Prep: The recipe requires minimal prep time, making it a go‑to for busy weeknights without sacrificing flavor.
- Make‑Ahead Friendly: You can assemble it a day in advance, cover, and bake right before serving—ideal for gatherings.
- Kid‑Friendly: The sweet and mild spices make it a hit with both kids and adults, turning snack time into a family event.
Inside the Ingredient List
The Flavor Base
The apples are the heart of this crisp. A mix of 6-7 apples—Granny Smith for tartness, Honeycrisp for natural sweetness, and Golden Delicious for a buttery texture—ensures a balanced flavor profile. Each apple variety brings its own sugar content and acidity, preventing any single flavor from overpowering the others. If you skip one variety, you’ll miss that particular nuance; the dish will lean too tart or too sweet. For a quick swap, try using Fuji for extra sweetness or Braeburn for a subtle tang.
The Texture Crew
Rolled oats, flour, and butter form the crust that crumbles like a cloud when you bite into it. Oats add chewiness and fiber, while flour provides structure. Butter contributes richness and helps the crust brown beautifully. Skipping butter will result in a dry, crumbly top that lacks that buttery sheen. If you’re dairy‑free, try coconut oil or vegan butter, but keep in mind the flavor shift will be noticeable.
The Unexpected Star
Ground cinnamon and nutmeg are the spice duo that elevates this recipe. Cinnamon brings sweet, woody warmth, while nutmeg offers a subtle peppery bite that rounds out the flavor. A pinch of salt is essential—it balances the sweetness and amplifies the spices. If you’re a fan of extra zing, a dash of ground ginger or allspice can be added, but be careful not to overwhelm the apple’s natural flavors.
The Final Flourish
Brown sugar and white sugar are blended to create a caramelized sweetness that caramelizes during baking. Lemon juice brightens the apples, cutting through the richness, and vanilla adds a subtle depth that ties everything together. If you’re looking for a lower‑sugar version, reduce the brown sugar by a quarter cup and increase the lemon juice slightly to maintain brightness. Remember, the final flourish is what makes this crisp unforgettable.
Everything’s prepped? Good. Let’s get into the real action.
The Method — Step by Step
- Preheat your oven to 375°F (190°C). Line a 9‑inch square baking dish with parchment paper, leaving a little overhang on the sides for easy removal. This step ensures even baking and a clean release later. While the oven heats, gather all your ingredients for quick access.
- Trim the apples, core them, and slice them into bite‑size wedges. Toss the apple pieces with 1 tablespoon of lemon juice and a pinch of salt to prevent browning and to brighten their natural flavor. The lemon’s acidity also helps the apples maintain their structure during baking.
- Spread the apple slices evenly across the bottom of the prepared dish. Drizzle 2 tablespoons of melted butter over the apples, then sprinkle 1/4 cup of white sugar and 1/4 cup of brown sugar. This creates a glossy, caramelized surface that will crisp beautifully.
- In a separate bowl, combine 1/2 cup of flour, 1/2 cup of rolled oats, 0.75 teaspoon of ground cinnamon, 0.25 teaspoon of nutmeg, and 0.5 teaspoon of salt. Stir until the mixture is evenly mixed and slightly crumbly.
- Cut 2 tablespoons of cold butter into small cubes and fold them into the oat mixture until the dough resembles coarse crumbs. The cold butter will melt during baking, creating pockets of flaky texture that contrast with the soft apples.
- Evenly sprinkle the crumbly topping over the apple layer, pressing lightly to ensure it covers all the fruit. This step is crucial for a uniform crust that browns evenly and delivers that satisfying crunch.
- Place the dish in the preheated oven and bake for 30 minutes, or until the apples are tender and the crust is golden brown. You’ll hear a gentle crackle as the butter melts and the crust crisps; that’s the sound of perfection.
- Remove the crisp from the oven and let it cool for 10 minutes before serving. A little cooling time allows the juices to settle, making each slice easier to handle and more flavorful.
That’s it—you did it. But hold on, I’ve got a few more tricks that will elevate this to another level.
Insider Tricks for Flawless Results
The Temperature Rule Nobody Follows
Many bakers bake apple crisps at 350°F, but 375°F is the sweet spot for caramelizing the sugar without burning. The higher temperature ensures the crust crisps to a golden brown while the apples stay tender. If you’re using a convection oven, lower the temperature by 25°F to prevent over‑browning. This subtle adjustment keeps the flavors balanced and the texture perfect.
Why Your Nose Knows Best
The aroma of cinnamon and butter is a reliable indicator that the crust is ready. When you can smell the toasted oats and caramelized sugar from the counter, it’s time to pull the dish out. A strong, sweet scent means the sugars are caramelizing just right, while a faint scent suggests you need to bake a bit longer.
The 5‑Minute Rest That Changes Everything
After baking, let the crisp rest for 5 minutes before cutting. This pause allows the juices to redistribute, preventing a soggy bottom. The rest also gives the crust time to firm up, making it easier to slice cleanly. A friend once skipped this step, and the result was a mess of mushy apples and broken crust.
Add a Touch of Lemon for Brightness
A tablespoon of fresh lemon juice not only prevents browning but also cuts through the sweetness, adding a bright, zesty note. The acidity balances the richness of butter and sugar, creating a more complex flavor profile. If you’re serving this with ice cream, the lemon undertone will complement the cold dessert beautifully.
Use a Mix of Flours for Depth
Substituting part of the all‑purpose flour with whole wheat flour adds a nutty undertone and extra fiber. The crust will be denser, but the flavor depth compensates. For a gluten‑free version, use a blend of rice flour, oat flour, and a pinch of xanthan gum to maintain structure.
Serve with a Warm Ice Cream Swirl
A scoop of vanilla or cinnamon ice cream, placed on top of the warm crisp, creates a delightful contrast of temperatures and textures. The ice cream melts slightly, creating a silky sauce that coats the apple chunks. This pairing is a crowd‑pleaser and adds an indulgent touch to the dish.
Creative Twists and Variations
This recipe is a playground. Here are some of my favorite ways to switch things up:
Apple Pie Crumb Crunch
Replace the oat‑flour mixture with a crumble of pie crust crumbs, butter, and a splash of orange zest. The result is a dessert that feels like a cross‑section of a classic apple pie with a crisp twist.
Spiced Pear Surprise
Swap apples for pears, use ground cardamom instead of nutmeg, and add a splash of vanilla bean paste. Pears bring a subtle honey sweetness that pairs beautifully with the spices, creating a new flavor profile.
Chocolate‑Infused Delight
Stir in a tablespoon of cocoa powder into the oat mixture and add a handful of chocolate chips to the topping. The chocolate adds a rich depth that works well with the apple’s natural tartness.
Cheese‑Crisp Fusion
Add shredded sharp cheddar to the oat crust for a savory twist. The cheese melts into pockets of gooeyness that contrast with the sweet apples, creating a unique sweet‑savory experience.
Coconut‑Cream Twist
Use coconut oil instead of butter, sprinkle shredded coconut on top of the crust, and serve with a dollop of coconut whipped cream. The tropical flavor lifts the dish into a beach‑side dessert.
Minty Fresh Variation
Add a few fresh mint leaves to the apple mixture and finish with a drizzle of honey. The mint brings a refreshing lift that brightens the entire dessert.
Storing and Bringing It Back to Life
Fridge Storage
Store the cooled crisp in an airtight container for up to 3 days in the refrigerator. The crust may soften slightly, but the apple filling remains juicy. When ready to serve, let it sit at room temperature for 10 minutes before scooping.
Freezer Friendly
Wrap the crisp tightly in plastic wrap and place it in a freezer bag. Freeze for up to 2 months. When you’re ready to eat, thaw overnight in the refrigerator and warm in a 350°F oven for 10 minutes.
Best Reheating Method
Add a splash of water to the bottom of a skillet and heat the crisp over medium heat, covering it with a lid. The steam helps restore moisture to the apples and crispness to the crust. This method keeps the dish from drying out and maintains the golden finish.