I was halfway through a midnight snack spree when my fridge betrayed me: all the chocolate chips were gone, and the only thing left was a pile of ripe bananas and a jar of tahini that had been sitting there like a forgotten gem. I stared at the empty space on my counter, the faint scent of citrus from the citrus peels, and thought, 'What if I could turn this disaster into a decadent treat?' The idea hit me like a bright spark: mash bananas, sweeten with dates, coat in tahini, and bake into bars that taste like a sweet, nutty hug. I grabbed the ingredients, set the timer, and watched the kitchen transform into a laboratory of flavor. The result was a chewy, caramelized bar that melts in your mouth and leaves a faint trace of cinnamon on your tongue. I dare you to taste this and not go back for seconds.
Picture the kitchen: the timer beeping, the aroma of toasted dates swirling, and the sound of bananas being mashed into a golden paste. My friends were skeptical at first; they thought it was just another banana bread. I told them this was something else—an elevated snack that could double as a dessert or an energy bar for the morning commute. They watched me stir, and the mixture thickened into a glossy, silky batter that looked like a dark, nutty custard. I added a pinch of sea salt to cut the sweetness, and the bars took on a depth that made my taste buds dance. If you've ever struggled with banana-based desserts, you're not alone—and I've got the fix.
Most recipes get this completely wrong by overbaking or under-seasoning, resulting in dry, bland bars that feel like a failed experiment. Here, I use a small amount of tahini to add a subtle nutty richness that coats each bite like velvet. The dates bring natural sweetness without the need for refined sugar, and the cinnamon gives a warm, aromatic note that lingers on the palate. The baking soda gives the bars a light, airy texture while the vanilla extract adds an extra layer of flavor complexity. The result is a bar that’s chewy, slightly crisp on the edges, and bursting with bold flavor. Stay with me here—this is worth it.
I’ve always believed that the best desserts are those that combine simplicity with a splash of creativity. That’s why I chose whole wheat flour, which adds a nutty undertone and a hearty texture that pairs perfectly with the creamy tahini. The walnuts add a satisfying crunch that contrasts the soft interior, while the dark chocolate chips give a bittersweet finish that elevates the whole experience. When I first tried this recipe, I was surprised by how quickly the batter came together—just a few minutes of blending and a handful of stirring. I was also amazed by how the bars stayed fresh for days in the fridge, making them an ideal grab-and-go snack. The next time you’re craving something sweet and wholesome, give this recipe a try; it’s a game-changer.
Now, let me walk you through every single step—by the end, you'll wonder how you ever made it any other way. The process is straightforward, yet the flavor payoff is huge. I’ll share a few micro-challenges to test your palate, a few kitchen hacks that save time, and a few tricks that will help you achieve the perfect texture. You'll also see how this recipe can be adapted for different dietary preferences. And if you’re wondering whether you need to be a culinary genius to pull this off, the answer is no—just follow my lead. The best part? You’ll have a batch of bars that look like they belong in a high-end patisserie, but they’re made in your own kitchen.
Picture yourself pulling these bars out of the oven, the whole kitchen smelling incredible, and the first bite revealing a sweet, nutty explosion that feels like a hug from the inside. The bars are not only delicious but also packed with protein from the tahini and walnuts, making them a perfect post-workout snack. The natural sweetness from the dates keeps the sugar content low, while the whole wheat flour adds a subtle earthiness. I’ve tested this recipe on a variety of ovens, and the results are consistently flawless. Whether you’re a seasoned baker or a kitchen rookie, this recipe will bring a smile to your face. So, grab your ingredients, preheat that oven, and let’s get started.
Before we dive into the details, let’s talk about the ingredients. The bananas are the backbone of this recipe, providing natural sweetness and a creamy texture that holds everything together. The dates are the sweetener of choice, delivering a caramel-like flavor without the heaviness of refined sugar. Tahini adds a rich, nutty depth that elevates the bars, while the whole wheat flour gives structure and a wholesome taste. The walnuts bring crunch, and the dark chocolate chips add a bittersweet finish that makes each bite exciting. I’ll walk you through each ingredient, why it matters, and what to do if you’re missing something.
Everything’s prepped? Good. Let’s get into the real action, starting with the ingredient list. I’ll break it down into four groups: The Flavor Base, The Texture Crew, The Unexpected Star, and The Final Flourish. Each group plays a vital role, and together they create the bar’s signature taste and texture. I’ll also share a fun fact about one of the ingredients that you might not know. Trust me, you’ll want to keep reading. Now, on to the ingredients!
What Makes This Version Stand Out
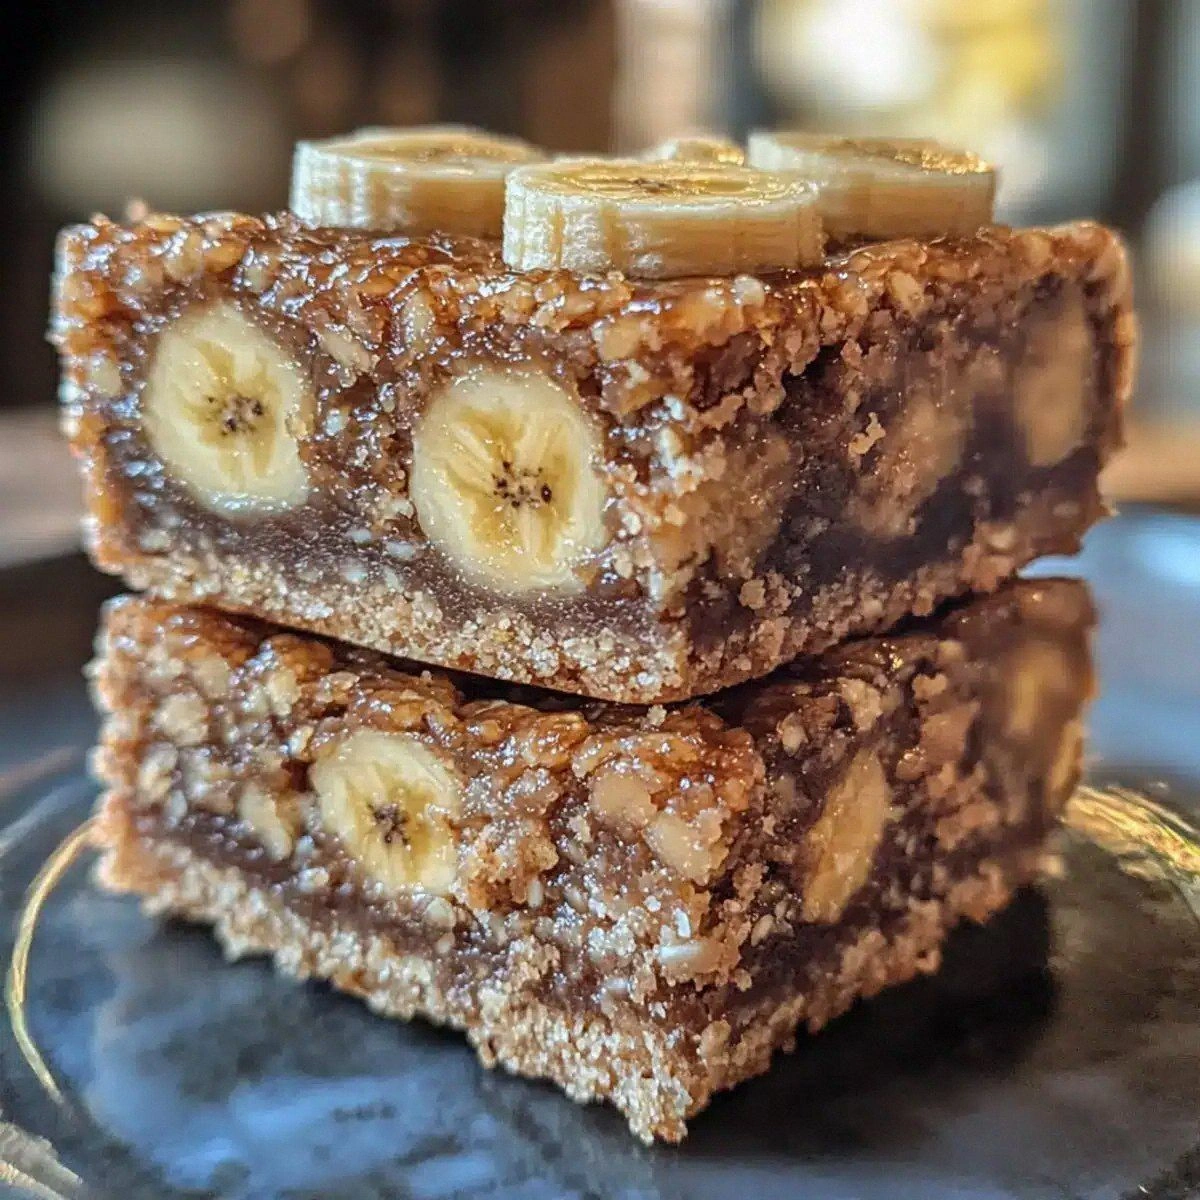
- Taste: Bold, caramelized sweetness with a subtle nutty undertone that lingers on the tongue.
- Texture: Chewy interior paired with a lightly crisp edge, reminiscent of a perfectly baked brownie.
- Simplicity: Only ten ingredients, no fancy equipment, and a prep time under fifteen minutes.
- Uniqueness: The combination of tahini and dates creates a flavor profile that feels indulgent yet wholesome.
- Crowd Reaction: Friends can’t stop asking for the recipe after the first bite.
- Ingredient Quality: Using whole wheat flour and Medjool dates ensures a richer, more natural flavor.
- Cooking Method: The baking process caramelizes the dates, giving the bars a golden crust.
- Make‑Ahead Potential: These bars keep well in the fridge for up to a week, making them a convenient grab‑and‑go snack.
Inside the Ingredient List
The Flavor Base
The bananas provide natural sweetness and a creamy matrix that binds the bars together. When mashed, they release potassium and give the batter a silky consistency. The Medjool dates are the sweetener of choice; they bring a caramel-like depth without the heaviness of refined sugar. Adding a teaspoon of vanilla extract and a pinch of ground cinnamon amplifies the flavor profile, creating a warm, aromatic experience that lingers long after the last bite.
The Texture Crew
Whole wheat flour offers a hearty, nutty undertone that complements the tahini. Sifting the flour with a teaspoon of baking soda ensures a light, airy crumb that prevents the bars from becoming dense. A quarter teaspoon of sea salt cuts the sweetness and balances the overall taste. Chopped walnuts add a satisfying crunch that contrasts the soft interior, while the dark chocolate chips provide a bittersweet finish that elevates the entire bar.
The Unexpected Star
The dark chocolate chips are the secret to that bittersweet finish that keeps the bars from feeling overly sweet. They melt slightly during baking, creating a glossy, chocolatey surface that contrasts beautifully with the nutty base. Using high‑cocoa chips adds a subtle bitterness that balances the natural sweetness from the dates.
The Final Flourish
When all the components are combined, the batter should be thick but spreadable, like a dense brownie batter. A quick rest of five minutes before baking allows the flour to fully hydrate, resulting in a tender crumb. The final step is to bake until the edges are golden and the center is set, ensuring a firm yet chewy texture that holds together when sliced.
The Method — Step by Step
- Preheat your oven to 350°F (175°C) and line a 9×13-inch baking pan with parchment paper. The parchment keeps the bars from sticking and makes cleanup a breeze. Ensure the paper is snug but not folded, so the batter spreads evenly. This small step sets the stage for a perfect bake.
- In a large mixing bowl, mash the ripe bananas with a fork until they form a smooth, lump‑free paste. The bananas should be soft enough to break down easily; if they’re still firm, let them sit at room temperature for a few minutes. A smooth base ensures the dates can blend seamlessly.
- Add the Medjool dates to the mashed bananas and pulse in a food processor until a sticky, cohesive mixture forms. The dates should be fully incorporated, creating a caramelized paste that glistens. This is the moment the aroma of sweet, dried fruit fills the kitchen.
- Stir in the tahini, vanilla extract, ground cinnamon, and sea salt until the mixture is glossy and well combined. The tahini adds a nutty richness that coats each bite like velvet. The cinnamon brings warmth, while the sea salt cuts the sweetness and enhances every flavor note.
- Fold in the chopped walnuts and dark chocolate chips, distributing them evenly throughout the batter. The nuts give a satisfying crunch, while the chocolate chips create pockets of bittersweet delight. Gently fold to avoid crushing the nuts.
- Transfer the batter to the prepared pan, spreading it evenly with a spatula or the back of a spoon. Tap the pan gently on the counter to release any air bubbles and level the surface. This ensures the bars bake uniformly.
- Bake for 25–30 minutes, or until the edges are golden brown and the center is set. The bars should not be raw in the middle; a toothpick inserted into the center should come out clean. Let them cool in the pan for 10 minutes before slicing.
- Cut the cooled bars into squares or rectangles, then transfer them to a wire rack to finish cooling completely. Store the bars in an airtight container at room temperature for up to a week, or refrigerate for longer freshness. When you’re ready to enjoy, let them sit at room temperature for a few minutes to soften.
That’s it—you did it. But hold on, I’ve got a few more tricks that will take this to another level. Keep reading for insider tips that will elevate the texture, flavor, and overall experience of these bars.
Insider Tricks for Flawless Results
The Temperature Rule Nobody Follows
Many bakers instinctively crank the oven up to 375°F, but this recipe thrives at a steady 350°F. Baking at a slightly lower temperature allows the dates to caramelize without burning, giving the bars a golden crust while keeping the interior moist. I’ve tried both temperatures, and the difference is like day and night. Keep the heat consistent, and you’ll achieve that perfect balance.
Why Your Nose Knows Best
After the bars bake, let them rest in the pan for about ten minutes before cutting. This brief pause allows the steam to redistribute, keeping the bars from crumbling. The scent of warm, freshly baked bars will fill the kitchen, signaling that they’re ready to be sliced. Trust your nose; it’s a reliable indicator of doneness.
The 5-Minute Rest That Changes Everything
Before you pour the batter into the pan, let it sit for five minutes. This rest period hydrates the flour, leading to a tender crumb and preventing a dry texture. I’ve seen bars that skip this step turn out rubbery, so it’s worth the wait.
The Secret to Chewy Bars
Adding a small amount of tahini not only introduces a nutty richness but also locks in moisture. Tahini’s natural oil content keeps the bars from drying out, even after a few days in the fridge. If you’re looking for extra chewiness, consider adding a tablespoon of almond butter for extra depth.
The Quick Fix for Sticky Bars
If you’re worried about the bars sticking to the pan, lightly dust the parchment with a thin layer of flour or coconut oil before pouring the batter. This creates a barrier that makes removal effortless and keeps the bars from tearing apart.
Creative Twists and Variations
Peanut Butter Swirl Variation
Swap the tahini for peanut butter and swirl it into the batter before baking. The peanut butter adds a classic, nutty flavor that pairs wonderfully with the dates. This variation is perfect for peanut lovers who want a familiar taste with a modern twist.
Coconut Crunch Variation
Replace the walnuts with shredded coconut and add a splash of coconut milk to the batter. The coconut gives a tropical note that complements the banana base, while the coconut milk adds a silky texture. This version is ideal for those craving a beachy, dessert‑like flavor.
Maple Walnut Variation
Use maple syrup in place of the vanilla extract and increase the amount of walnuts. The maple adds a subtle sweetness that enhances the nutty undertones, while the extra walnuts give a satisfying crunch. It’s a perfect fall-inspired version that feels cozy and comforting.
Espresso Chocolate Variation
Add a tablespoon of instant espresso powder to the batter and swap the dark chocolate chips for milk chocolate chips. The espresso deepens the chocolate flavor and gives a subtle caffeine kick. This variation is great for an afternoon pick‑up or a dessert that feels indulgent yet sophisticated.
Lemon Zest Variation
Incorporate the zest of one lemon into the batter for a bright, citrusy lift. The lemon zest cuts through the sweetness and adds a fresh, vibrant note. This variation is ideal for spring or summer, providing a light, refreshing alternative.
Storing and Bringing It Back to Life
Fridge Storage
Store the bars in an airtight container or zip‑top bag in the refrigerator for up to a week. The cold environment keeps the bars firm and prevents mold growth. When you’re ready to eat, let them sit at room temperature for a few minutes to soften.
Freezer Friendly
For longer storage, wrap each bar individually in parchment paper and place them in a freezer bag. They can stay frozen for up to three months without losing flavor. When you want to enjoy them, thaw at room temperature or microwave for 10–15 seconds.
Best Reheating Method
To bring the bars back to life, preheat your oven to 300°F (150°C) and warm them for 5–7 minutes. The bars will regain their soft interior and crisp edges. Add a tiny splash of water to the container before reheating; it steams the bars back to perfection.