Picture this: you’re in the middle of a frantic week, your fridge is a sad, lonely collection of wilted lettuce and a single half‑used jar of salsa, and suddenly you hear the faint hum of your oven and the promise of a warm, comforting meal. I was that person—except instead of ordering takeout, I decided to create something that would make my taste buds sing and my friends swoon. I pulled out every pantry staple I could find, tossed in a dash of daring, and the result was Bang Bang Chicken that will have you saying, “I dare you to taste this and not go back for seconds.”
The kitchen was a whirlwind of sizzling pans, the sweet aroma of honey mingling with the sharp sting of chili paste, and the faint crackle of a hot skillet. I could almost hear the applause from the imaginary audience as the chicken hit the pan, the sound of that satisfying sizzle being the soundtrack to culinary triumph. The first bite was a revelation: a silky, creamy sauce that clings to every crisp edge, a burst of heat that lingers without overwhelming, and a crunch that shatters like thin ice when you bite into the panko coating. It was, hands down, the best version of a fried chicken dish I’ve ever made at home.
Most recipes get this completely wrong. They either over‑cook the chicken, resulting in dry meat, or they under‑season the sauce, leaving it bland. I’ve spent years experimenting with sauce ratios, but the secret is the balance between mayonnaise, honey, and sweet chili sauce—a creamy base that’s sweet, spicy, and tangy all at once. The next twist? A splash of buttermilk that tenderizes the chicken to a melt‑in‑your‑mouth texture, and a coating of panko that gives that signature crunch without turning the dish into a greasy mess. If you’ve ever struggled with making a fried chicken that isn’t too oily or too dry, you’re not alone—and I’ve got the fix.
Okay, ready for the game‑changer? The technique that elevates this dish from “good” to “legendary” is a two‑step batter that locks in moisture and flavor. The first coat is a dry crumb mix of cornstarch, flour, smoked paprika, and garlic powder, giving the chicken a sturdy shell. The second coat is a wet mixture of egg, buttermilk, and a dash of hot sauce, creating a silky, slightly spicy layer that holds the crunchy exterior together. By the end of this guide, you’ll wonder how you ever made it any other way.
What Makes This Version Stand Out
- Flavor: A harmonious blend of sweet, spicy, and savory that coats the chicken like velvet.
- Texture: Crispy edges that shatter like thin ice, paired with a tender, juicy interior.
- Ease: A straightforward, two‑step coating process that saves time and effort.
- Versatility: Works as a main dish, appetizer, or party platter.
- Make‑Ahead: You can prep the coating and sauce a day ahead without compromising quality.
- Ingredient Quality: Uses fresh, high‑quality ingredients for maximum flavor impact.
- Crowd‑Pleaser: Guaranteed to get rave reviews at potlucks, family dinners, or date nights.
- Health‑Friendly: A lighter version of fried chicken that still delivers on crunch and taste.
Alright, let's break down exactly what goes into this masterpiece...
Inside the Ingredient List
The Flavor Base
At the heart of Bang Bang Chicken lies a sauce that’s both creamy and fiery. The mayonnaise provides a rich, velvety texture that holds the spices together, while the honey adds a subtle sweetness that balances the heat from the chili paste and hot sauce. Sweet chili sauce brings a fruity undertone that elevates the overall flavor profile. If you’re a fan of extra heat, you can add a splash of sriracha or a pinch of cayenne, but the original recipe keeps it just hot enough to leave a lingering aftertaste.
The Texture Crew
The coating is where the crunch comes to life. Cornstarch is the secret to a light, airy batter that doesn’t clump; it also helps absorb excess moisture, preventing soggy chicken. All‑purpose flour adds body and helps the dry coating stick to the wet batter. Smoked paprika and garlic powder give the coating a subtle depth of flavor that complements the sweet and spicy sauce. If you’re looking for a gluten‑free option, swap the flour for a gluten‑free blend or use almond flour for a nutty twist.
The Unexpected Star
Buttermilk is the unsung hero that tenderizes the chicken, making each bite melt‑in‑your‑mouth. The acidity in buttermilk breaks down proteins, creating a juicy interior that contrasts beautifully with the crispy exterior. If you’re lactose intolerant, you can use a non‑dairy buttermilk substitute made from almond milk and a splash of lemon juice. This small change keeps the texture intact while accommodating dietary restrictions.
The Final Flourish
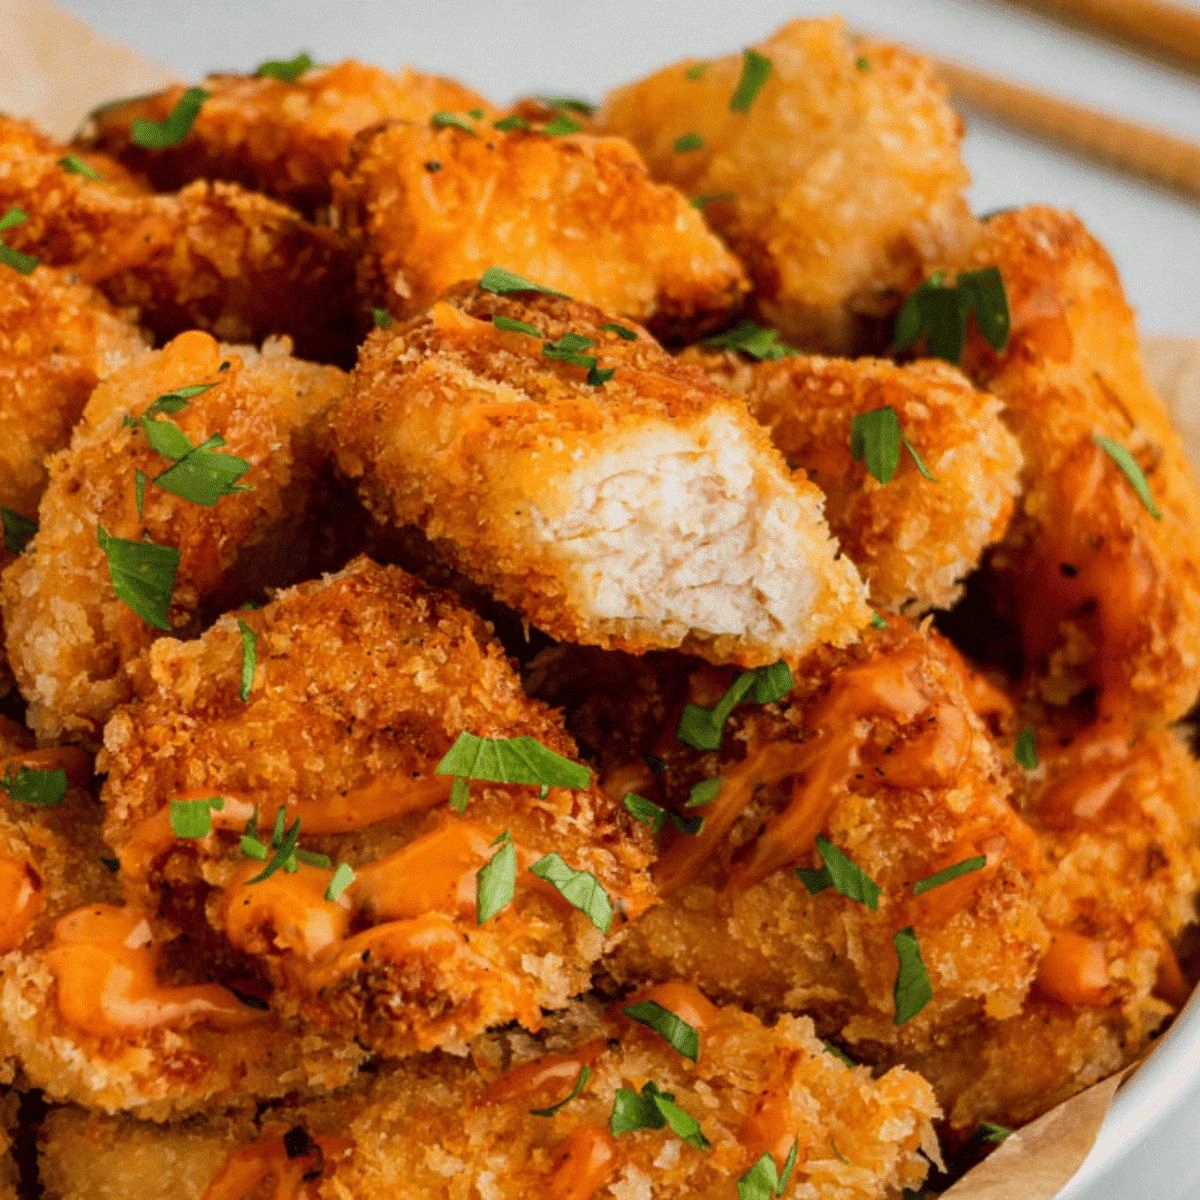
Fresh parsley adds a burst of color and a bright, herbaceous note that cuts through the richness of the sauce. Panko breadcrumbs are essential for achieving that signature crunch; their airy structure creates a light, crisp shell that doesn’t weigh down the chicken. The hot sauce, honey, and sweet chili sauce work together to create a complex flavor that lingers on the palate. A pinch of kosher salt and pepper rounds out the seasoning, ensuring each bite is perfectly balanced.
Everything's prepped? Good. Let's get into the real action...
The Method — Step by Step
- First, combine ⅓ cup cornstarch, ¼ cup all‑purpose flour, ½ tbsp smoked paprika, ½ tbsp garlic powder, ½ tsp kosher salt, and ¼ tsp ground black pepper in a shallow dish. This dry mix will form the first protective shell. Shake the bowl to ensure all spices are evenly distributed. The aroma of paprika and garlic should already be dancing in the air. Keep this mixture aside; you’ll dip the chicken in it after the wet batter.
- In a separate bowl, whisk together ½ cup buttermilk, 1 large egg, and 1 tbsp hot sauce until the mixture is smooth. The buttermilk’s acidity will tenderize the chicken, while the egg adds structure. As you whisk, the mixture will turn glossy, indicating the proteins are binding properly. This wet batter will be the second coat that holds the dry coating in place.
- Season the 1.5 lb boneless, skinless chicken breasts with ¼ tsp kosher salt and ⅛ tsp ground black pepper. Slice the breasts into bite‑size pieces or keep them whole if you prefer. Pat the chicken dry with paper towels—this step is crucial for a crisp coating. The drier the surface, the better the batter will adhere.
- Dip each chicken piece first into the wet batter, ensuring it’s fully coated. Shake off any excess. Then, roll it in the dry coating mix, pressing gently to adhere. Repeat the process for all pieces. The double‑coating technique ensures maximum crunch and flavor retention. If you’re short on time, you can skip the second dip, but the texture will suffer.
- Heat ⅓ cup vegetable oil in a large skillet over medium‑high heat. The oil should shimmer but not smoke. When a small drop of batter hits the oil, it should sizzle immediately—this is the cue that the temperature is right. If the oil is too cool, the coating will absorb oil and become soggy.
- Carefully place the coated chicken into the hot oil. Don’t overcrowd the pan; you’ll want each piece to have space to brown evenly. Fry for 4–5 minutes on each side, or until the coating turns golden brown and the internal temperature reaches 165°F. The sizzle should be audible, and the edges will start pulling away from the pan.
- Once cooked, transfer the chicken to a paper towel‑lined plate to drain excess oil. The crust should feel firm, and the chicken should still be moist inside. Let the chicken rest for 2 minutes before serving; this allows juices to redistribute.
- While the chicken rests, whisk ½ cup mayonnaise, 2 tbsps honey, 2 tbsps sweet chili sauce, 1 tsp red chili paste, ¼ tsp kosher salt, and ⅛ tsp ground black pepper in a bowl until smooth. The sauce should be creamy and slightly thick, with a visible swirl of spice. Taste and adjust seasoning if necessary.
- Toss the fried chicken in the sauce, ensuring every piece is coated evenly. The sauce should cling to the coating like a second skin, adding a glossy finish. Sprinkle 1 tbsp fresh parsley over the top for a pop of color and freshness.
- Serve immediately with your favorite side—think crispy fries, a crisp slaw, or a simple green salad. The sauce’s sweetness and heat pair wonderfully with a cool cucumber salad. Enjoy the burst of flavors and the satisfying crunch that will keep you coming back for more.
That's it — you did it. But hold on, I've got a few more tricks that'll take this to another level...
Insider Tricks for Flawless Results
The Temperature Rule Nobody Follows
Many cooks think any medium‑high heat will do the trick, but the secret is maintaining an oil temperature of 350°F. Use a thermometer to monitor the oil, or test with a small breadcrumb; if it sizzles and turns golden in about 60 seconds, you’re good. This consistency prevents the coating from becoming greasy or under‑cooked.
Why Your Nose Knows Best
Before you start frying, sniff the sauce. A sweet, spicy aroma indicates the flavors are balanced. If it smells too acidic, add a pinch of sugar; if it’s too sweet, throw in a splash of lime juice. Your nose is a reliable flavor gauge that can save you from a culinary mishap.
The 5-Minute Rest That Changes Everything
After frying, let the chicken rest on a wire rack for 5 minutes. This allows the steam to escape, keeping the coating crisp. If you skip this step, the coating will trap moisture and become soggy.
The Right Pan for the Job
A heavy‑bottomed skillet or a cast‑iron pan distributes heat evenly, preventing hot spots that can burn the coating. If you don’t have a cast‑iron, a stainless steel pan with a thick base works well.
Don’t Skip the Dry Coat
A friend once tried to skip the cornstarch and flour mix, hoping the egg batter would hold everything together. The result? A soggy mess that tasted like a soggy pancake. The dry coat is the secret to that signature crunch.
Fresh Herbs Make a Difference
Using fresh parsley instead of dried adds brightness and a subtle peppery note that lifts the entire dish. If parsley isn’t on hand, cilantro or basil can be a delightful substitute.
Creative Twists and Variations
This recipe is a playground. Here are some of my favorite ways to switch things up:
Spicy Cajun Bang Bang
Swap the sweet chili sauce for a spicy Cajun seasoning blend. Add a pinch of cayenne pepper to the sauce for an extra kick. This version is perfect for those who love a smoky, spicy flavor profile.
Garlic Parmesan Crunch
Replace the panko with grated Parmesan cheese mixed with breadcrumbs. Add minced garlic to the sauce for a deeper umami bite. The result is a crispy, cheesy coating that’s irresistible.
Asian Fusion Twist
Use a mixture of soy sauce and rice vinegar in the sauce, and add a dash of sesame oil. Sprinkle toasted sesame seeds on top for crunch and a nutty aroma. This version takes the dish straight to a sushi bar.
Vegan Bang Bang
Use a plant‑based mayonnaise and replace the egg with aquafaba. Swap the chicken for tofu or tempeh strips. The flavor stays the same, but the dish becomes plant‑friendly.
Low‑Calorie Version
Air‑fry the coated chicken instead of deep‑frying. Use a light drizzle of oil or a non‑stick spray. The coating remains crispy while cutting down on fat.
Breakfast Bang Bang
Serve the chicken with a side of scrambled eggs and toast. Add a splash of hot sauce to the eggs for a spicy breakfast twist. This is a hearty, protein‑packed start to the day.
Storing and Bringing It Back to Life
Fridge Storage
Cool the chicken completely, then place it in an airtight container. Store in the fridge for up to 3 days. The coating may soften slightly, but the flavor remains intact.
Freezer Friendly
Flash‑freeze the chicken on a parchment‑lined tray, then transfer to a freezer bag. Cook directly from frozen for 5–7 minutes on each side. The coating stays crisp, and the sauce remains creamy.
Best Reheating Method
Reheat in a 375°F oven for 10 minutes, or until the chicken is heated through. Add a splash of water before reheating to keep the coating from drying out. The result is a juicy, crunchy chicken that tastes almost as good as fresh.